Elisabeth Slouchy Beanie Free Crochet Pattern

How to Crochet an Elisabeth Slouchy Beanie Chemo Cap.
This Easy Crochet Chemo Cap Pattern is meant to help you make a simple, soft hat that will be a comfortable hat option for a chemo patient and make them feel cherished and uplifted. Chemo treatments are such a difficult time for so many and its alway nice to have something special to wear to make you feel a little better.
The Elisabeth Slouchy Beanie is an Easy Crochet Chemo Cap Pattern and it was created especially for the 2024 Crochet for Cancer Challenge hosted by Sweet Potato 3 Designs.
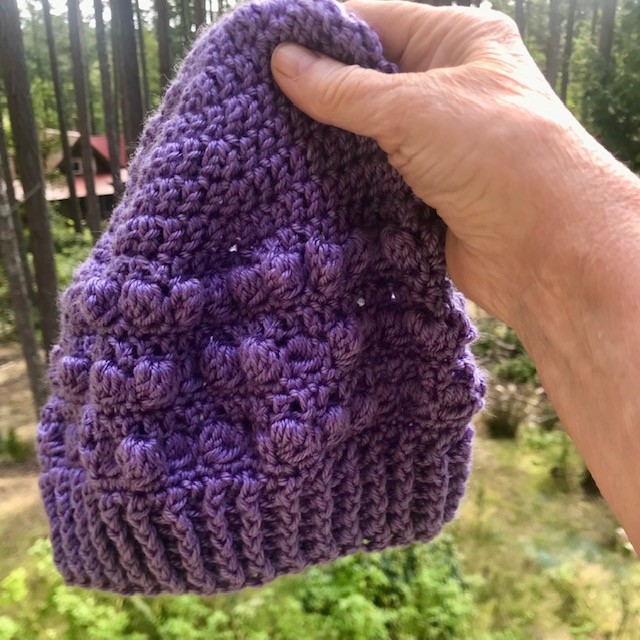
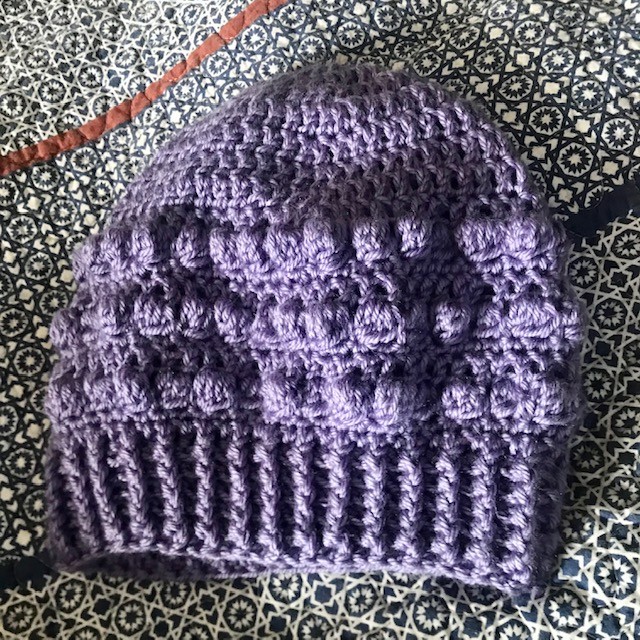
The Elisabeth Slouchy Beanie is a lightweight beanie made with a soft worsted weight (4) yarn and it features the bobble stitch. You will discover it is so easy to make. I also have a crochet tutorial on my youtube channel to show you how to do the bobble stitch. It is the perfect crochet project to support cancer research and also learn a new stitch.
**This post contains affiliate links. If you make a purchase using some of my links I may receive a small commission at no extra cost to you.**
Hi everyone. I am so excited to share my Elisabeth Slouchy Beanie free crochet pattern with you.
This Easy Crochet Chemo Cap Pattern is dedicated to my dear friend Elisabeth. She is an amazing friend and a courageous woman who survived breast cancer and is an inspiration to others. Her strength and determination show up in so many areas of her life. She has a huge heart and an adventurous spirit and I am honoured to have her as a friend.
This Beanie makes up so soft and it is the perfect project for someone needing a pretty hat to wear while having chemo treatment, but also forever afterwards as well as it is so stylish.
It is also available as a pdf in my Ravelry Shop.

Description of the Elisabeth Slouchy Beanie Chemo Cap Pattern.
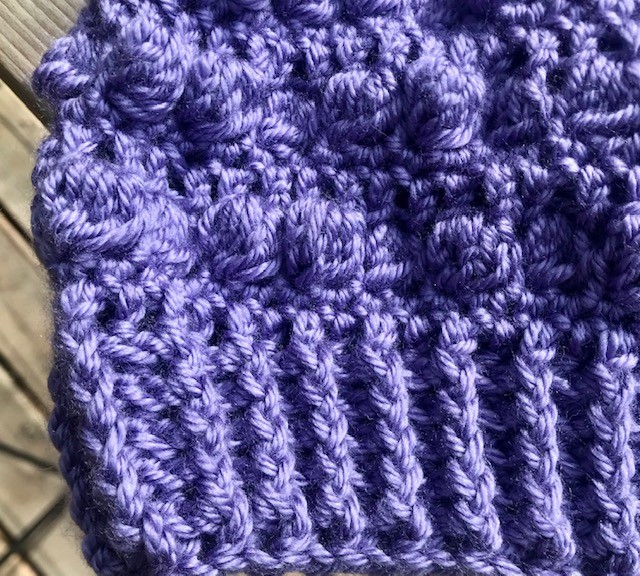
The Elisabeth Slouchy Beanie pattern is a top down beanie. The body of the beanie is made up of double crochet stitches and bobble stitches worked on an H or 5 mm hook, so it has a soft texture. The brim is made with alternating front and back post only double crochet stitches. This type of brim is simple and stylish.
Don’t forget to pin it for later so you don’t lose it.
Here are the video tutorials on how to make the bobble stitch
This is the right handed version.
And the Left Handed Version is here.

 Sign Up For My Newsletter.
Please consider signing up for my newletter and joining me over on facebook so you are always in the loop for what is happening with Carroway Crochet.
Sign up for my Newsletter
Get the latest info on free patterns and fun blog hops.
Join Me on Facebook.
Follow me on my Facebook Page for the latest video news and what I am up to.
Join our Crochet Community Group.
Get the latest updates on my free patterns, latest pattern release and share your crochet projects with our Carroway Crochet Community on Facebook. You will also get the updates on new blog hops I host or new pattern releases.

Looking for More Great Hats Created for the Crochet for Cancer Cause.
This is my third time taking part in the Crochet for Cancer Challenge.
You can find my other contributions here as free patterns on my blog.
The Simple Striped Beanie is made with supr bulky yarn.
The Diane Beanie was my super popular chemo cap from 2023.

The Elisabeth Slouchy Beanie
Pattern by Pam Carr ©2024
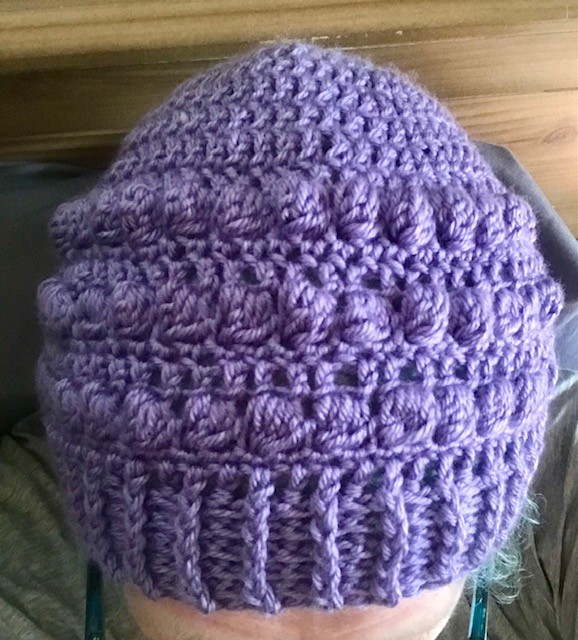
Hi everyone. I am so excited to share my Elisabeth Slouchy Beanie free crochet pattern with you. The Elisabeth Slouchy Beanie makes up so soft and it is the perfect project for someone needing a pretty hat to wear while having chemo treatment, but also forever afterwards as well as it is so stylish. I used the soft lavendar coloured yarn for myElisabeth Slouchy Beanie.
This Easy Crochet Chemo Cap Pattern is for a top-down beanie. The body of the beanie is made up of double crochet stitches worked with an H, 5mm hook, so it has a soft texture. The brim is made with alternating front and back post double crochet stitches. This type of brim is simple and stylish.
The Elisabeth Slouchy Beanie Pattern
Size: Teen/Adult
Finished Hat Size: 20-23“/ 51-56 cm in circumference.
Supplies you will need:
Yarn: One skein of Worsted weight (4) yarn.
I used a soft acrylic worsted weight (4) yarn from my stash for my hat.
Hook: size 5 mm, US – H/8
Notions: Tapestry needle and scissors.
Gauge: 13 sc – 14 rows = 4” (10 cm)
Abbreviations (uses US terms)
-
Ch = chain
-
sc = single crochet
-
st = stitch
-
dc = double crochet
How to make the Bobble Stitch.
-
Yarn over, insert hook into stitch and pull up a loop. Yarn over, pull through two loops
-
Repeat number one in the same stitch/space until you have a total of 6 loops on your hook.
-
Yarn over, pull through all 6 loops at once.
-
Single crochet in next stitch.
Here is where you can find a video tutorial on how to crochet the bobble stitch
This pattern uses US terminology. The US and UK crochet terms are different, but they use the same terms to describe different stitches. Here is a simple conversion chart for anyone in the UK.
USsingle crochet (sc)double crochet (dc) |
UKDouble crochet (dc)Treble (tr) |
Special Stitches used in the Brim
For the brim you will do alternating Front Post Double Crochet and Back Post Double Crochet.
FPDC or front post double crochet.
Yarn over, insert hook from the front side of the work to back and then to front again, around the post of the indicated stitch on the previous row; yarn over and pull up a loop (3 loops on hook), yarn over and draw through two loops, (2 loops on hook), yarn over and draw through two loops, (1 loop on hook).
BPDC or back post double crochet.
Yarn over, insert hook from the back side of the work to front and to back again around the post of the indicated stitch on the previous row; yarn over and pull up a loop (3 loops on hook), yarn over and draw through two loops (2 loops on hook), yarn over and draw through two loops (1 loop on hook)
A tip to remember when working this ribbed brim.
When you work 1 front post double crochet (FP DC) around the post of the double crochet in the row below, this stitch is raised on the surface of the fabric facing you. Always make sure that the post stitches are raised to the same side in each successive row or round. Keep an eye on the ribs and remember: If the stitch you’re working is raised to the front, work a front post stitch; if the stitch is raised to the back, work a back post stitch.
Here is a great video tutorial to learn this technique.
Instructions:
This hat is worked in the round.
Please note that the Ch 2 worked at the beginning of a Round does not count as a stitch.
Do not turn at the end of each Round.
Chain 4 and join to make a small ring or you can start with a magic ring.
Round 1: Ch 2 and make 11 DC in the ring, join to top of ch2 with a sl st, (11 DC)
Round 2: Ch2, 2 DC in each stitch around, join to top of ch2. (22 DC)
Round 3: Ch 2, (2 DC in first st, DC in next st), repeat around, join to top of ch2. (33 DC)
Round 4: Ch 2, (2 DC in first st, DC into each of the next 2 stitches), repeat around, join to top of ch2. (44 DC)
Round 5: Ch 2, (2 DC in first st, DC into each of the next 10 stitches), repeat around, join to top of ch2. (48 DC)
Round 6: Ch 2, (2 DC in first st, DC into each of the next 11 stitches), join to top of ch2. (52 DC)
Round 7: Ch 2, (2 DC in first st, DC into each of the next 12 stitches), join to top of ch2, (56 DC)
Round 8: Ch 2, (2 DC in first st, DC into each of the next 13 stitches), join to top of ch2. (60 DC)
Round 9: Ch 2, (2 DC in first st, DC into each of the next 14 stitches), join to top of ch2. (64 DC)
Round 10: Ch1, SC into the first st. make a bobble stitch in the next stitch and continue around until the last st, sc into the last st. Join with a sl st to the top of the ch1. (32 bobble stitches)
Round 11: Ch1, sc into the first st and into every stitch across. Join with a sl st to the top of the sc. (64 st)
Round 12: Ch 2, DC in each st around, join to top of ch2. (64 DC)
Round 13: Ch1, SC into the first st. make a bobble stitch in the next stitch and continue around until the last st, sc into the last st. Join with a sl st to the top of the ch1 (32 bobble stitches)
Round 14: Ch1, sc into the first st and into every stitch across. Join with a sl st to the top of the sc. (64 st)
Round 15: Ch 2, DC in each st around, join to top of ch2. (64 DC)
Round 16: Ch1, SC into the first st. make a bobble stitch in the next stitch and continue around until the last st, sc into the last st. Join with a sl st to the top of the ch1. (32 bobble stitches)
Round 17: Ch1, sc into the first st and into every stitch across. Join with a sl st to the top of the sc. (64 st).
Round 18: Ch 2, DC in each st around, join to top of ch2, (64 DC)
Note: If you want a smaller hat stop the increases at Row 8 and continue with 60 stitches.
Making the Brim.
Note: Instructions for doing the brim section using the FPDC and BPDC are above, along with a link to a video tutorial.
Round 19: Ch 2, *FPDC into DC in row below, BPDC into next DC in row below* repeat around, join with a sl st to top of Ch2.
Round 20: Ch 2, *FPDC into DC in row below, BPDC into next DC in row below* repeat around, join with a sl st to top of Ch2.
Round 21: Ch 2, *FPDC into DC in row below, BPDC into next DC in row below* repeat around, join with a sl st to top of Ch2.
Round 22: Ch 2, *FPDC into DC in row below, BPDC into next DC in row below* repeat around, join with a sl st to top of Ch2.
Round 23: Ch 2, *FPDC into DC in row below, BPDC into next DC in row below* repeat around, join with a sl st to top of Ch2.
Fasten off, weave in ends.
If you have any questions or need help with the patterns, please email me at carrowaycrochet@outlook.com, and Iʼll be glad to help you.
OTHER FREE CROCHET PATTERNS YOU MIGHT LOVE!
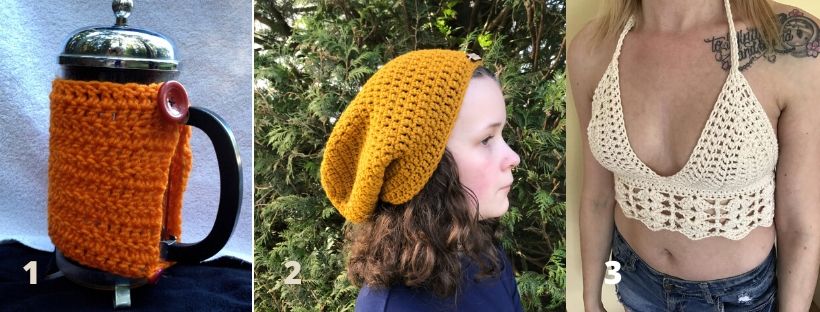
1. French Press Cozy
2. The Dreamer Beanie
3. The Ivory Lace Bralette
More Places to Find Crochet Free Patterns:
If you love crochet, you can find over a thousand free crochet patterns including some for crop tops and bralettes over at All Free Crochet
 I am honoured to have my free crochet bralette pattern, the Earth Mother Bralette Pattern added to the All Free Crochet site.
It is a great resource for crochet lovers and I am proud to also have my Bella B Shorts posted over on the All Free Crochet Site.
Selling items made from my patterns?
You are more than welcome to se items made from my pattern. Please do share my link and tag and help promote it on social media. Thank you.
Let’s Share and Connect!
Thank you for trying my free Freedom Beanie crochet pattern, I hope you enjoyed it! Please share pictures of your completed beanies on Instagram and Facebook. Tag them @carrowaycrochet #carrowaycrochet and #simplestripedbeanie on Instagram.
Thank you so much for visiting me here at Carroway Crochet .
Other places you can find me are:
This design, written work and images are a copyright of
©CarrowayCrochet and may not be copied or reproduced in any way.
You have permission to sell finished products made from this pattern, but please leave a link to my blog, www.carrowaycrochet.com in your product listing specifying that I am the designer of this pattern.
Thank you.
Thank you so much for this pattern! I love making chemo hats and this will definitely go to a good cause. I appreciate all the effort you put into the pattern.
Thank you so much for your kind comment. I am so happy to hear you made use of the pattern. All the best for 2025