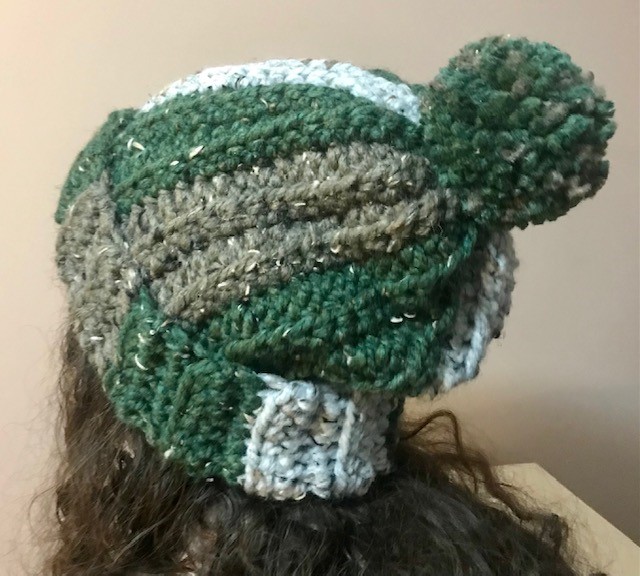
The Woodland Beanie Free Crochet Pattern.
Introducing my Woodland Beanie Free Crochet Pattern. The Woodland Beanie is a super bulky beanie and it is so easy to make, it is a great project for an adventurous beginner.
**This post contains affiliate links. If you make a purchase using some of my links I may receive a small commission at no extra cost to you.**
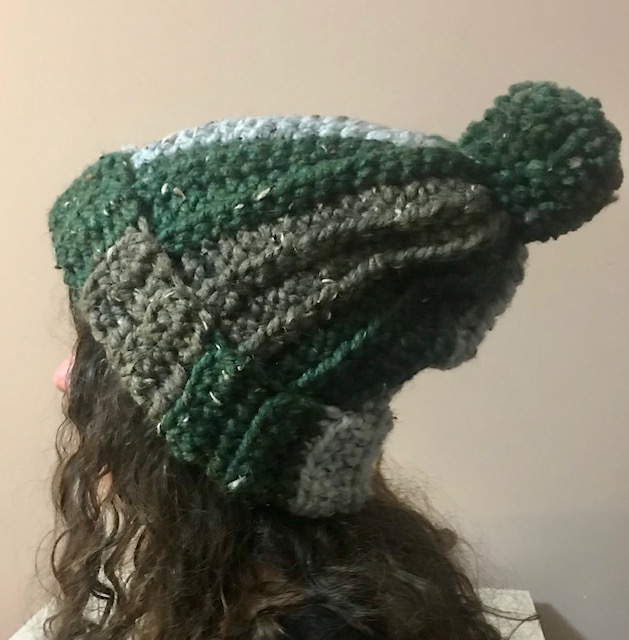
Hi everyone. I am so excited to share The Woodland Beanie Free Crochet Pattern with you. This Beanie makes up easily and it is the perfect project for selling at craft fairs or for making as a gift. I used forest tone colours from the Lions Brand Wool Ease Thick and Quick yarn collection.
It is also available as a pdf in my Ravelry Shop.
Get the latest updates on free patterns and new designs and also share your crochet projects with our Carroway Crochet Community on Facebook. You will also get the updates on new blog hops I host or new pattern releases.
Description of the Woodland Beanie Free Pattern.
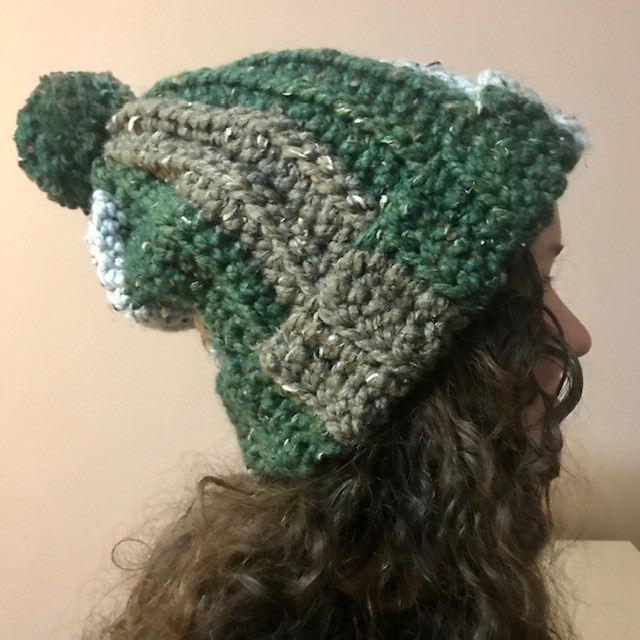
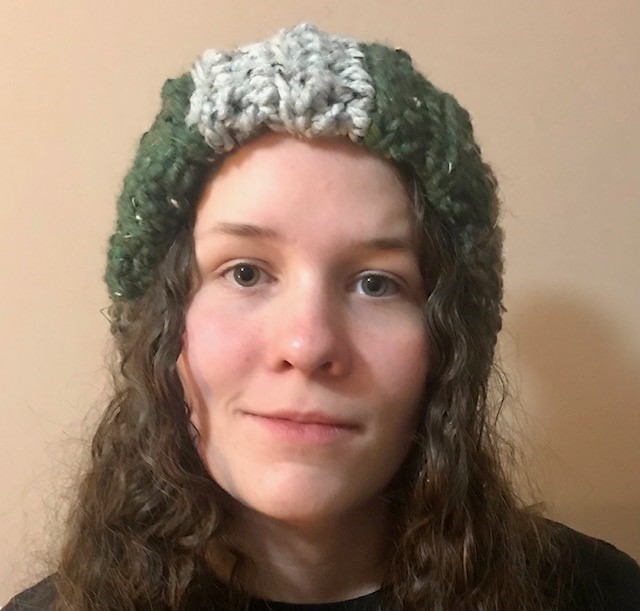
The Woodland Beanie Free Crochet Pattern is a sideways construction beanie. You start with a chain as tall as you want the beanie to be and work your rows until it is long enough to go around your head. The body of the beanie is made up of half double crochet stitches and single crochet stitches worked into the back loop only, so it has this great cozy texture. In this pattern there it enough length for a large folded up brim
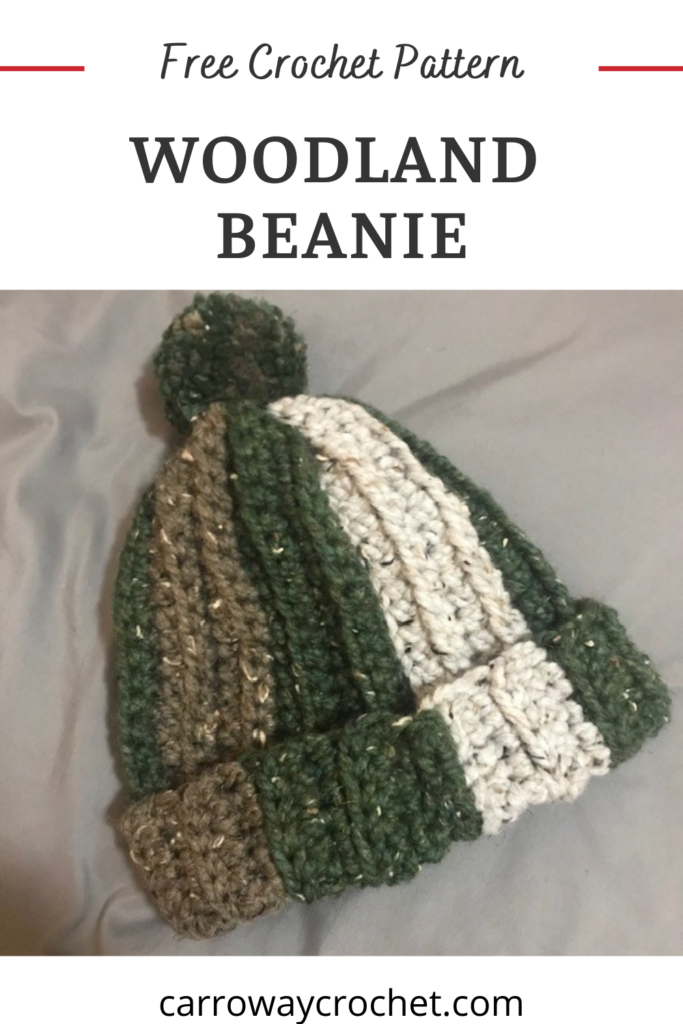
Don’t forget to pin it for later so you don’t lose it.
Are you a Visual Learner?
Here are the video tutorials on how to make my Basic Chunky Beanie.
All About the Yarn.
I nearly always use Lion Brand Wool Ease Thick and Quick whenever I make up my Beanie crochet pattern. I tried using a substitute but it never had the luxurious, cozy appeal. I think it is the fact that this yarn is 20% wool and 80% acrylic, so it has a softness and springiness that is hard to duplicate with other yarns. You can however substitute any super bulky weight yarn you have available to make these beanies, but they might have a different feel and vibe.
I have used Lion Brand Wool Ease Thick and Quick on other crochet patterns here on my blog, including the Short and Chunky Fingerless Gloves and my Warmest Feet Ever Slipper Socks.
Colourways:
Lion Brand Wool Ease Thick and Quick yarn is available in a wide variety of shades, including neutrals, and lovely earth tones and pinks etc. It is such a user friendly yarn and just great for making these crochet beanies. I used Kale, Barley and Grey for this Simple Striped Beanie.
Lion Brand Wool Ease Thick and Quick is a super bulky weight yarn with a number 6 on the label.
Care instructions for Lion Brand Wool Ease Thick and Quick.
Machine Wash, Machine Dry
You can machine wash this yarn but the initial water temperature should not exceed 40C or 105F. You can Dry Clean it with any solvent. Do not use any bleach products on Lion Brand Thick and Quick. You can use a machine dryer at the hottest available temperature setting. Do not us an iron to smooth or finish items made with this yarn.
The Woodland Beanie
Pattern by Pam Carr ©2022
Introducing the The Woodland Beanie Free Crochet Pattern which is made with super bulky yarn and the single crochet and half double crochet stitch. I would love to see lots of your Woodland Beanies in different colours once they are done. I have chosen colours from nature for my stripes.
Supplies you will need:
Yarn: Super Bulky weight yarn (6) Lion Brand Wool Ease Thick and Quick yarn is perfect. I used the colours Kale, Barley and Marble Grey for my Woodland Beanie. You may use other super bulky (6) yarn but the beanie’s size may vary. This is a great project for using up your super bulky yarn stash.
Hook: Size N– 9.00mm
Notions:
A Pom Pom Maker for the yarn pom pom or a faux fur pom pom
Scissors, Tapestry needle.
Gauge: 9 hdc by 4 hdc rows = 4” (10 cm) with an N – 9.00mm mm, hook
(Feel free to go up or down a hook size to get the correct gauge.)
Abbreviations (uses US conventions)
-
Ch = chain
-
st = stitch
-
sc = single crochet
-
sl st = slip stitch
-
Blo = back loop only
-
hdc blo = half double crochet back loop only
-
sc blo = single crochet back loop only
Special Stitches for this Pattern.
Back Loop Only BLO
This beanie is made using the single crochet back loop only stitch (sc blo) and the half double crochet back loop only stitch, (hdc blo)
When you see blo after sc or hdc it is to indicate that you do the specified stitch into the back loop only of the previous stitch. I have a video on how to find the back loop on my youtube channel. https://www.youtube.com/watch?v=pQhzE70Ov-U&t=85s /
This pattern uses US terminology.
The US and UK crochet terms are different, but they use the same terms to describe different stitches. Here is a simple conversion chart for anyone in the UK.
USSingle Crochet (sc)Half Double Crochet (hdc) |
UKDouble Crochet (dc)Half Treble (htr) |
Size: Finished Size (laid flat): 10″ wide and 13″ tall
When you roll up the brim it is 10” wide and 10” tall
Instructions:
Do not count the turning ch as a stitch
Start with the colour Kale
With N hook, Chain 30.
Row 1: sc into the 2nd ch from the hook and sc across to the end, Ch1 and turn (29 st)
Row 2: hdc blo into the first st and into the next 19 st, sc blo into the last 9 st, ch1 and turn (29 st)
Row 3: sc blo into the first st and into every st across, ch1 and turn (29 st)
Row 4: hdc blo into the first st and into every st across, ch1 and turn (29 st)
Change to Barley
Row 5: sc blo into the 1st st and into each st across to the end, ch1 and turn (29 st)
Row 6: hdc blo into the first st and into the next 19 st, sc blo into the last 9 st, ch1 and turn (29 st)
Row 7: sc blo into the first st and into every st across, ch1 and turn (29 st)
Row 8: hdc blo into the first st and into every st across , ch1 and turn (29 st)
Change to Kale
Row 9: sc blo into the first st and into every st across, ch1 and turn (29 st)
Row 10: hdc blo into the first st and into the next 19 st, sc blo into the last 9 st, ch1 and turn (29 st)
Row 11: sc blo into the first st and into every st across, ch1 and turn (29 st)
Row 12: hdc blo into the first st and into every st across, ch1 and turn (29 st)
Change to Marble Grey
Row 13: sc blo into the first st and into every st across, ch1 and turn (29 st)
Row 14: hdc blo into the first st and into the next 19 st, sc blo into the last 9 st, ch1 and turn (29 st)
Row 15: sc blo into the first st and into every st across, ch1 and turn (29 st)
Row 16: hdc blo into the first st and into every st across , ch1 and turn (29 st)
Change to Kale
Row 17: sc blo into the first st and into every st across, ch1 and turn (29 st)
Row 18: hdc blo into the first st and into the next 19 st, sc blo into the last 9 st, ch1 and turn (29 st)
Row 19: sc blo into the first st and into every st across, ch1 and turn (29 st)
Row 20: hdc blo into the first st and into every st across, ch1 and turn (29 st)
Change to Barley
Row 21: sc blo into the first st and into every st across, ch1 and turn (29 st)
Row 22: hdc blo into the first st and into the next 19 st, sc blo into the last 9 st, ch1 and turn (29 st)
Row 23: sc blo into the first st and into every st across, ch1 and turn (29 st)
Row 24: hdc blo into the first st and into every st across, ch1 and turn (29 st)
Change to Kale
Row 25: sc blo into the first st and into every st across, ch1 and turn (29 st)
Row 26: hdc blo into the first st and into the next 19 st, sc blo into the last 9 st, ch1 and turn (29 st)
Row 27: sc blo into the first st and into every st across, ch1 and turn (29 st)
Row 28: hdc blo into the first st and into every st across, ch1 and turn (29 st)
Change to Marble Grey
Row 29: sc blo into the first st and into every st across, ch1 and turn (29 st)
Row 30: hdc blo into the first st and into the next 19 st, sc blo into the last 9 st, ch1 and turn (29 st)
Row 31: sc blo into the first st and into every st across, ch1 and turn (29 st)
Row 32: hdc blo into the first st and into every st across.
Do not fasten off.
Fold in half lengthways and seam together using a slst. You can also use a whip stitch if you prefer.
Fasten off and weave in all the ends.
Using a strand of yarn at least 10” long and a yarn needle, gather up the stitches along the top of the beanie and pull tight. Work back and forwards to secure the top of the beanie. Fasten off and weave in the ends.
Turn the beanie right side out and fold up the brim.
Make a yarn pom pom and attach to the top of your beanie or use a faux fur pom pom.
I hope you enjoy your Woodland Hat.
If you have any questions or need help with the patterns, please email me at carrowaycrochet@outlook.com, and Iʼll be glad to help you
OTHER FREE CROCHET PATTERNS YOU MIGHT LOVE!
More Places to Find Crochet Free Patterns:
If you love crochet, you can find over a thousand free crochet patterns including some for crop tops and bralettes over at All Free Crochet
 I am honoured to have my free crochet bralette pattern, the Earth Mother Bralette Pattern added to the All Free Crochet site.
It is a great resource for crochet lovers and I am proud to also have my Bella B Shorts posted over on the All Free Crochet Site.
Selling items made from my patterns?
You are more than welcome to se items made from my pattern. Please do share my link and tag and help promote it on social media. Thank you.
Let’s Share and Connect!
Thank you for trying my free Woodland Beanie crochet pattern, I hope you enjoyed it! Please share pictures of your completed beanies on Instagram and Facebook. Tag them @carrowaycrochet #carrowaycrochet and #woodlandbeanie on Instagram.
Thank you so much for visiting me here at Carroway Crochet .
Other places you can find me are:
Ravelry
TikTok
This design, written work and images are a copyright of
©CarrowayCrochet and may not be copied or reproduced in any way.
You have permission to sell finished products made from this pattern, but please leave a link to my blog, www.carrowaycrochet.com in your product listing specifying that I am the designer of this pattern.
Thank you.
Please follow and like us:





One thought on “The Woodland Beanie Free Crochet Pattern.”
Comments are closed.