The Mandala Square Free crochet blanket square pattern

 How to Crochet A Mandala Square.
I am so excited to share my Mandala Square Pattern as a part of the 2026 Granny Square Month CAL
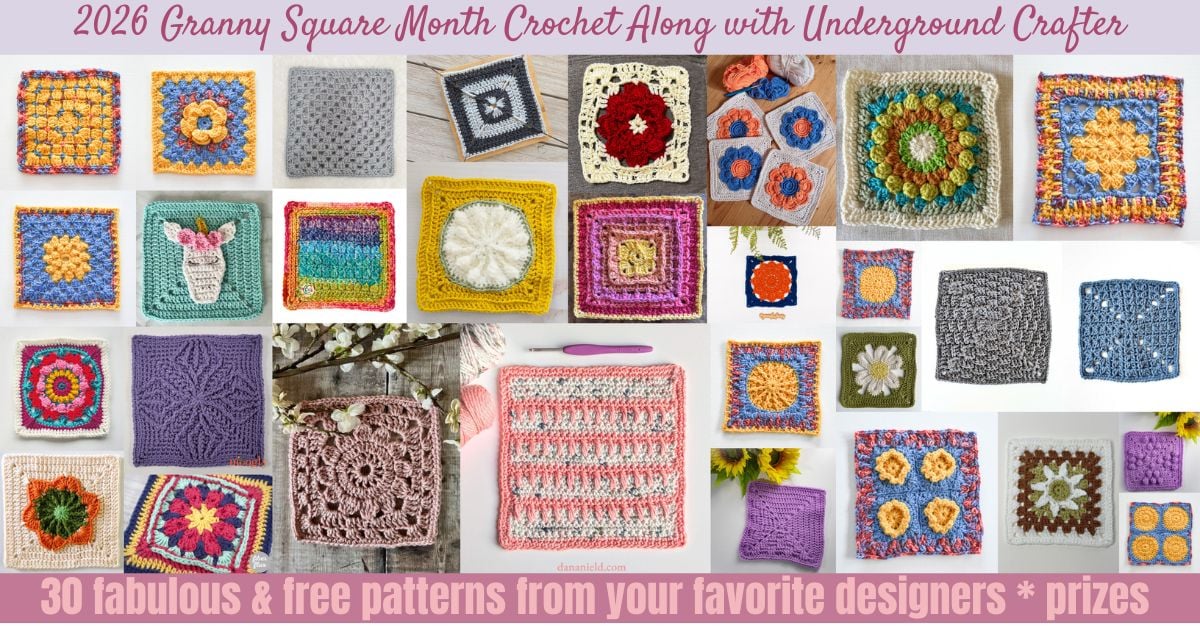
I came up with my Mandala Square Design when I was invited to design a square pattern for the 2026 Granny Square Month Crochet Along hosted by Marie of the Underground Crafter. Each day this month features a brand new granny square pattern designed by Marie or another designer.
You can find out all about this fun event and sign up for email notifications and see how to win prizes here: 2026 Granny Square Month CAL Information.
My square features lots of different textured stitches involving clusters and the popcorn stitch. This is a fun little square that looks good in multiple colours.
I used coloured yarn I found in my stash for my square. This is truly a scrappy stash busting pattern!
Get My Mandala Square Pattern Free on June 14th.
Use the coupon code MANDALA26
Go here to find it on ravelry.
Once on the Ravelry Listing you need to click on BUY NOW and then enter the coupon code MANDALA26 into the text box and click APPLY CODE and then you can download your free pdf for the Mandala Square,
THERE IS A BUNDLE !!!
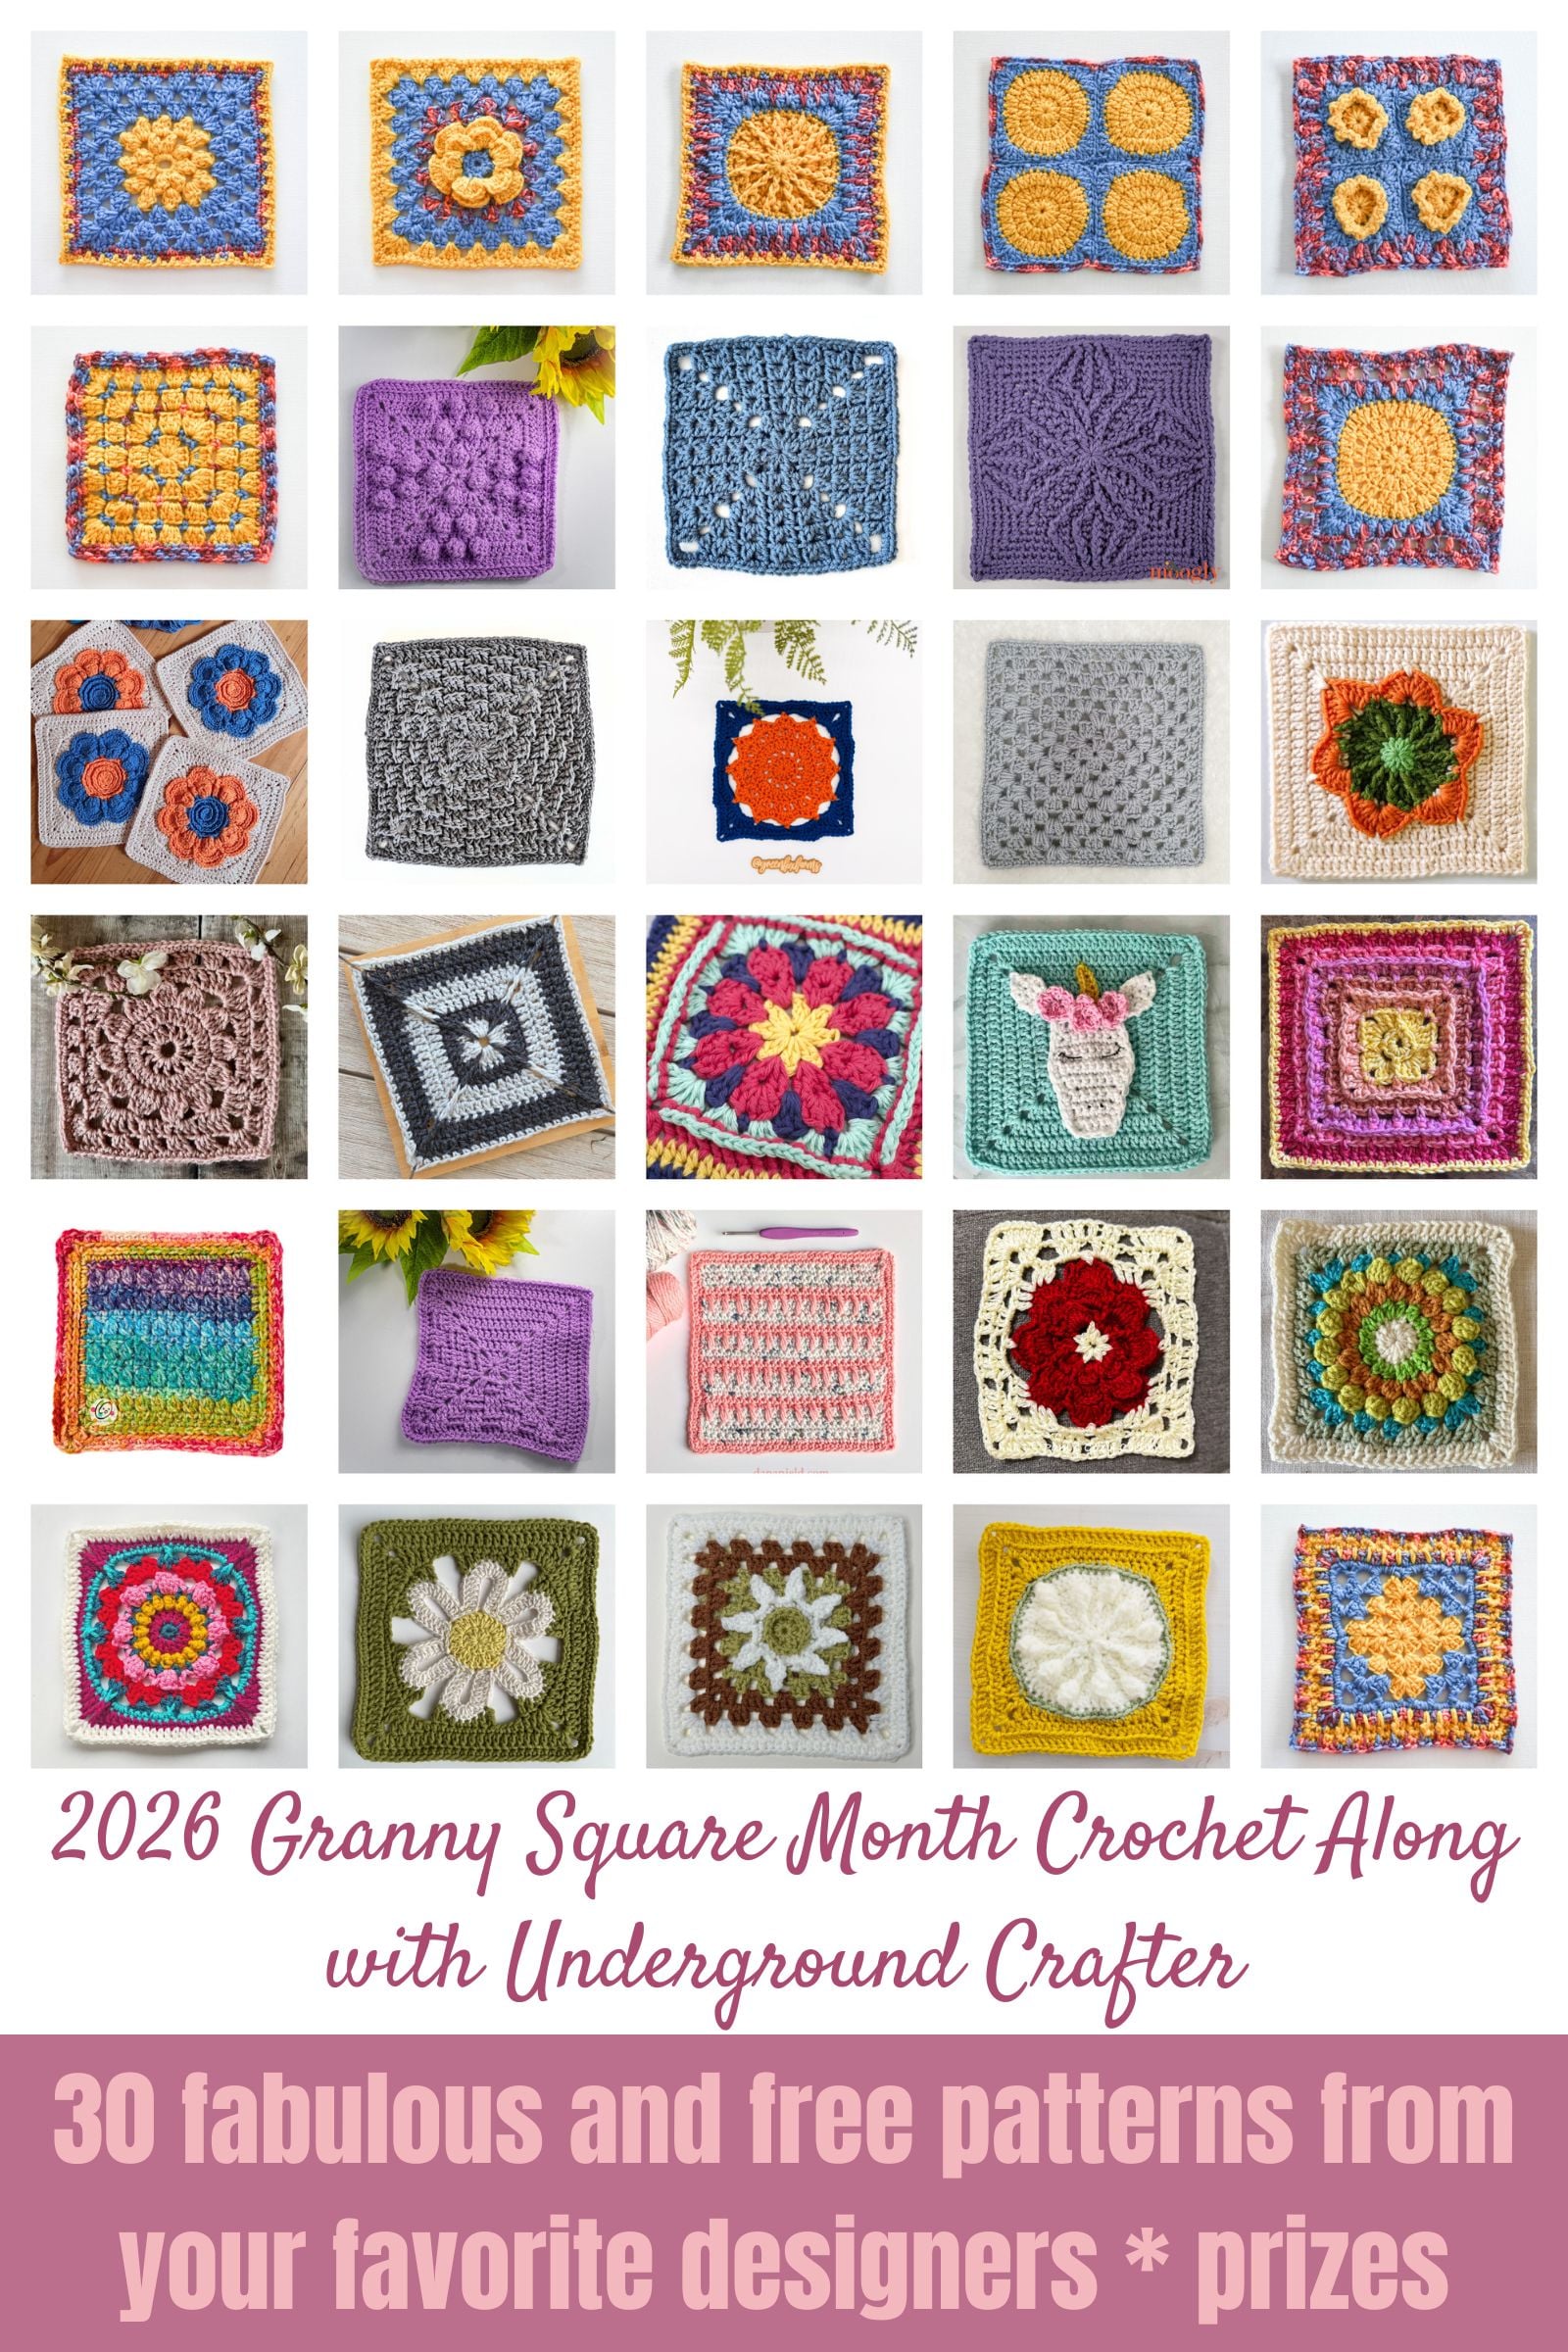
Get all 30 Granny Square Patterns!
For a limited time you can get a low-cost AD-FREE printable version of ALL 30 GRANNY SQUARE PATTERNS! This is an amazing deal and works out to be less and a dollar per pattern.
Hook me up!
![]()
![]()
![]()
![]() **This post contains affiliate links. If you make a purchase using some of my links I may receive a small commission at no extra cost to you.**
**This post contains affiliate links. If you make a purchase using some of my links I may receive a small commission at no extra cost to you.**
![]()

About the Mandala Square Pattern.
This square is a bit different as it starts out with a circle which is then worked into a square.
Once you complete the circular section you add the corners and it becomes a versatile square that can be used to make many items, such as blankets, bags, sweaters etc.
This pattern is for an 8” square to be used in a blanket. I used worsted (4) weight yarn and a J-6mm hook.

Check out my latest Video on How to Crochet a Simple Beanie.
If you prefer to have the blanket square pattern in front of you instead of on the screen you can get the ad free pdf .
Purchase the Mandala Square Blanket Square Pattern on Ravelry.

Sign up for my Newsletter
Get the latest info on free patterns and fun blog hops. Sign up here.
Join Me on Facebook.
Follow me on Facebook for lots of great crochet news and all the latest videos and free patterns coming from Carroway Crochet.
Join in With the Carroway Crochet Community .
You can also share your crochet projects with our Carroway Crochet Community on Facebook. You will also get the updates on new blog hops I host or new pattern releases.

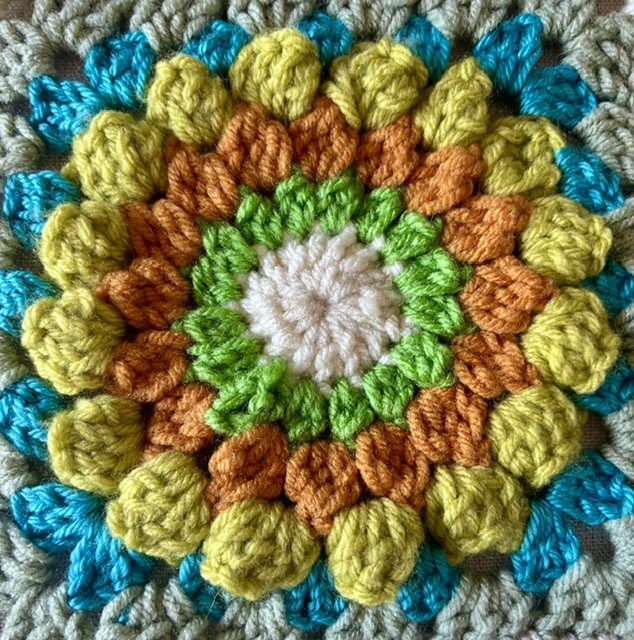
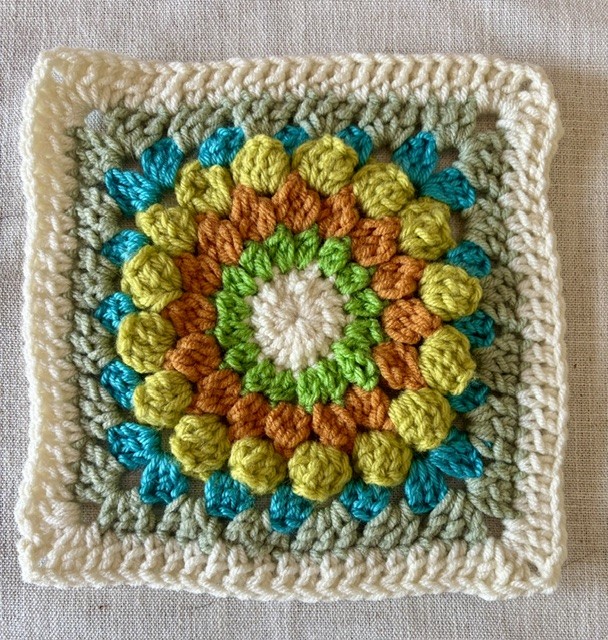
The Mandala Square Close Up

The Mandala Square
Pattern by Pam Carr ©2026
Introducing the Mandala Square.
This square is a bit different as it starts out with a circle which is then worked into a square. I just love all the textures in this colourful square. There are 2 and 3 double crochet cluster stitches as well as the popcorn stitch used in this square.
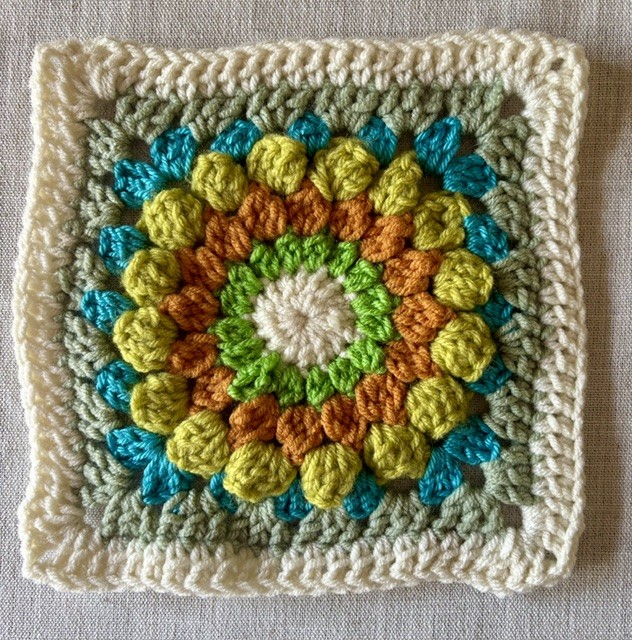
Once you complete the circular section you add the corners and it becomes a versatile square that can be used to make many items, such as blankets, bags, sweaters etc.
This pattern is for an 8” square to be used in a blanket. I used worsted (4) weight yarn and a H-5mm hook.
Supplies you will need:
Yarn: Any worsted weight (4) yarn. I have used Loops and Threads Soft Classic Yarn and Loops and Threads Impeccable Yarn and other yarn from my stash for the one in the pictures shown here.
It is a great pattern to use up your stash.
You will need 6 colours. The colours I used are below. Colour A is used in the first and the last round.
Colour A; White (Loops and Threads Soft Classic Yarn)
Colour B: Lime Green from my stash
Colour C: Curry (Loops and Threads Soft Classic Yarn)
Colour D: Grass (Loops and Threads Impeccable)
Colour E: Turquoise from my stash
Colour F: Sage (Loops and Threads Soft Classic Yarn)
Hook: Size H/8 -5mm
Notions: Scissors, tapestry needle, a button of your choice
Gauge: 12 dc – 7 rows = 4” (10 cm)
Abbreviations (uses US conventions)
-
Ch = chain
-
st = stitch
-
dc = Double crochet
-
yo = yarn over
-
sl st = slip stitch
This pattern uses US terminology. The US and UK crochet terms are different, but they use the same terms to describe different stitches. Here is a simple conversion chart for anyone in the UK.
USDouble crochet (dc) |
UKTreble (tr) |
My YouTube channel, www.youtube.com/CarrowayCrochet, is a great resource for video tutorials for the double crochet, the double crochet cluster and the pop corn stitch.
Size: 8” wide by 8” tall.
Special Stitches for the Mandala Square
2 Double Crochet Cluster:
Yo, insert hook in st, yo, pull through st, yo, pull through 2 loops on hook, (yo, insert hook in same st, yo, pull through st, yo, pull through 2 loops on hook) 1 more time, yo, pull through all 3 loops on hook, ch 1
3 Double Crochet Cluster:
Yo, insert hook in st, yo, pull through st, yo, pull through 2 loops on hook, (yo, insert hook in same st, yo, pull through st, yo, pull through 2 loops on hook) 2 times, yo, pull through all 4 loops on hook,d ch 1.
Popcorn Stitch:
Yo, make 4 double crochet stitches into the stitch or space, (the amount of dcs made can vary depending on your choice of popcorn st, for this pattern I am using a 4dc popcorn st)
When 4 dc have been made into the same st or space, remove the hook from the loop at the top of the dc you just worked and place your hook through the top of the first double crochet in the popcorn.
Now go back and pick up the first loop at the top of the last double crochet worked, (the fourth dc of the popcorn), Pull this loop through the loop already on the hook. Your popcorn stitch really stands up and creates an amazing texture.
Colours:
The square is made with six colours, I will call them Colour A, Colour B, Colour C, Colour D, and Colour E.
Colour A is used for the first and last round.
Instructions:
Do not turn at the end of each round as it is worked in the round.
With Colour A (I used White from Loops and Threads Soft Classic Yarn)
Ch 4. Join with sl st to first ch to form ring or make a Magic Loop to start.
Round 1: Ch 2, make 16 dc into the ring. Join with a slip stitch into the top of the ch2.
Fasten off
Change to Colour B (I used Lime Green from my stash.)
This round is made with 2 double crochet clusters as seen in the instructions above, however the first cluster is slightly different as it begins with the ch3 at the start of the round. It consists of the ch3, (which acts as the first dc of the cluster), and then one more dc cluster stitch is added), I have written up the steps of this first cluster below, and then you carry on with the regular 2 double crochet clusters as described above.
Join new colour into any st from Round 1
Round 2: Ch3, Yo, insert hook in base of ch3, yo, pull through st, yo, pull through 2 loops on hook, yo, pull through all 2 loops on hook, (This is your first cluster.)
Now you will be making regular 2 double crochet clusters as described in the instructions above *ch 1, make a 2dc cluster in the next st* Repeat between * and * around to the end. You will have sixteen 2 double crochet clusters with ch1s in between each cluster. Join with a sl st to the top of the ch3. (16 2dc clusters. 16 ch1 spaces)
Fasten off.
Change to Colour C: (I used Curry from Loops and Threads Soft Classics)
The next round is worked in 3 dc clusters. Once again, the first cluster is different as you are starting with a ch3 that acts as the first dc.
Join new colour into any ch1 space from Round 2
Round 3: Ch3, Yo, insert hook in base of ch3, yo, pull through st, yo, pull through 2 loops on hook, yo, insert hook into the same sp, pull through st, yo, pull through 2 loops on hook, yo, pull through all 3 loops on hook, (This is your first cluster.)
Now you will be making regular 3 double crochet clusters as described in the instructions above. *ch 2, work a 3 double crochet cluster as described above into the next ch1 sp,* repeat between * and * into each ch1 space around. to the end, join with a sl st to the top of the ch3 (16 3dc clusters. 16 ch2 spaces)
Fasten off.
Change to Colour D: (I used Grass from Loops and Threads Impeccable)
The next round is made with popcorn stitch as described above.
Join new colour into any ch 2 space from Round 3.
Round 4: Ch3, *make 4dc into the same sp, remove your hook from the working loop on your hook where you made the 4th dc and put the hook into the top of the 1dc st you made and then back into the loop of the 4th dc, and pull this loop through the loop on the hook. Ch3.* This creates the popcorn stitch, repeat between * and * around to the end. Join with a slip stitch into the top of the ch3. (16 popcorn stitches and 16 ch 3 spaces)
Fasten off
Change to Colour E: (I used turquoise from my stash.)
Join new colour to any ch3 space from Round 4, this will become the first corner.
Round 5: Ch 3, (this acts as the first dc of your new cluster), make 2 more dc into the same sp, (this is half of the first corner to be completed at the end of the round ) ch1, Make 3dc into the ch sp from the previous row, (it is between two popcorn stitches,) ch1, make 3dc into the next ch space, ch1, make 3dc into the next ch1 space, ch1, Make 3dc, ch3, 3dc into the next corner sp,(this is the second corner) ch1, 3dc into the ch1 sp from the previous row, ch1, 3dc into the next ch1 sp, ch1, make 3dc into the next ch1 space, ch1, make 3dc, ch3, 3dc into the next corner space,(this is your third corner) ch1, 3dc into the ch1 sp from the previous row, ch1, 3dc into the next ch1 sp, ch1, make 3dc into the next ch1 space, ch1, make 3dc, ch3, 3dc into the next corner space, (this is your fourth corner) ch1, 3dc into the ch1 sp from the previous row ch1 , 3dc into the ch1 sp, ch1, make 3dc into the next ch1 space, ch1, we now complete the first corner, make 3dc, ch3 and join to the top of the first ch3 with a sl st. (15 dc and 6 ch st each side)
Fasten off.
Change to Colour F. (I used Sage from Loops and Threads Soft Classics)
Join new colour into any corner ch3 space
Round 6: Ch 3, (this acts as the first dc of your new cluster), make 2 more dc into the same corner sp, (this is half of the first corner to be completed at the end of the round) Make 3dc into the sp from the previous row, (it is between two dc shells,) make 3dc into the next space, make 3dc into the next space, make 3dc into the next space. Make 3dc, ch2, 3dc into the next corner sp,(this is the second corner), 3dc into the next sp from the previous row, 3dc into the next sp, 3dc into the next space, 3dc into the next sp, make 3dc, ch2, 3dc into the next corner space,(this is your third corner) 3dc into the next sp from the previous row, 3dc into the next sp, make 3dc into the next space, 3dc into the next sp, make 3dc, ch2, 3dc into the next corner space, (this is your fourth corner) 3dc into the next sp from the previous row, 3dc into the next sp, make 3dc into the next space, 3dc into the next sp, we now complete the first corner, make 3dc, ch2 and join to the top of the first ch3 with a sl st. (18dc and 2 ch st)
Fasten off.
Change to Colour A. (I used White from Loops and Threads Soft Classics)
Join new colour into any corner ch2 space
Round 7: Ch3, 2dc into the same ch2 space of the previous corner, *dc into the first and every stitch across to the next corner,* 3dc, ch2, 3dc into the ch2 space* Repeat between the * and * twice, dc into the first and every stitch across to the last corner, 3dc in the ch2 space, ch2 and join to the top of the ch2 with a sl st. (24 st and 2ch st each side)
Fasten off and weave in the ends. Now you have a beautiful Mandala Square.
Thank you for trying my pattern, I hope you enjoy it! Please share pictures of your completed items on Instagram and Facebook. Tag them @carrowaycrochet #carrowaycrochet #MandalaSquare on Instagram.
OTHER FREE CROCHET PATTERNS YOU MIGHT LOVE!
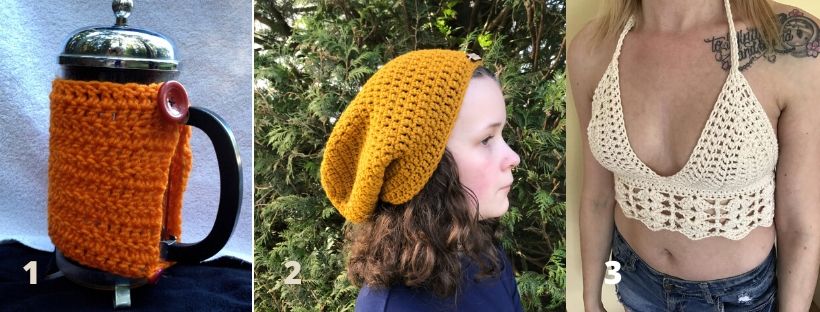
1. French Press Cozy
2. The Dreamer Beanie
3. The Ivory Lace Bralette
More Places to Find Crochet Free Patterns:
If you love crochet, you can find over a thousand free crochet patterns including some for crop tops and bralettes over at All Free Crochet
I am honoured to have my free crochet bralette pattern, the Earth Mother Bralette Pattern added to the All Free Crochet site.
 It is a great resource for crochet lovers and I am proud to also have my Take Me Outside Infinity Scarf Pattern posted over on the All Free Crochet Site.

Selling items made from my patterns?
You are more than welcome to se items made from my pattern. Please do share my link and tag and help promote it on social media. Thank you.
If you have any questions or need help with the patterns, please email me at carrowaycrochet@outlook.com, and Iʼll be glad to help you.
Thank you again for trying y pattern, I hope you enjoy it! Please share pictures of your completed Gloves on Instagram and Facebook. Tag them @carrowaycrochet #carrowaycrochet #shortandchunkygloves on Instagram.
Find other patterns by Carroway Crochet in my Etsy Shop and on Ravelry.
Let’s Share and Connect!
Thank you for trying my free crochet bralette pattern, I hope you enjoyed it! Please share pictures of your completed Bralettes on Instagram and Facebook. Tag them @carrowaycrochet #carrowaycrochet and #ivorylacebralette on Instagram.
Thank you so much for visiting me here at Carroway Crochet .
Find other patterns by Carroway Crochet in my Etsy Shop and on Ravelry.
Other places you can find me are:
This design, written work and images are a copyright of
©CarrowayCrochet and may not be copied or reproduced in any way.
You have permission to sell finished products made from this pattern, but please leave a link to my blog, www.carrowaycrochet.com in your product listing specifying that I am the designer of this pattern.
Thank you.