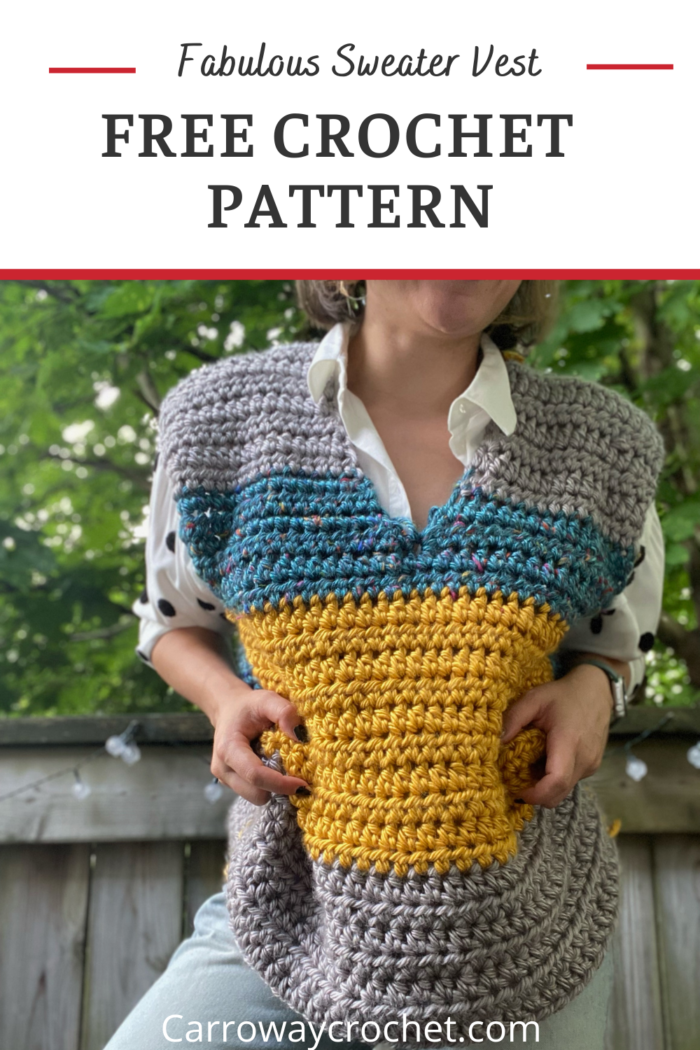
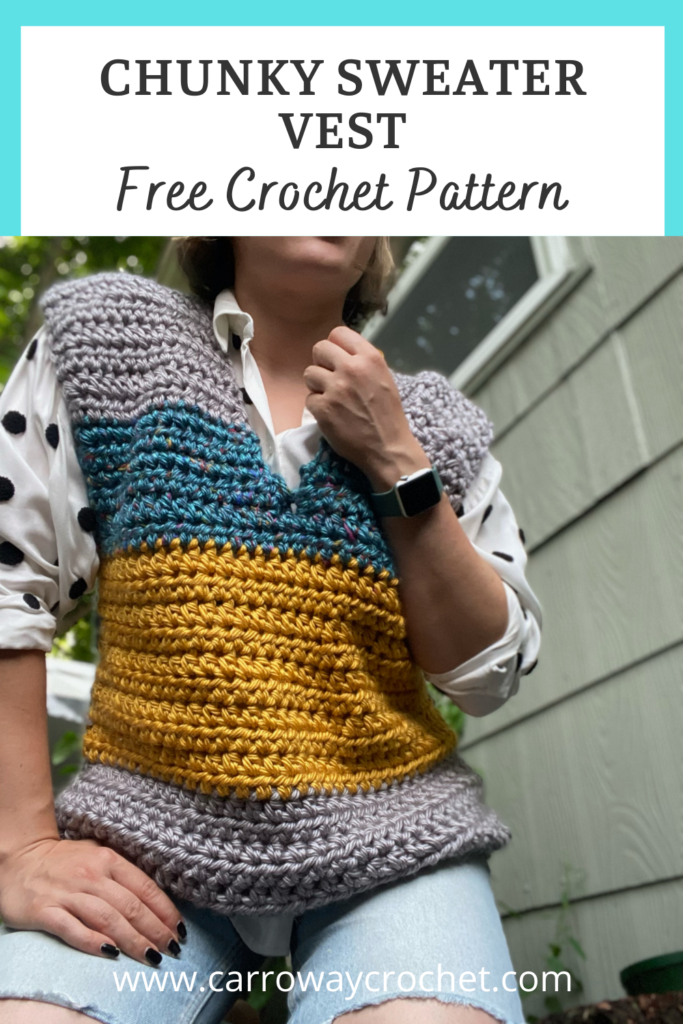
Chunky Sweater Vest: Free Crochet Pattern
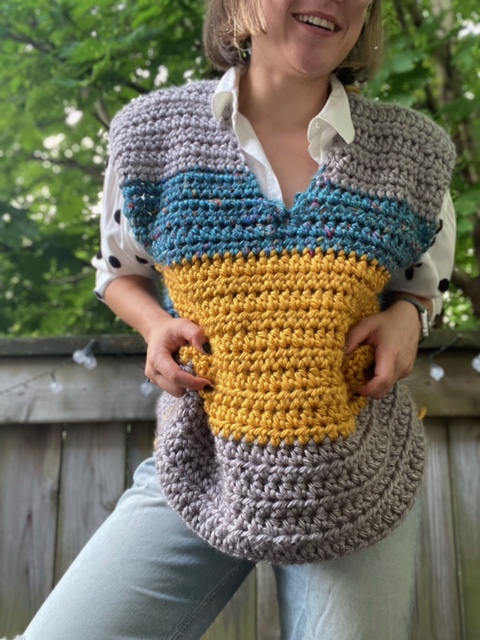
The Chunky Sweater Vest pattern is a free crochet pattern and perfect for fall days that are just around the corner. The chunky sweater vest is oversized and so comfy and stylish.
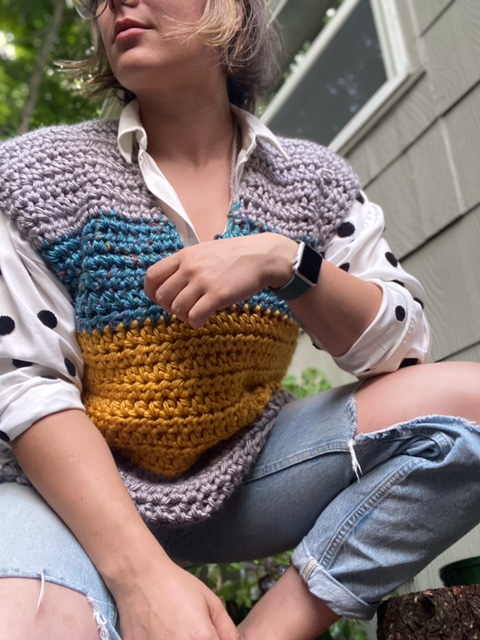
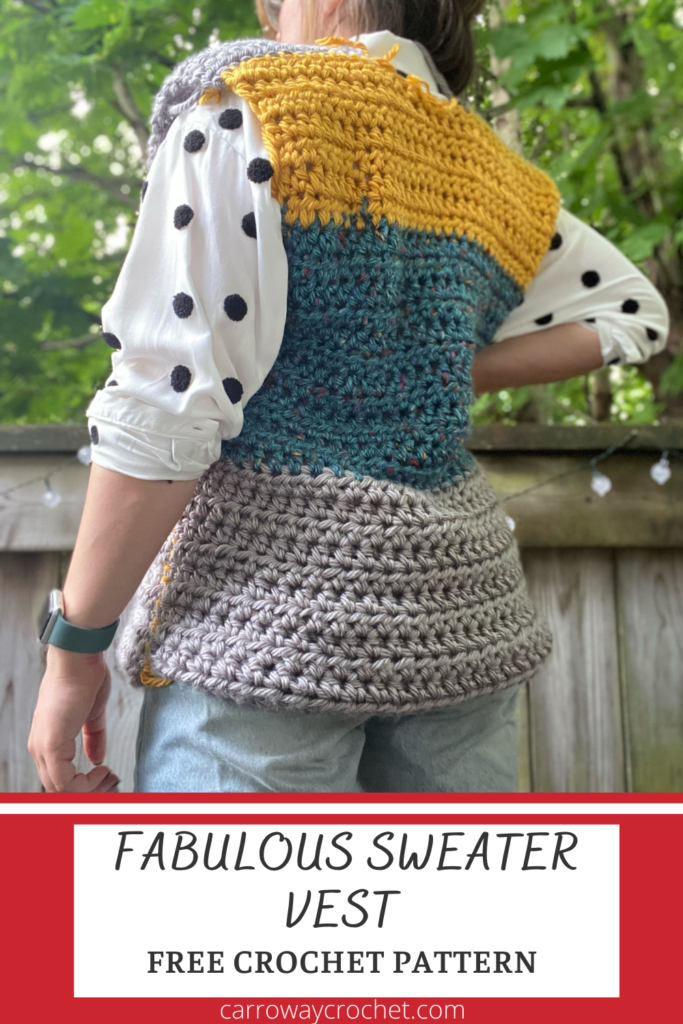
Introducing the Fabulous Chunky Sweater Vest. This gorgeous super bulky oversized sweater vest is beginner friendly and so stylish.
The Fabulous Chunky Sweater Vest is made with the half double crochet stitch and a 15mm crochet hook. For this chunky sweater vest I chose to use Super Bulky Tuff Puff yarn from We Crochet. It is 100% wool and comes in a vast array of gorgeous colours. I definitely recommend this yarn. You can, however, use any super bulky yarn for your project.
This is a fashion forward oversized sweater vest and perfect for those new to crochet but who want to create a modern crochet garment.
I love modern crochet projects and this Chunky Sweater Vest definitely has a modern vibe.
**This post contains affiliate links. If you make a purchase using some of my links I may receive a small commission at no extra cost to you.**
Description of The Chunky Sweater Vest Pattern.
The Chunky Sweater Vest can be made for sizes XS up to 5X.
Over Sized sweaters and cardies are all the rage right now. This chunky sweater vest is perfect for the oversized look. The chunky sweater vest is meant to have a loose fit. If you want a snugger fit then just go down a size or two.
The chunky sweater vest pattern uses We Crochet’s Knit Picks Tuff Puff super bulky yarn. It is 100% wool and very cozy. You can substitute any super bulky (6) yarn for your project.
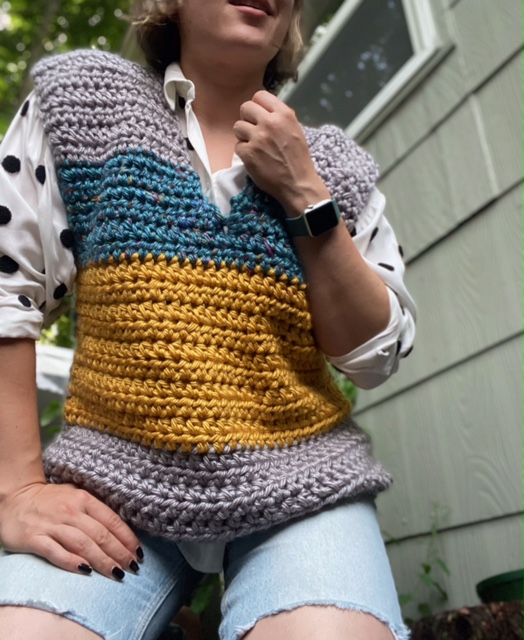
The chunky sweater vest is made of two pieces, the rectangular back piece and the front section that has a v neck. It is made with colour block sections that create the cool look. The large hook means this chunky sweater vest works up very quickly.
Do you love making garments for your crochet wardrobe.
You might be interested in my Carefree Vest or my Happy Hippy Sweater patterns if you love making garments.
If you prefer the ad free printable pdf you can find it in my Etsy Shop.
This pattern is available in an ad-free, printable PDF on Ravelry
Don’t forget to pin this free Fabulous Chunky Sweater Vest pattern for later so you don’t lose it.


Do you like crochet tutorials?
Here is my latest video tutorial on youtube. I made a video tutorial of how to make the Granny Square Bucket Hat. It is in two parts. Here is Part One.
Part Two is here. I hope they are helpful to you as you make your Granny Square Bucket Hat.
PIN ME FOR LATER


The Fabulous Chunky Sweater Vest Pattern
Pattern by Pam Carr 2021
Supplies you will need:
Yarn: Super Bulky weight yarn. Look for the (6) on the label . I used Knit Picks Tuff Puff 100% wool yarn from We Crochet.
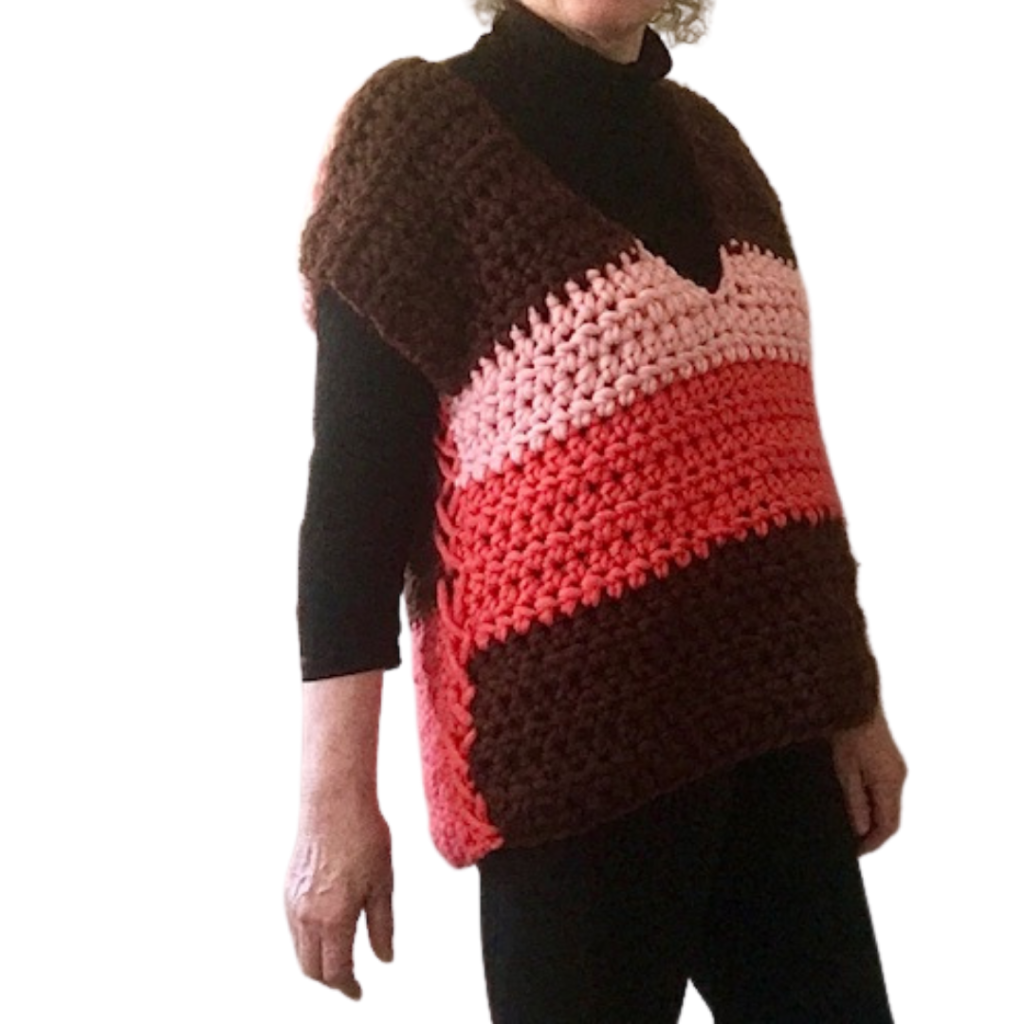
The Fabulous Sweater Vest in the pictures is made with the colours Bark, Cactus Blossom and Flamingo.
You can use any super bulky (6) yarn for this sweater vest.
You can also switch up the colours and the length of each block if you want to use up your stash.
Here are the quantities of yarn you will need to make your Fabulous Sweater Vest as seen in the photos here in the pattern. For a solid colour vest you will use less yarn.
NOTE: Tuff Puff skeins have 44 yards in each skein. The yardage may vary if you substitute other (6) super bulky yarn.
Making the colour blocks as in the pattern you will have yarn left over from some of the colours as complete skeins will not be used up. The pattern is flexible if you want to vary the colour blocks to use up yarn you have on hand.
The skeins mentioned here are for Tuff Puff Yarn from We Crochet and they are small skeins of 44 yards each.
XS and S/M sizes: 484 yards in total. 5 skeins of Colour A, 4 skeins of Colour B, 2 skeins of Colour C.
L/XL size: 528 yards in total. 5 skeins of Colour A, 4 skeins of Colour B, 3 skeins of Colour C.
2X/3X: 616 yards total. 6 skeins of Colour A, 5 skeins of Colour B, 3 skeins of Colour C.
4X/5X: 704 yards total. 6 skeins of Colour A, 6 skeins of Colour B, 4 skeins of Colour C
Hook: Size Q – 15 mm
Notions: Scissors, tapestry needle.
Gauge: 5hdc– 4 hdc rows = 4”x 4″ (10 cm) with a L hook
Abbreviations (uses US conventions)
- Ch = chain
- st = stitch
- hdc = half double crochet
- sl st = slip stitch
This pattern uses US terminology. The US and UK crochet terms are different, but they use the same terms to describe different stitches. Here is a simple conversion chart for anyone in the UK.
| US
Half Double Crochet (hdc) Single Crochet (sc)
|
UK
Half Treble crochet (htr) Double Crochet (dc)
|
Sizes: This sweater vest has been designed to be oversized.
To fit bust measurement
XS: 28”-30” [71-76cm]
Small: 32”-34″ [81-86.5 cm]
Medium: 36-38″ [91.5-96.5 cm]
Large: 40-42″ [101.5-106.5 cm]
XL: 44-46″ [112-117 cm]
2/3XL : 48-54″ [122-137 cm]
4/5 XL: 56”-62” [142-158cm]
The actual size of your panels should be approximately
| Width inches | Width cm | Length inches | Length
cm |
|
| Extra Small | 24” | 61cm | 24” | 61cm |
| Small/Medium | 26” | 66cm | 25” | 63.5cm |
| Large/XL | 28” | 71cm | 26” | 66cm |
| 2X/3 X | 30” | 76cm | 27” | 68.5cm |
| 4X/5 X | 32” | 81.5cm | 28” | 71cm |
Instructions:
This top is made with two panels which form the back and front of the garment. The front is split to create the v neck.
The Front
The front is made up of three colour blocks . I am using the colours I selected for the purposes of this pattern, but you can substitute your colours in place of my A, B, and C colours.
Colour A – Bark
Colour B – Cactus Blossom
Colour C – Flamingo
With Colour A
Chain 31, (32, 35 , 38, 40 )
Note: The ch 1 turning st does not count as a stitch.
Row 1: hdc into second chain from the hook, hdc across. Ch1 and turn. 30 (31, 34, 37, 39 )
Row 2: hdc in each st across, ch 1 and turn, 30 (31, 34, 37, 39 )
Repeat row 2 until total length measures 6” (7”, 7”, 7”, 8”), [15, (17.5, 17.5, 17.5, 20) cm]
Change to Colour B.
Repeat row 2 until total length measures 12” (13”, 14”, 14”, 15”), [30.5, (33, 36, 36, 38) cm]
Change to Colour C.
Sizes XS, S/M, L/XL, 2X/3X. Repeat row 2 until total length measures 14” (14”, 15”, 15”), [35.5, (35.5, 38, 38, ) cm]
For Size 4X/5X continue on to the V Neck section in Colour C.
V Neck
Now we will be splitting the front to work the sides of the V neck.
Row 1 of the decrease section: hdc 13, (13, 15, 16, 17), hdc 2 together (this is the decrease), Turn work. 14 (14, 16, 17, 18)st
Row 2: ch1 hdc in the next st and every stitch across. Turn work. 14 (14, 16, 17, 18)st.
Change to Colour A
Row3: ch1, hdc in next st and each st across until the last 2 st, hdc 2 together. 13 (13, 15, 16, 17)
Row 4: Ch 1, hdc across 13 (13, 15, 16, 17) stitches.
Row 5: ch1, hdc in next st and each st across until the last 2 st, hdc 2 together. 12 (12, 14, 15, 16)
Row 6: ch1 hdc in each st across, turn
Repeat Row 6 until your total length from the beginning of the work is 24”, (25”, 26”, 27”, 28”) [61, (63.5, 66, 68.5, 71) cm]
You have finished the first side of your V Neck. Fasten off and weave in ends.
Second side of the V Neck Section.
Reattach the yarn to the middle of your front.
Note: The S/M and 2X/3X/ and 4X/5X sizes will have one stitch unworked in the middle so the sides each have the same number of stitches.
Row 1 of the decrease section: ch 1, hdc 2 together, (this is the decrease), Hdc in each st to the end. Turn work. 14 (14, 16, 17, 18)st
Row 2: ch1 hdc in the next st and every stitch across. Turn work. 14 (14, 16, 17, 18)st
Change to Colour A
Row3: ch1, hdc 2 together, hdc in next st and each st across. 13 (13, 15, 16, 17)
Row 4: Ch 1, hdc across 13 (13, 15, 16, 17) stitches.
Row 5: ch1, hdc 2 together, hdc in next st and each st across, 12 (12, 14, 15, 16)
Row 6: ch1 hdc in each st across, turn
Repeat Row 6 until your total length from the beginning of the work is 24”, (25”, 26”, 27”, 28”). [61, (63.5, 66, 68.5, 71) cm]
Fasten off and weave in the ends
You have finished the second side of your V Neck.

The Back Panel.
The back of the sweater vest is made up of three colour blocks . I am using the colours I selected but you can substitute your colours in place of my A, B, and C colours.
Colour A – Bark
Colour B – Cactus Blossom
Colour C – Flamingo
With Colour B
Chain 31, (32, 35 , 38, 40 )
Note: The Ch 1 turning chain on each row does not count as a stitch.
Row 1: hdc into second chain from the hook, hdc across. Ch1 and turn. 30 (31, 34, 37, 39 )
Row 2: hdc in each st across, ch 1 and turn, 30 (31, 34, 37, 39 )
Repeat row 2 until total length measures 8” (9”, 9”, 9”, 10), [20, (22.5, 22.5, 22.5, 25.5) cm]
Change to Colour A.
Repeat row 2 until total length measures 18” (19”, 19”, 19”, 20”, [46, (48, 48, 48, 51) cm]
Change to Colour C.
Repeat row 2 until total length measures 24” (25”, 26”, 27”, 28”), [61, (63.5, 66, 68.5, 71) cm]
Fasten off and weave in the ends.
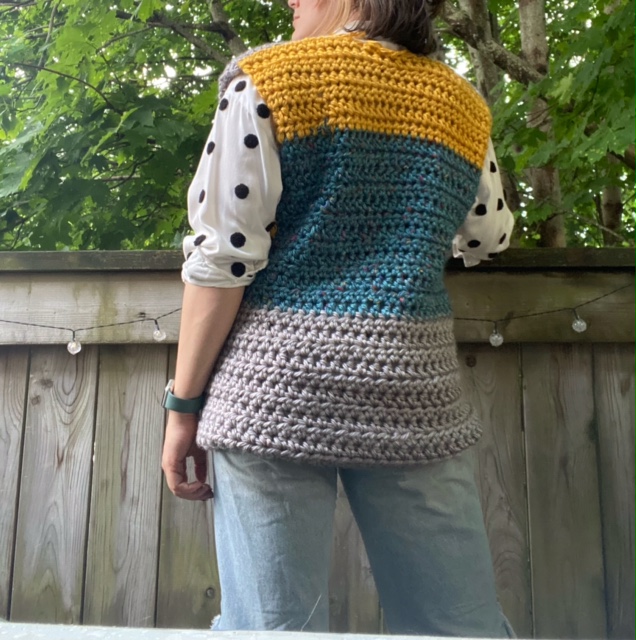
Construction.
Sewing together the front and back panels.
Shoulder Seams.
Place the back panel with the right side facing up and lay the front panel on top of it with the right side facing down. (right sides together).
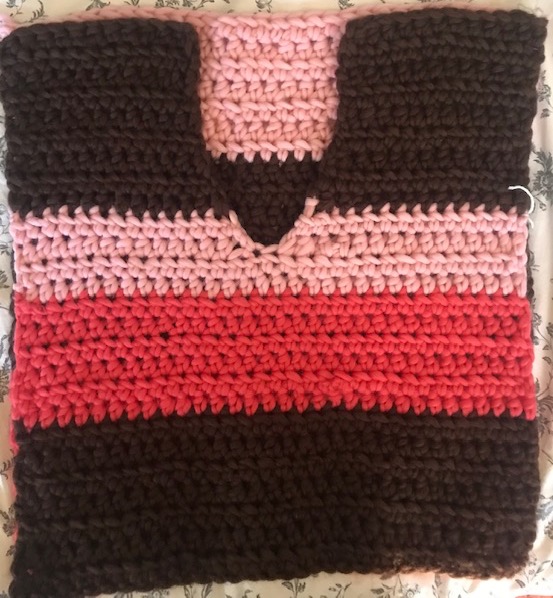
Place stitch markers or tie with yarn at the top of each side edge.
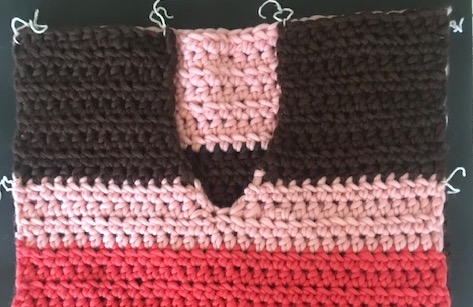
Match the front and back stitches as you work in from each side to the centre of the neck, and mark with a stitch marker or pins. Each shoulder should have the same amount of stitches.. Whip stitch the shoulders together.
Be sure to do several stitches at the end of each section to ensure it doesn’t come undone with wear.
Fasten off and weave in the ends.
Side seams.
Measure down 8” (9”, 10”, 11”, 12”) from the top on each side of the sweater vest and mark with stitch markers or a short piece of yarn. This creates the arm holes.
Note: This measurement is a guide and you can adjust it to fit you.
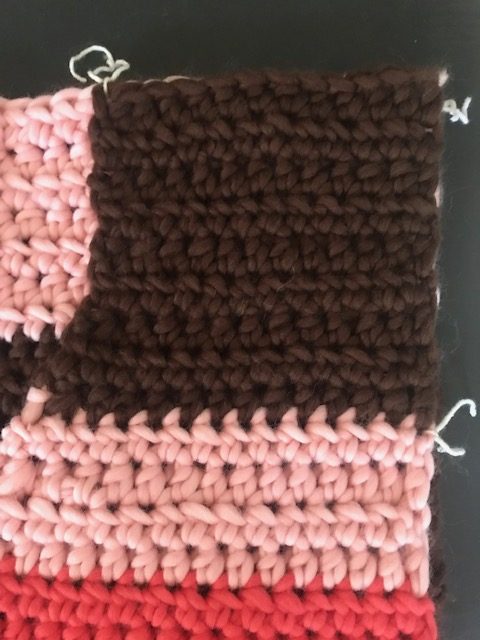
Use pins or stitch markers to join the back and front side seams as you go down from under the armhole, matching up the rows until you get to the bottom edge of the panels.
Using the whip stitch or your preferred method of sewing, start at the bottom and sew the back and the front panels together. Make sure you are matching the rows as you go. Stop when you get to the stitch marker at the bottom of the arm hole.
Finish off and weave in the ends.
Do the same on the other side of the sweater vest.
Finish off and weave in the ends.
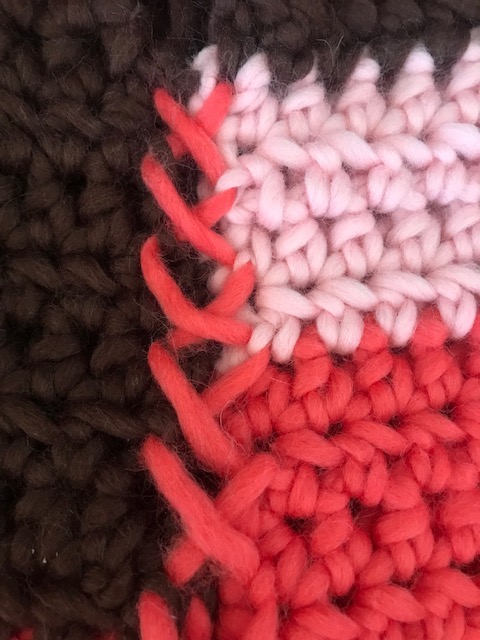
Turn it right side out.
Laced Trim. (Optional)
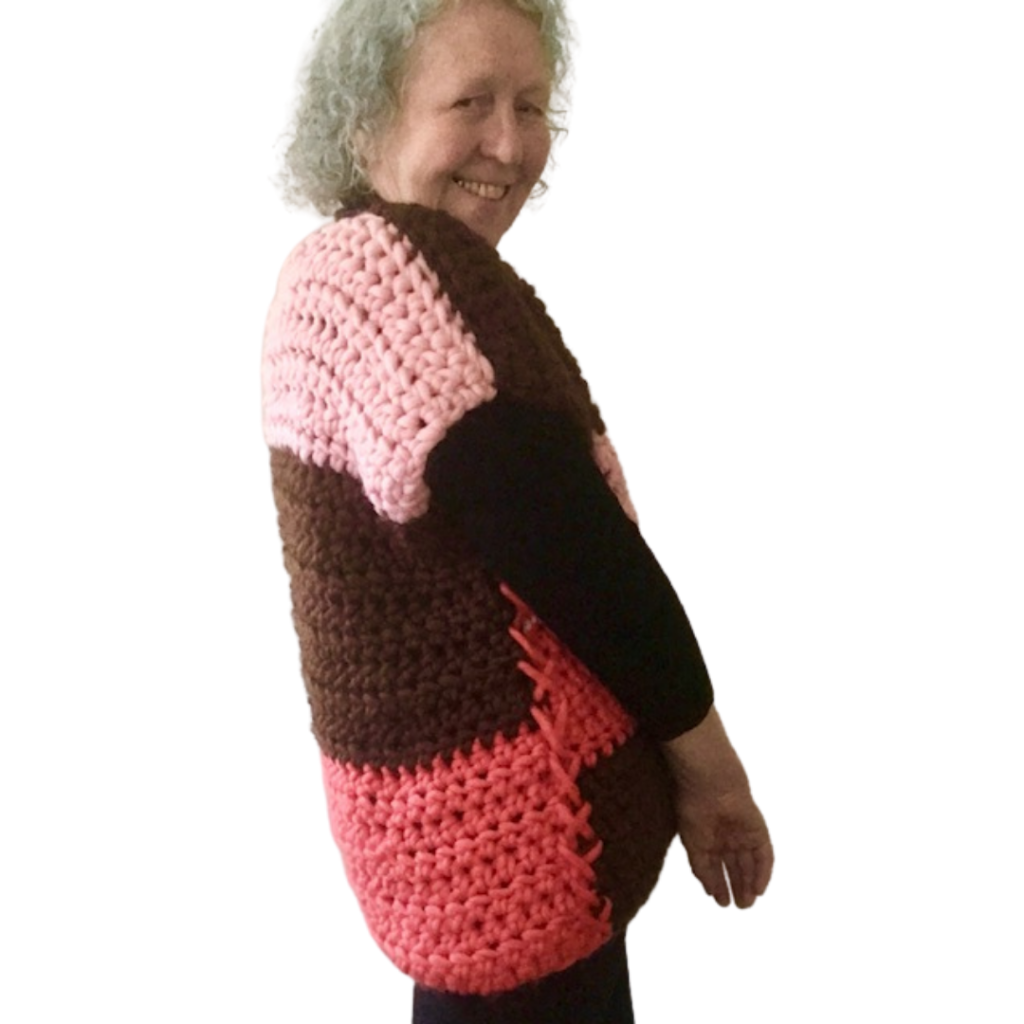
I chose to lace down each side seam for dramatic effect. Make sure that the right sides are facing out when you do ths. .
Cut two pieces of yarn 40”long, one for either side seam.
I used a needle on each end of the yarn to make threading through the sitiches easier. Insert the needle from the front and pull the yarn behind seam and out through the other side of the side seam. Make sure you have the same lenth of yarn on each side of the starting point.
Now begin to criss cross the yarn, (as if you were lacing a shoelace,) moving the yarn down either side of the sweater vest from the underarm, where the side seams begins, down to the bottom edge of the vest. Fasten with a knot and weave in the ends.
Repeat this for the other side seam..
You now have a Fabulous Chunky Sweater Vest.
If you have any questions or need help with the patterns, please email me at carrowaycrochet@outlook.com, and Iʼll be glad to help you.

Other Patterns You May Like.
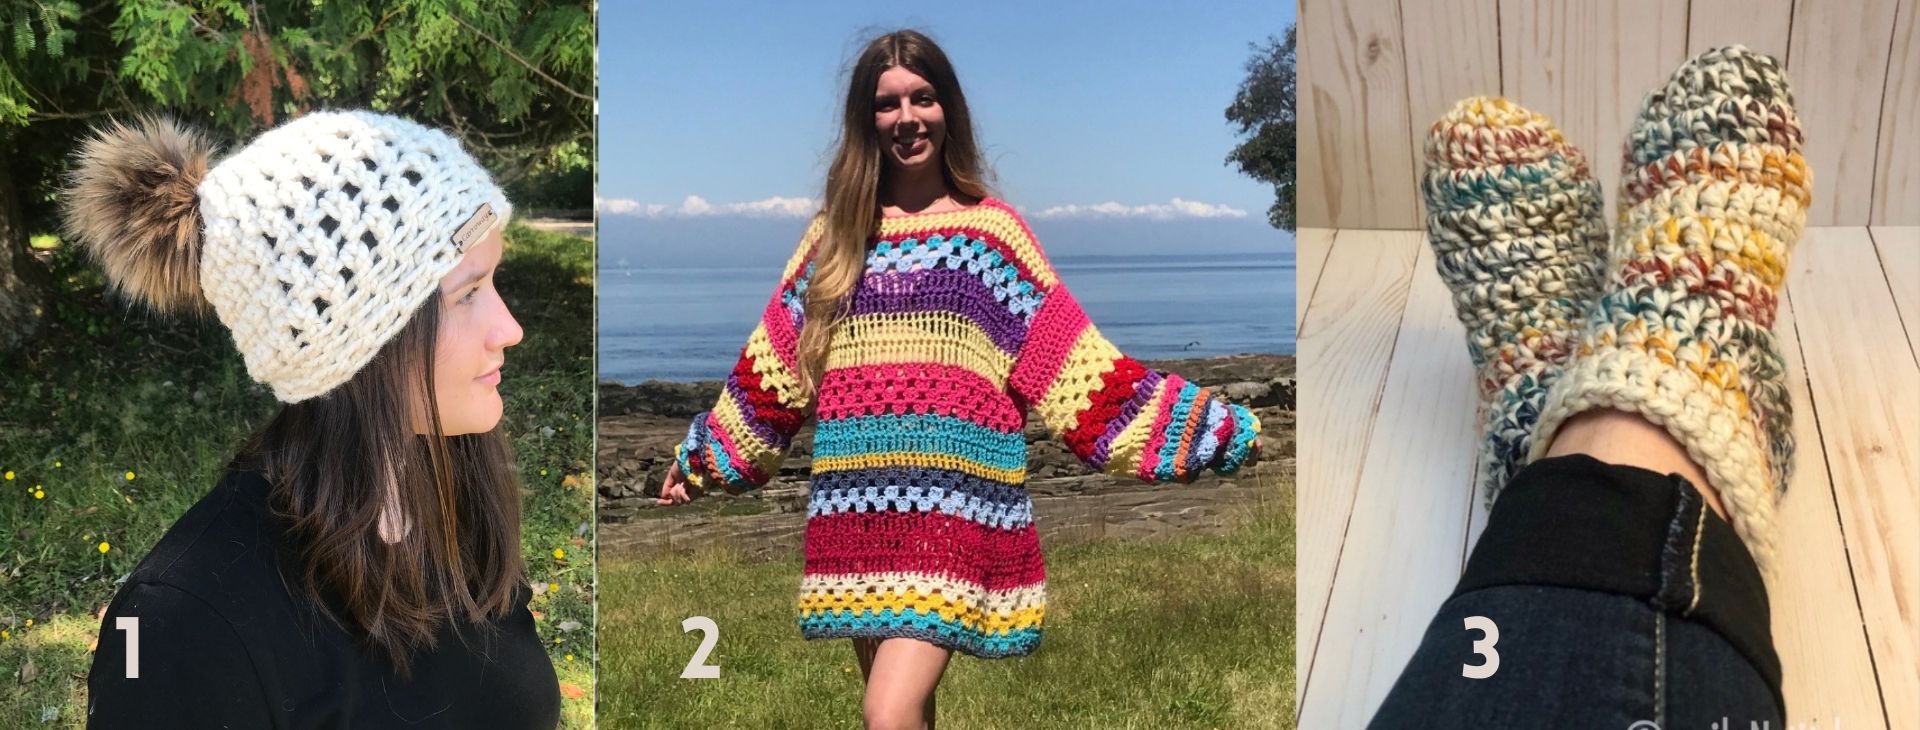
3. The Warmest Feet Ever Slipper Socks.
More Places to Find Crochet Free Patterns:
If you love crochet, you can find over a thousand free crochet patterns including some for crop tops and bralettes over at All Free Crochet
I am honoured to have my free crochet bralette pattern, the Earth Mother Bralette Pattern added to the All Free Crochet site.

Selling items made from my patterns?
You are more than welcome to se items made from my pattern. Please do share my link and tag and help promote it on social media. Thank you.
If you have any questions or need help with the patterns, please email me at carrowaycrochet@outlook.com, and Iʼll be glad to help you.
Thank you again for trying y pattern, I hope you enjoy it! Please share pictures of your completed Gloves on Instagram and Facebook. Tag them @carrowaycrochet #carrowaycrochet #shortandchunkygloves on Instagram.
Find other patterns by Carroway Crochet in my Etsy Shop and on Ravelry.
Let’s Share and Connect!
Thank you for trying my free crochet bralette pattern, I hope you enjoyed it! Please share pictures of your completed Bralettes on Instagram and Facebook. Tag them @carrowaycrochet #carrowaycrochet and #fabulousvest on Instagram.
Thank you so much for visiting me here at Carroway Crochet .
Find other patterns by Carroway Crochet in my Etsy Shop and on Ravelry.
Other places you can find me are:
This design, written work and images are a copyright of
©CarrowayCrochet and may not be copied or reproduced in any way.
You have permission to sell finished products made from this pattern, but please leave a link to my blog, www.carrowaycrochet.com in your product listing specifying that I am the designer of this pattern.
Thank you.





One thought on “Chunky Sweater Vest: Free Crochet Pattern”
Comments are closed.