Gothic Bralette Goth Style Bralette Free Crochet Pattern

The Gothic Bralette Top: A Free Crochet Bralette Pattern for You.
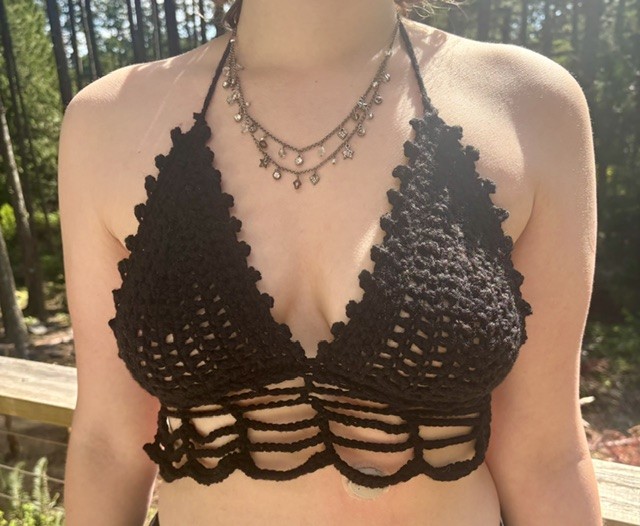
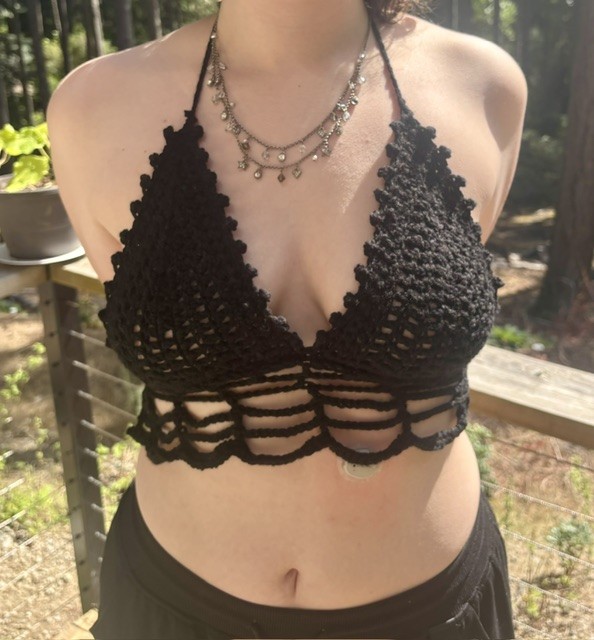
Looking for a quirky free crochet bralette pattern. You need look no further. The Gothic Bralette Top is perfect for those looking for something different. It is great for laying in the sun or going about your day. This is such an easy Free Crochet Bralette Pattern.
This post contains affiliate links that support the content on carrowaycrochet.com. All opinions are my own. By clicking on the links below I may earn a commission at no cost you yourself.
Keep on scrolling to get to the Free Crochet Bralette Pattern.
Are You A Visual Learner.
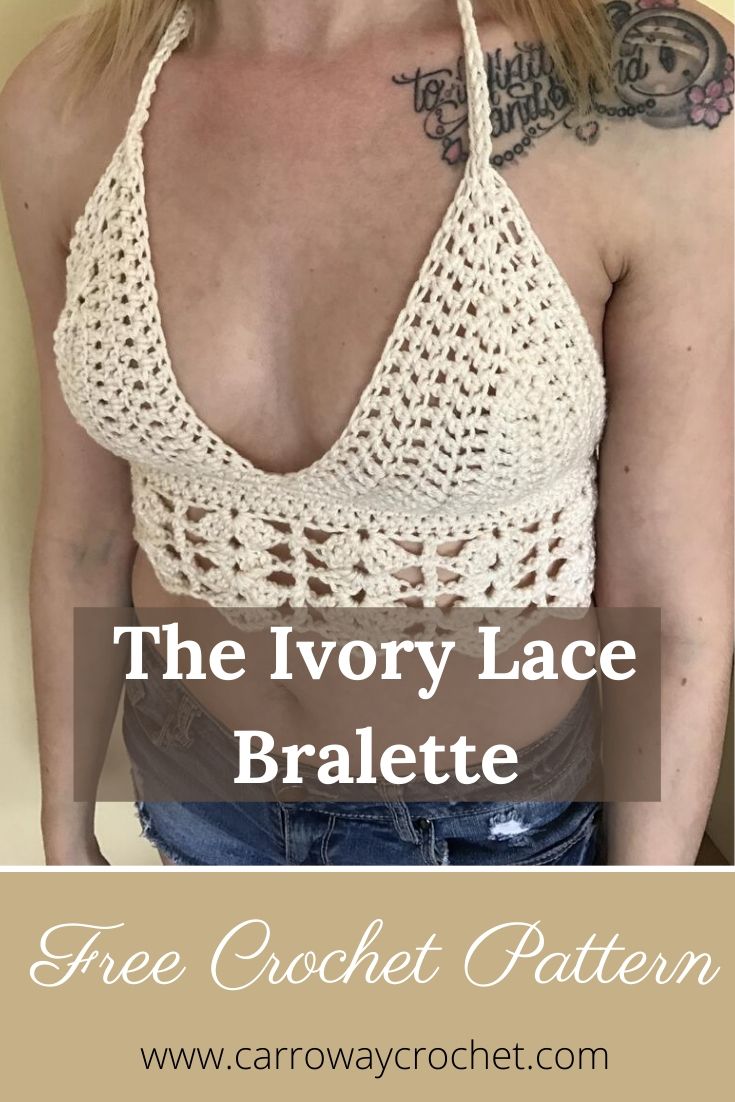
Here are the video tutorials for a different bralette you might enjoy, the Ivory Lace Bralette.
These videos are easy to follow step by step tutorials fo help you make your beautiful bralette.
This is the right handed tutorial
Here is the left Handed Tutorial for you
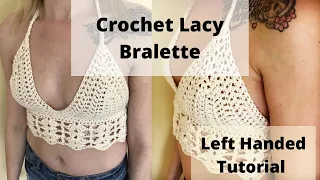
If you love bralettes you might also enjoy my Earth Mother Bralette Tutorial on my YouTube Channel.
Here is the right handed version.
And here is the Left Handed Version
Sign up for my Newsletter
Get the latest info on free patterns and fun blog hops.
Join Me on Facebook.
Follow me on Facebook for lots of great crochet news and all the latest videos and free patterns coming from Carroway Crochet.
If you would love to join us and share your projects and get all the updates on free patterns etc just click on the image below to join my Carroway Crochet Community on Facebook.

Description of the Gothic Bralette pattern.
I’m just so happy to share the Gothic Pattern by Carroway Crochet.
This Free Crochet Bralette Pattern makes the perfect top for those looking for a quirky or gothic vibe You could also pair it with my Bella B Crochet Shorts which are also a free pattern here on my blog.
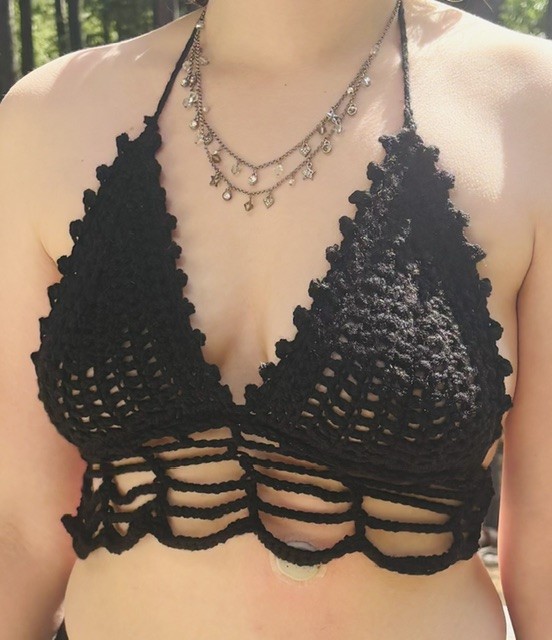
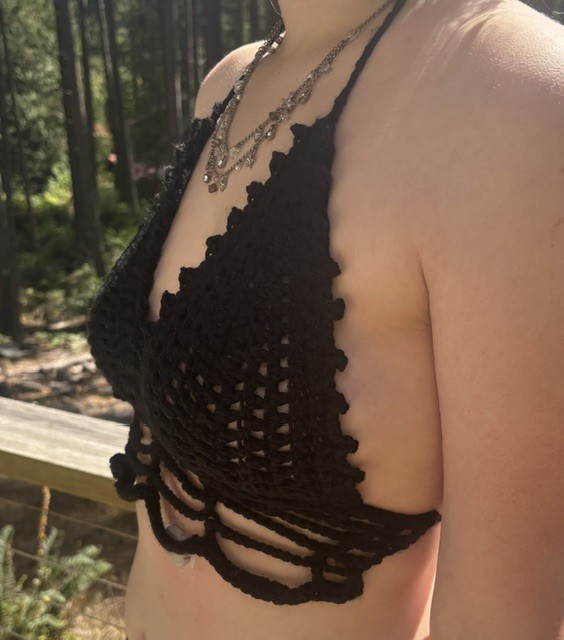
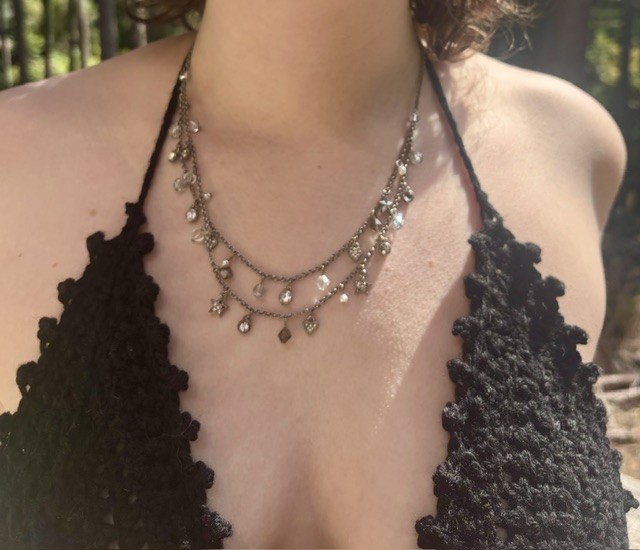
This bralette style top has an goth vibe when made with black yarn and the bodice has a lacy spider wev effect. You can make it as short or as long as you like.
The pattern is written for Extra Small, Small, Medium, Large and Extra Large. The cups use mostly double crochet stitches, while some sizes need a row of half double crochet to get the sizes to fit.
The Gothic Bralette is so on trend right now, especially with the fun picot trim around the cups. You can make it with your choice of worsted weight yarn, either acrylic or cotton, just look for the number (4) on the yarn label.
I have also made it wth a ruby red picot trim and it looks great.
It is an advanced beginner friendly crochet pattern, with easy to follow instructions. It is in US terms.
You are more than welcome to sell items made from my pattern. Please do share my link and tag and help promote it on social media. Thank you.
Pin This For Later

The Gothic Bralette Top
Pattern by Pam Carr ©2026
Introducing the “Gothic Bralette Top” Pattern by Carroway Crochet. This gothic inspired bralette crop top is perfect for summer days on the beach and for cool festival experiences. Feel the gothic vibe as you wear your spidery webbed lace bralette.
This bralette style top has a spider web inspired pattern on the bodice. You can make it as long as you like according to your style preference.
The Gothic Bralette Top is so on trend right now. You can make it with your choice of worsted weight yarn, either acrylic or cotton, just look for the number (4) on the yarn label.
The pattern is written for Extra Small, Small, Medium, Large and Extra Large. It is an advanced beginner to intermediate crochet pattern, with easy to follow instructions. It is in US terms.
The Gothic Bralette Top
Supplies you will need:
Yarn: Any worsted weight (4) yarn. I have used acrylic yarn for the one in the pictures shown here.
Hook: Size H/8, 5mm
Notions: Scissors , tapestry needle.
Gauge: 13 sc – 14 rows = 4” (10 cm)
You are more than welcome to sell items made from my pattern. Please do share my link and tag and help promote it on social media. Thank you.
Abbreviations (uses US conventions)
-
Ch = chain
-
st = stitch
-
sc = single crochet
-
hdc = half double crochet
-
dc = Double crochet
-
Sk = skip
-
Sl st= slip stitch
This pattern uses US terminology. The US and UK crochet terms are different, but they use the same terms to describe different stitches. Here is a simple conversion chart for anyone in the UK.
USDouble crochet (dc)Half Double Crochet (hdc)Single Crochet (sc) |
UKTreble (tr)Half Treble (htr)Double crochet (dc) |
Sizes: Extra Small, Small, Medium, Large, Extra Large
Instructions:
Cups, make two.
I have included the pattern for each of the different sizes mentioned above.
Ch 2 at start of each row does not count as a stitch.
Colours:
I used black for this Gothic Style Bralette
You can choose any colour you like to make your Gothic top.
Extra Small Cup: Make two.
Fits: 32A, 34A, 32B
Finished cup should measure 5″- 5.5” approx.
Ch 9
Row 1: Dc into 3rd ch from the hook and into the next 5 chain stitches, (2 dc, ch1, 2dc) into the last chain, dc down other side of the chain. (8 st each side of the ch1 space)
Row 2: Ch2 and turn, dc into next 8 st, (2dc, ch1, 2dc) into ch1 sp, dc 8 down other side. (10 stitches each side of the ch1 space)
Row 3: ch2, turn, dc into next 10 st, (2dc, ch1, 2dc) into ch1 sp, dc 10 down other side. (12 stitches each side of the ch1 space)
Row 4: ch2, turn, hdc into next 12 st, (2hdc, ch1, 2hdc) into ch1 sp, hdc 12 down other side. (14 stitches each side of the ch1 space)
Row 5: ch2, turn, hdc into next 14 st, (2hdc, ch1, 2hdc) into ch1 sp, hdc 14 down other side. (16 stitches each side of the ch1 space)
Row 6: ch2, turn, sc into next 16 st, (2sc, ch1, 2sc) into ch1 sp, sc 16 down other side. (18 stitches each side of the ch1 space)
Trim row: ch1, turn, sc up one side, sc into top ch1 sp, sc down other side, 3sc into corner, turn and sc across the bottom of the cup.
(TIP: put one sc into the end of each sc and hdc row and two sc into each dc row end) sc 3 into last sc row end, sl st to ch1 at corner.)
Finish off, and weave in ends.
For Small Cup: Make two.
Fits: 36A, 34B, 36B, 32C, 34C, 32D
Finished cup should measure 6″- 6.5” approx.
Ch 11
Row 1: dc into 3rd ch from the hook and into the next 7 chain stitches, (2 dc, ch1, 2dc) into the last chain, dc 8 stitches down the other side of the chain. (10 st each side of the ch1 space)
Row 2: ch2 and turn, dc into next 10 st, (2dc, ch1, 2dc) into ch1 sp, dc 10 down other side. (12 stitches each side of the ch1 space)
Row 3: ch2, turn, dc into next 12 st, (2dc, ch1, 2dc) into ch1 sp, dc 12 down other side. (14 stitches each side of the ch1 space)
Row 4: ch2, turn, dc into next 14 st, (2dc, ch1, 2dc) into ch1 sp, dc 14 down other side. (16 stitches each side of the ch1 space)
Row 5: ch1, turn, hdc into next 16 st, (2hdc, ch1, 2hdc) into ch1 sp, hdc 16 down other side. (18 stitches each side of the ch1 space)
Row 6: ch1, turn, sc into next 18 st, (2sc, ch1, 2sc) into ch1 sp, sc 18 down other side. (20 stitches each side of the ch1 space)
Trim row: ch1, turn, sc up one side, sc into top ch1 sp, sc down other side, 3sc into corner, turn and sc across the bottom of the cup.
(TIP: put one sc into each sc or hdc row end and two sc into each dc row end) sc 3 into last hdc, sl st to ch1 at corner.)st to ch1 at corner.
Finish off, and weave in ends.
For Medium Cups: Make two.
Fits: 34C, 32D, 34D, 36D, 32DD
Finished cup should measure 7″- 7 ½” approx.
Ch 13
Row 1: dc into 3rd ch from the hook and next 9 chain stitches, (2 dc, ch1, 2dc) into the last chain. Then dc 10 stitches down the other side of the chain. (12 st each side of the ch1 space)
Row 2: ch2 and turn, dc 12 st, (2dc, ch1, 2dc) into ch1 sp, dc 12 down other side, (14 stitches each side of the ch1 space)
Row 3: ch2, turn, dc into next 14 st, (2dc, ch1, 2dc) into ch1 sp, dc 14 down other side (16 stitches each side of the ch1 space)
Row 4: ch2, turn, dc into next 16 st, (2dc, ch1, 2dc) into ch1 sp, dc 16 down other side (18 stitches each side of the ch1 space)
Row 5: ch2, turn, dc into next 18 st, (2dc, ch1, 2dc) into ch1 sp, dc 18 down other side (20 stitches each side of the ch1 space)
Row 6: ch2, turn, dc into next 20 st, (2dc, ch1, 2dc) into ch1 sp, dc 20 down other side (22 stitches each side of the ch1 space)
Trim row: ch1, turn, sc up one side, sc into top ch1 sp, sc down other side, 3sc into corner, turn and sc across the bottom of the cup.
(TIP: put two sc into each dc row end) sc 3 into last hdc, sl st to ch1 at corner.)
Finish off, and weave in ends.
For Large Cups, Make two.
Fit: 36C, 32D, 34D, 36D, 32DD, 38C
Finished cup should measure 8” – 8.5”
Ch 15
Row 1: dc into 3rd st from the hook and next 11st, (2 dc, ch1, 2dc) into the last chain, dc 12 down other side. (14 st each side of the ch1 space.)
Row 2: Ch2 and turn, dc 14 st, (2dc, ch1, 2dc) into ch1 sp, dc 14 down other side, (16 stitches each side of the ch1 space)
Row 3: ch2, turn, dc into next 16 st, (2dc, ch1, 2dc) into ch1 sp, dc 16 down other side (18 stitches each side of the ch1 space)
Row 4: ch2, turn, dc into next 18 st, (2dc, ch1, 2dc) into ch1 sp, dc 18 down other side (20 stitches each side of the ch1 space)
Row 5: ch2, turn, dc into next 20 st, (2dc, ch1, 2dc) into ch1 sp, dc 20 down other side (22 stitches each side of the ch1 space)
Row 6: ch2, turn, dc into next 22 st, (2dc, ch1, 2dc) into ch1 sp, dc 22 down other side (24 stitches each side of the ch1 space)
Row 7: ch2, turn, dc into next 24 st, (2dc, ch1, 2dc) into ch1 sp, dc 24 down other side (26 stitches each side of the ch1 space)
Trim row: ch1, turn, sc up one side, sc into top ch1 sp, sc down other side, 3sc into corner, turn and sc across the bottom of the cup.
(TIP: put two sc into each dc row end) sc 3 into last dc, sl st to ch1 at corner.)
Finish off, and weave in ends.
For Extra Large Cups, Make two.
Fit: 36D, 38C or larger
Finished cup should measure 9” – 9.5” approx.
Ch 17
Row 1: dc into 3rd st from the hook and next 13st, (2 dc, ch1, 2dc) into the last chain, dc 14 down other side of the chain. (16 stitches each side of the ch1 space)
Row 2: ch2 and turn, dc 16 st, (2dc, ch1, 2dc) into ch1 sp, dc 16 down other side. (18 stitches each side of the ch1 space)
Row 3: ch2, turn, dc into next 18 st, (2dc, ch1, 2dc) into ch1 sp, dc 18 down other side. (20 stitches each side of the ch1 space)
Row 4: ch2, turn, dc into next 20 st, (2dc, ch1, 2dc) into ch1 sp, dc 20 down other side. (22 stitches each side of the ch1 space)
Row 5: ch2, turn, dc into next 22 st, (2dc, ch1, 2dc) into ch1 sp, dc 22 down other side. (24 stitches each side of the ch1 space)
Row 6: ch2, turn, dc into next 24 st, (2dc, ch1, 2dc) into ch1 sp, dc 24 down other side. (26 stitches each side of the ch1 space)
Row 7: ch2, turn, dc into next 26 st, (2dc, ch1, 2dc) into ch1 sp, dc 26 down other side. (28 stitches each side of the ch1 space)
Repeat extra rounds if necessary to make the cup larger.
Trim row: ch1, turn, sc up one side, sc into top ch1 sp, sc down other side, 3sc into corner, turn and sc across the bottom of the cup.
(TIP: put two sc into each dc row end) sc 3 into last hdc, sl st to ch1 at corner.)
Finish off and weave in ends.
Bodice:
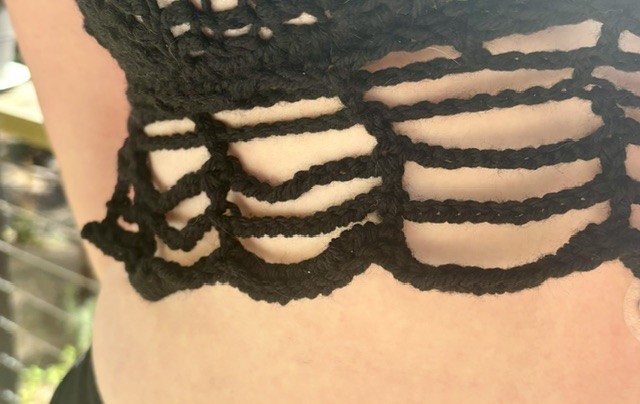
The bodice is the section that goes below the bralette and has the back straps attached to it.
This can be customized to fit your body.
I have listed the various sizes and how many chains are recommended for each size. You can, however, make a chain long enough to go from one side of your rib cage to the other. For a medium I suggest you ch 64 plus 1. You can make it smaller or larger, but make sure it is in multiples of 8 plus 1 so the pattern works.
I have written the bodice pattern for sizes, XS, S, M, L, XL
Recommended starting chains for the above sizes:
Extra Small: Waist size 25.”
Ch48+1 (this makes a 16.5”crocheted bodice) approx.
Small: Waist size 28.”
Ch 56+1 (this makes a 18.5” crocheted bodice) approx.
Medium: Waist size 30.”
Ch 64+1 (this makes a 19.5” bodice) approx.
Large: Waist size 34.”
Ch 72+1 (this makes a 22” bodice) approx.
Extra Large: Waist 37.”
Ch 80+1 (this makes a 24.5” bodice) approx.
Instructions for the bodice:
Chain the required amount from the sizing information above and follow this pattern. It is the same for all sizes.
Row 1: SC into the 2nd chain from the hook. SC all the way across to the end and turn.
Row 2: Ch 5, sk3 the first 3 single crochet stitches, DC into the next st, * ch3, sk3 st, DC into next st*, repeat from * to * across to the end.
Row 3: Ch 5, sk3 st, dc into the top of the previous dc, *ch7, sk7, dc into the top of the previous dc st*, repeat from * to * across to the end, ch3, sk3, dc into the top of the ch2. .
Row 4: Ch 5, sk3 st, dc into the top of the previous dc, *ch11, sk7, dc into the top of the previous dc st*, repeat from * to * across to the end, ch3, sk3, dc into the 2nd ch of the previous turning chain.
Row 5: Ch 5, sk3 st, dc into the top of the previous dc, *ch11, dc into the top of the previous dc st*, repeat from * to * across to the end, ch3, sk3, dc into the last st.
Row 6: Ch 5, sk3 st, dc into the top of the previous dc, *ch11, dc into the top of the previous dc st*, repeat from * to * across to the end, ch3, sk3, dc into the last st.
Row 7: Ch 2, make 3sc into the ch3 sp, sc into the top of the previous dc, *sc11into the ch11 sp, sc into the top of the previous dc st*, and repeat from * to * across to the end, make 3sc into the ch3 sp, sc into the top of the turning ch.
Fasten off and weave in the ends.
Joining the cups to the bodice.
Fold the bodice in half to locate the centre and mark it with a stitch marker or a piece of contrasting yarn.
Place the cups, right sides facing down over the bodice and pin in place.
Check the sides of the cups to see that they match, with even sides of the bodice at each end.
You can attach the cups by whip stitching them onto the bodice. Remember to use a matching yarn for the whip stitching.
You can also sc or sl st them onto the bodice if you choose to.
Fasten off and weave in the ends.
Now you are ready to add the picot trim to the cups.
Picot trim for around the cups.
Join the black or contrasting yarn to bottom edge where the cup meets the bodice.
Sl st into next 2 stitches, ch3, sl st into 1st ch, creating a tiny loop, (this is the picot), *sl st into next 2 st, ch3, sl st into 1st ch, * repeat from * to * until the top of the cup, sl st over the two stitches in the top of the cup, ignoring the ch 1 sp, *sl st into next 2 st, ch3, sl st into 1st ch, * repeat from * to * until last 2 st. sl st into these 2 st.
You are now at the V where the cups meet.
Move across to the second cup and repeat this pattern.
Fasten off and weave in the ends.
Back straps:
Join the black or a contrast colour yarn to the side of the bodice and chain 80 for a 25” tie. You can sc back down the chain if you want a thicker tie.
Do the same for the other side.
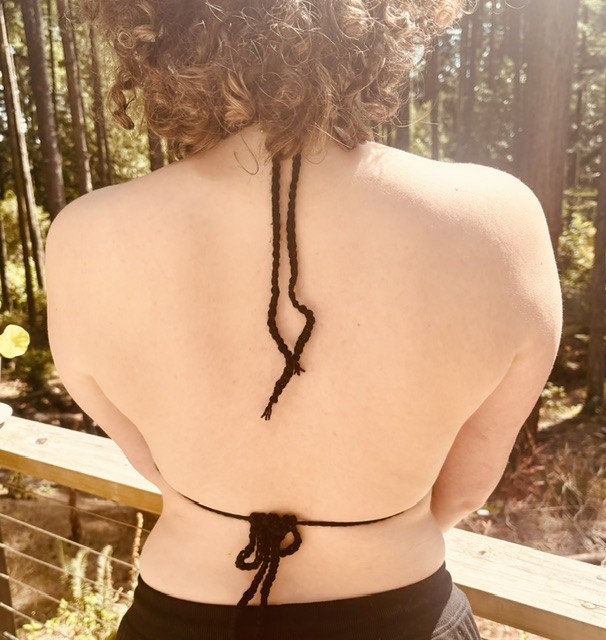
Halter Straps/Ties:
Join the black or a contrast colour yarn to the top of the cup. Chain 60 for a 20” tie. You can sc back down the chain if you want a thicker tie. I tie a knot at the end to make it look pretty.
Do the same to the other cup.
Fasten off and weave in the ends.
You now have a Gothic Bralette Top!
It is so exciting to make an amazing one-of-a-kind item to wear or give to a friend.
If you have any questions or need help with the patterns, please email me at carrowaycrochet@outlook.com, and Iʼll be glad to help you.
OTHER FREE CROCHET PATTERNS YOU MIGHT LOVE!
More Places to Find Crochet Bralette Patterns:
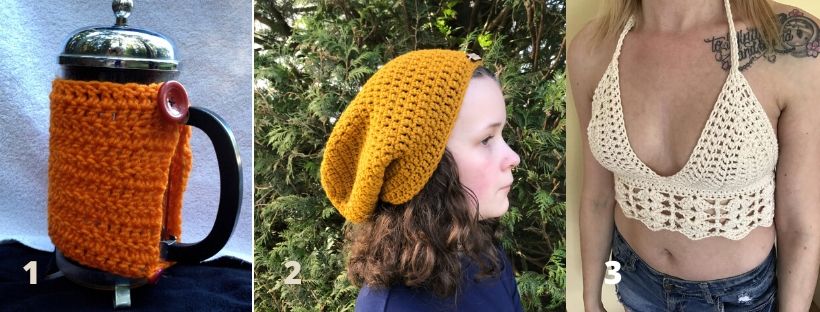
If you love crochet, you can find over a thousand free crochet patterns including some for crop tops and bralettes over at All Free Crochet
I am honoured to have had my free crochet bralette pattern, the Earth Mother Bralette Pattern recently added to the All Free Crochet site.

It is a great resource for crochet lovers and I am proud to also have my Take Me Outside Infinity Scarf Pattern posted over on the All Free Crochet Site.

Let’s Share and Connect!
Thank you for trying my free crochet bralette pattern, I hope you enjoyed it! Please share pictures of your completed Bralettes on Instagram and Facebook. Tag them @carrowaycrochet #carrowaycrochet and #ivorylacebralette on Instagram.
Thank you so much for visiting me here at Carroway Crochet .
Find other patterns by Carroway Crochet in my Etsy Shop and on Ravelry.
Other places you can find me are:
Ravelry
This design, written work and images are a copyright of
©CarrowayCrochet and may not be copied or reproduced in any way.
You have permission to sell finished products made from this pattern, but please leave a link to my blog, www.carrowaycrochet.com in your product listing specifying that I am the designer of this pattern.
Please follow and like us: