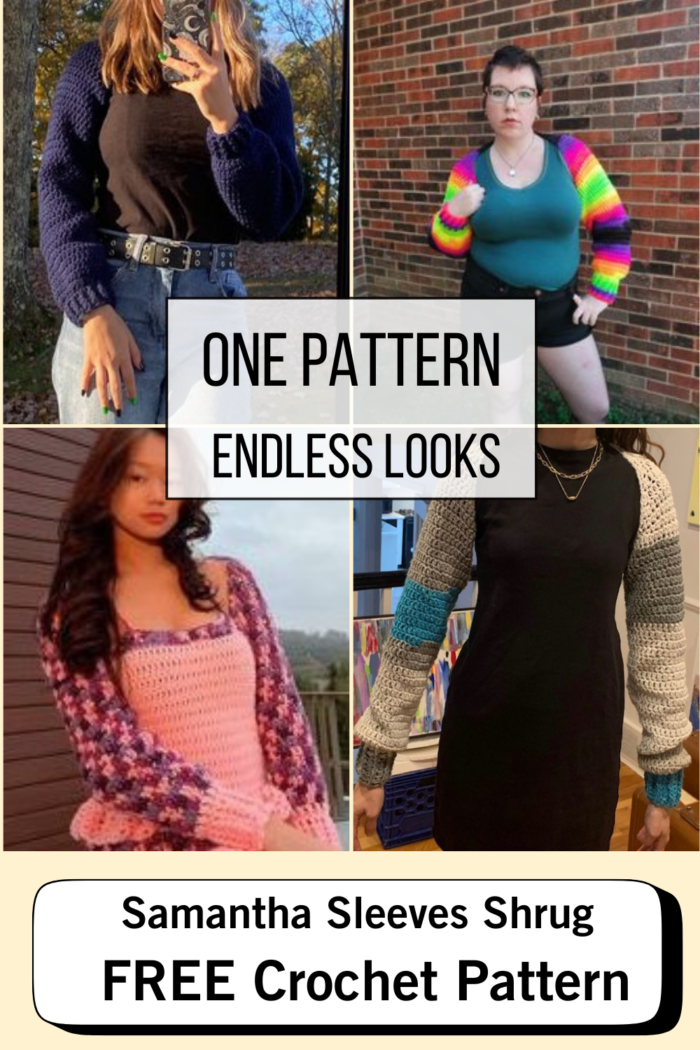
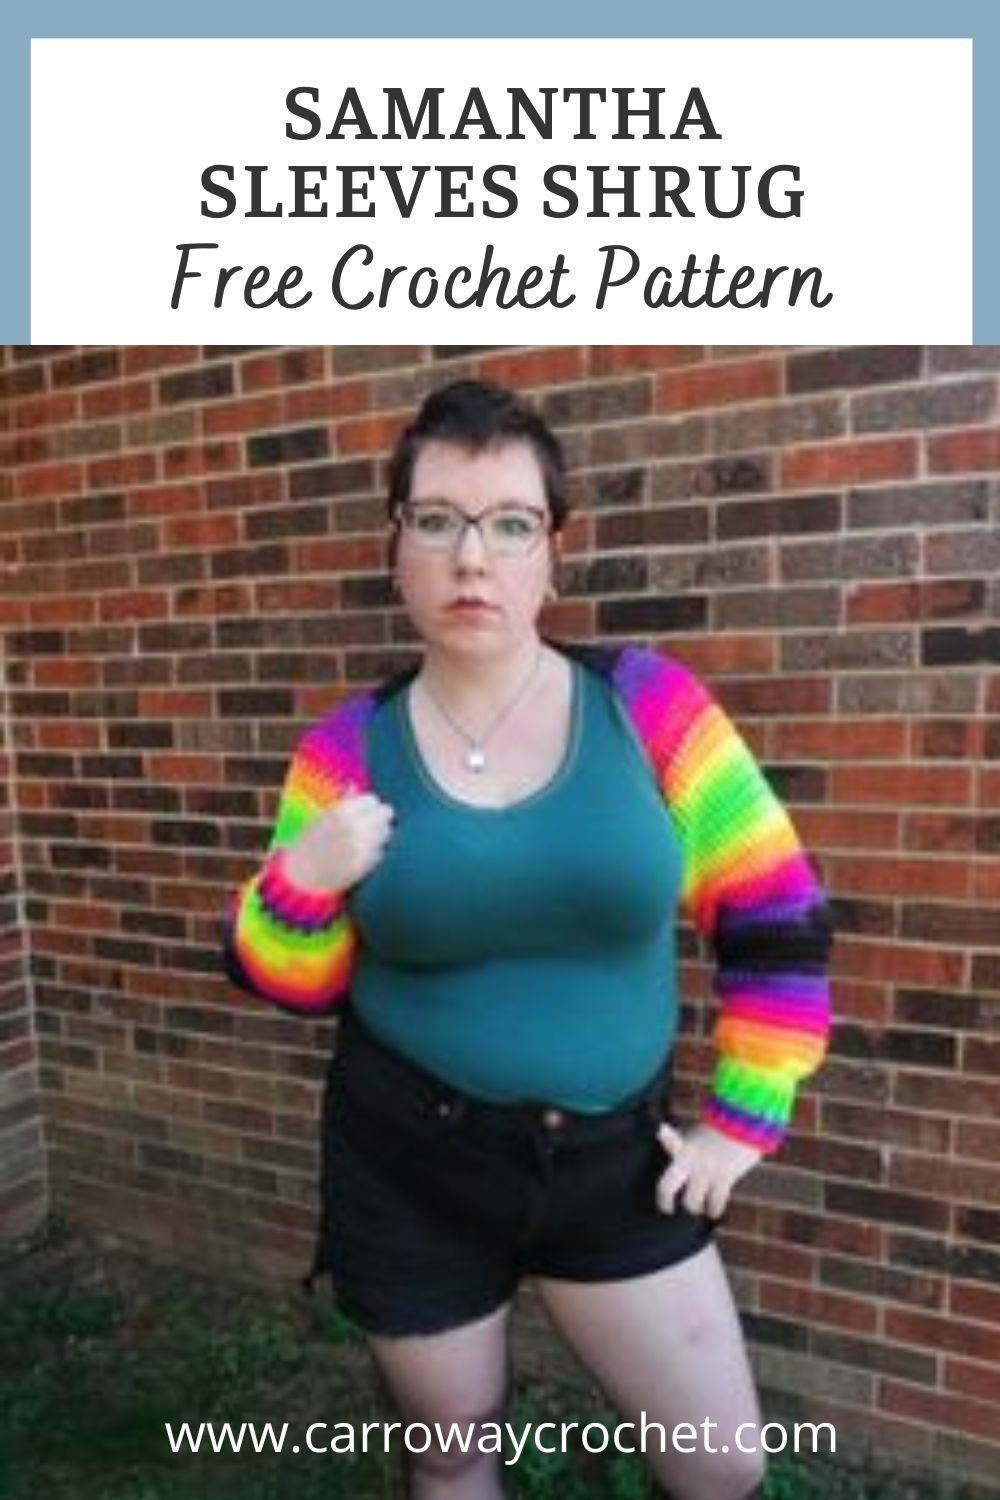
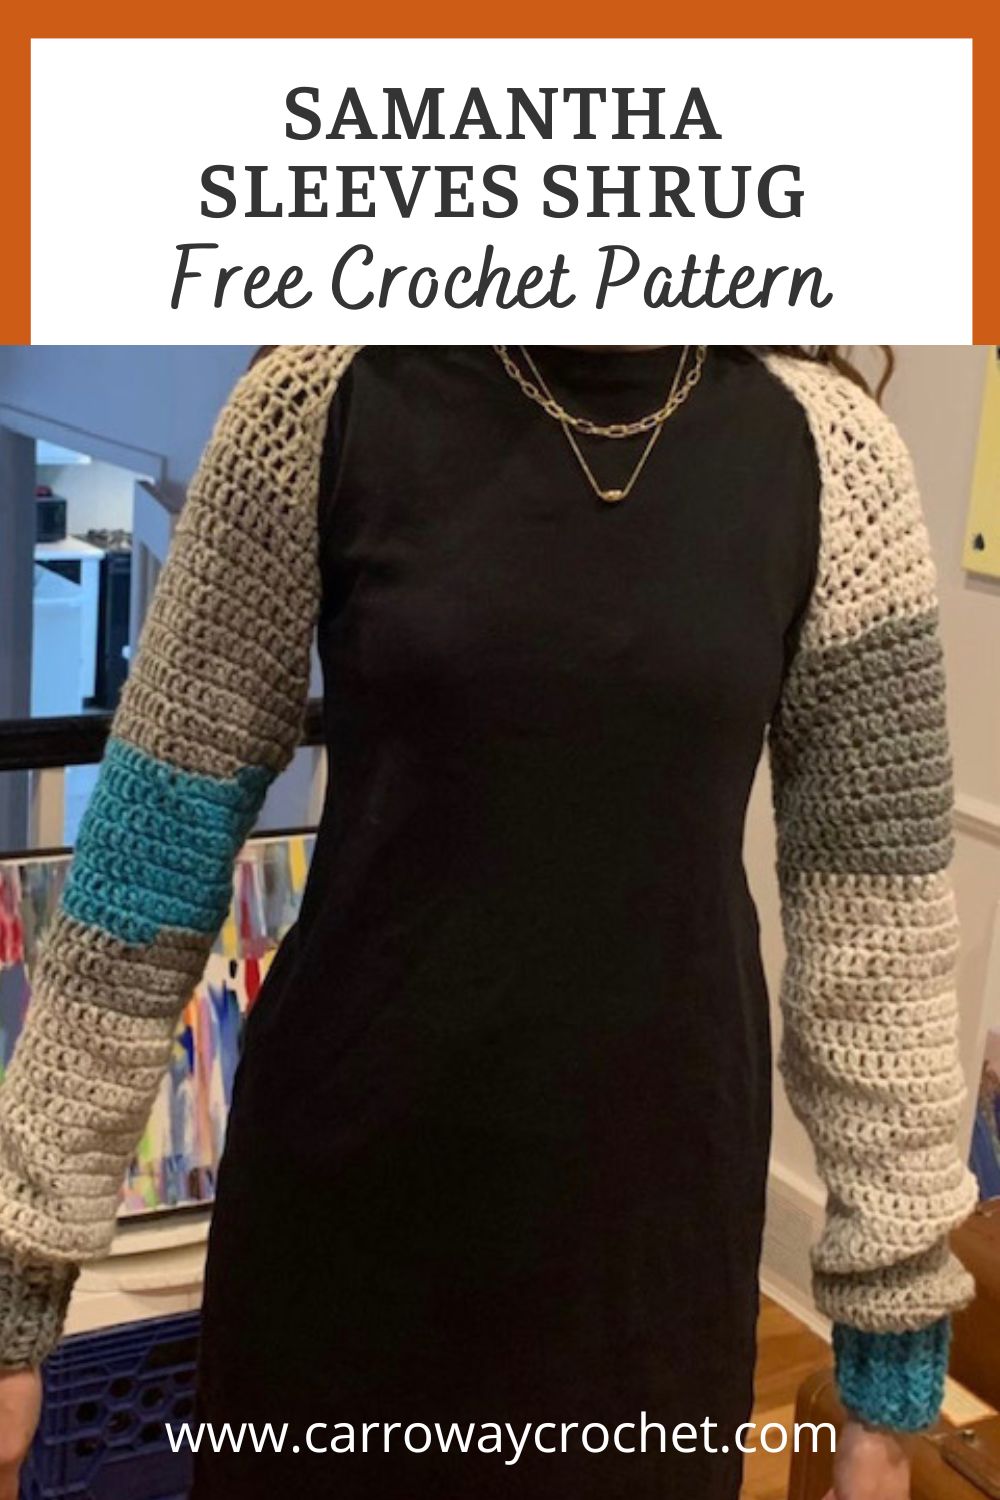
Samantha Sleeves Shrug: Free Crochet Pattern

Samantha Sleeves Shrug.
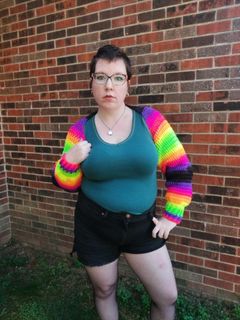
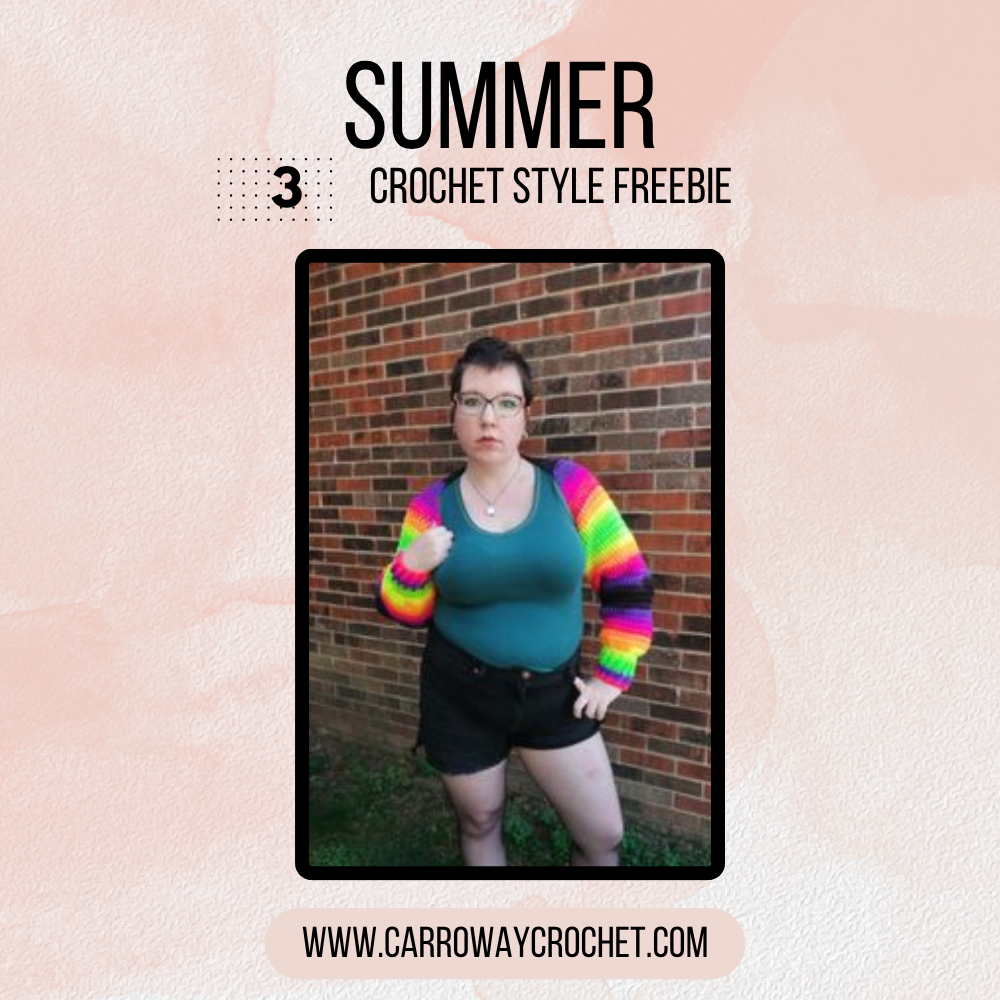
Here is another fun and oh so useful pattern for you. Meet the Samantha Sleeves Shrug, designed to look cool but also keep your arms warm. Pick the perfect colours for your personal style and vibe and make yourself this fashion forward Sleeves Shrug, You will feel great as you wear something you have created and it is guaranteed get you noticed the minute you put it on. AND it is beginner friendly too.
I am so excited to bring you the Samantha Sleeves Shrug Free Crochet Pattern.
The Samantha Sleeves Shrug Free Crochet Pattern is beginner friendly and has easy to follow construction instructions
You can make your Samantha Sleeves Shrug with any worsted weight (4) or Aran yarn and you can customize how long your sleeves are. It is easy to customize and all the tips for that are in the pattern.
**This post contains affiliate links. If you make a purchase using some of my links I may receive a small commission at no extra cost to you.**

About the Samantha Sleeves Shrug Free Crochet Pattern.
Have you been looking for something a little different. Something that expresses your personality and adds some style to your wardrobe. If so, the Samantha Sleeves Free Crochet Pattern is for you.
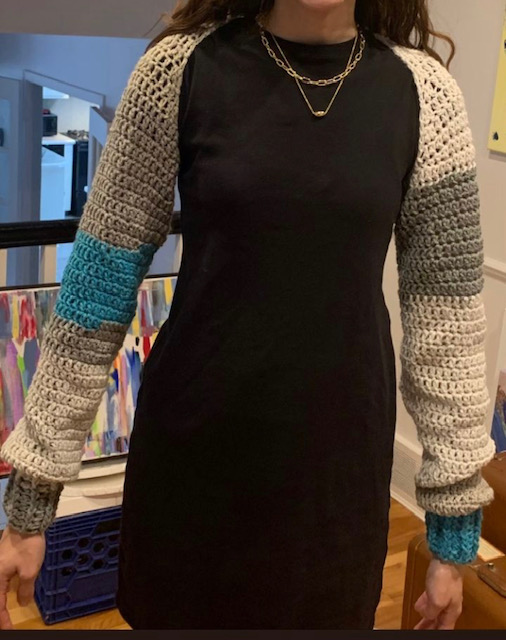
It is a beginner friendly pattern and has ribbed cuffs. The panels and sleeves are made from the centre back out to the sleeves.
Don’t Forget to Pin This For Later.


The Samantha Sleeves Shrug Free Crochet Pattern Comes in All The Sizes.
The other great thing about the Samantha Sleeves Shrug pattern is it is for sizes, XS/S, Med, Large, XL, 2XL, 3/4X and 5X. So no one is left out.
There are also tips on how you can make your sleeves as long or as short as you want. Lots of room to make it fit the way you want it too.
If you prefer to have the pattern in front of you instead of on the screen you can get the ad free pdf .
Get the Pattern on Etsy.

Purchase the Samantha Sleeves Shrug Pattern on Ravelry.

Don’t Forget to Pin This for Later
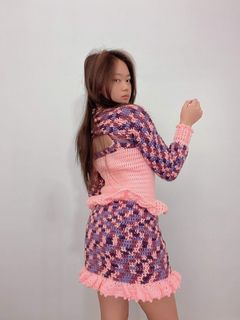
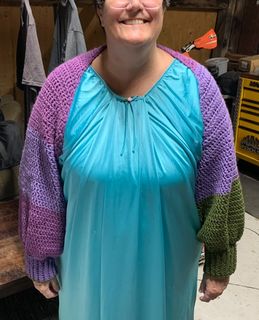
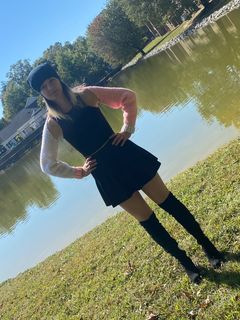
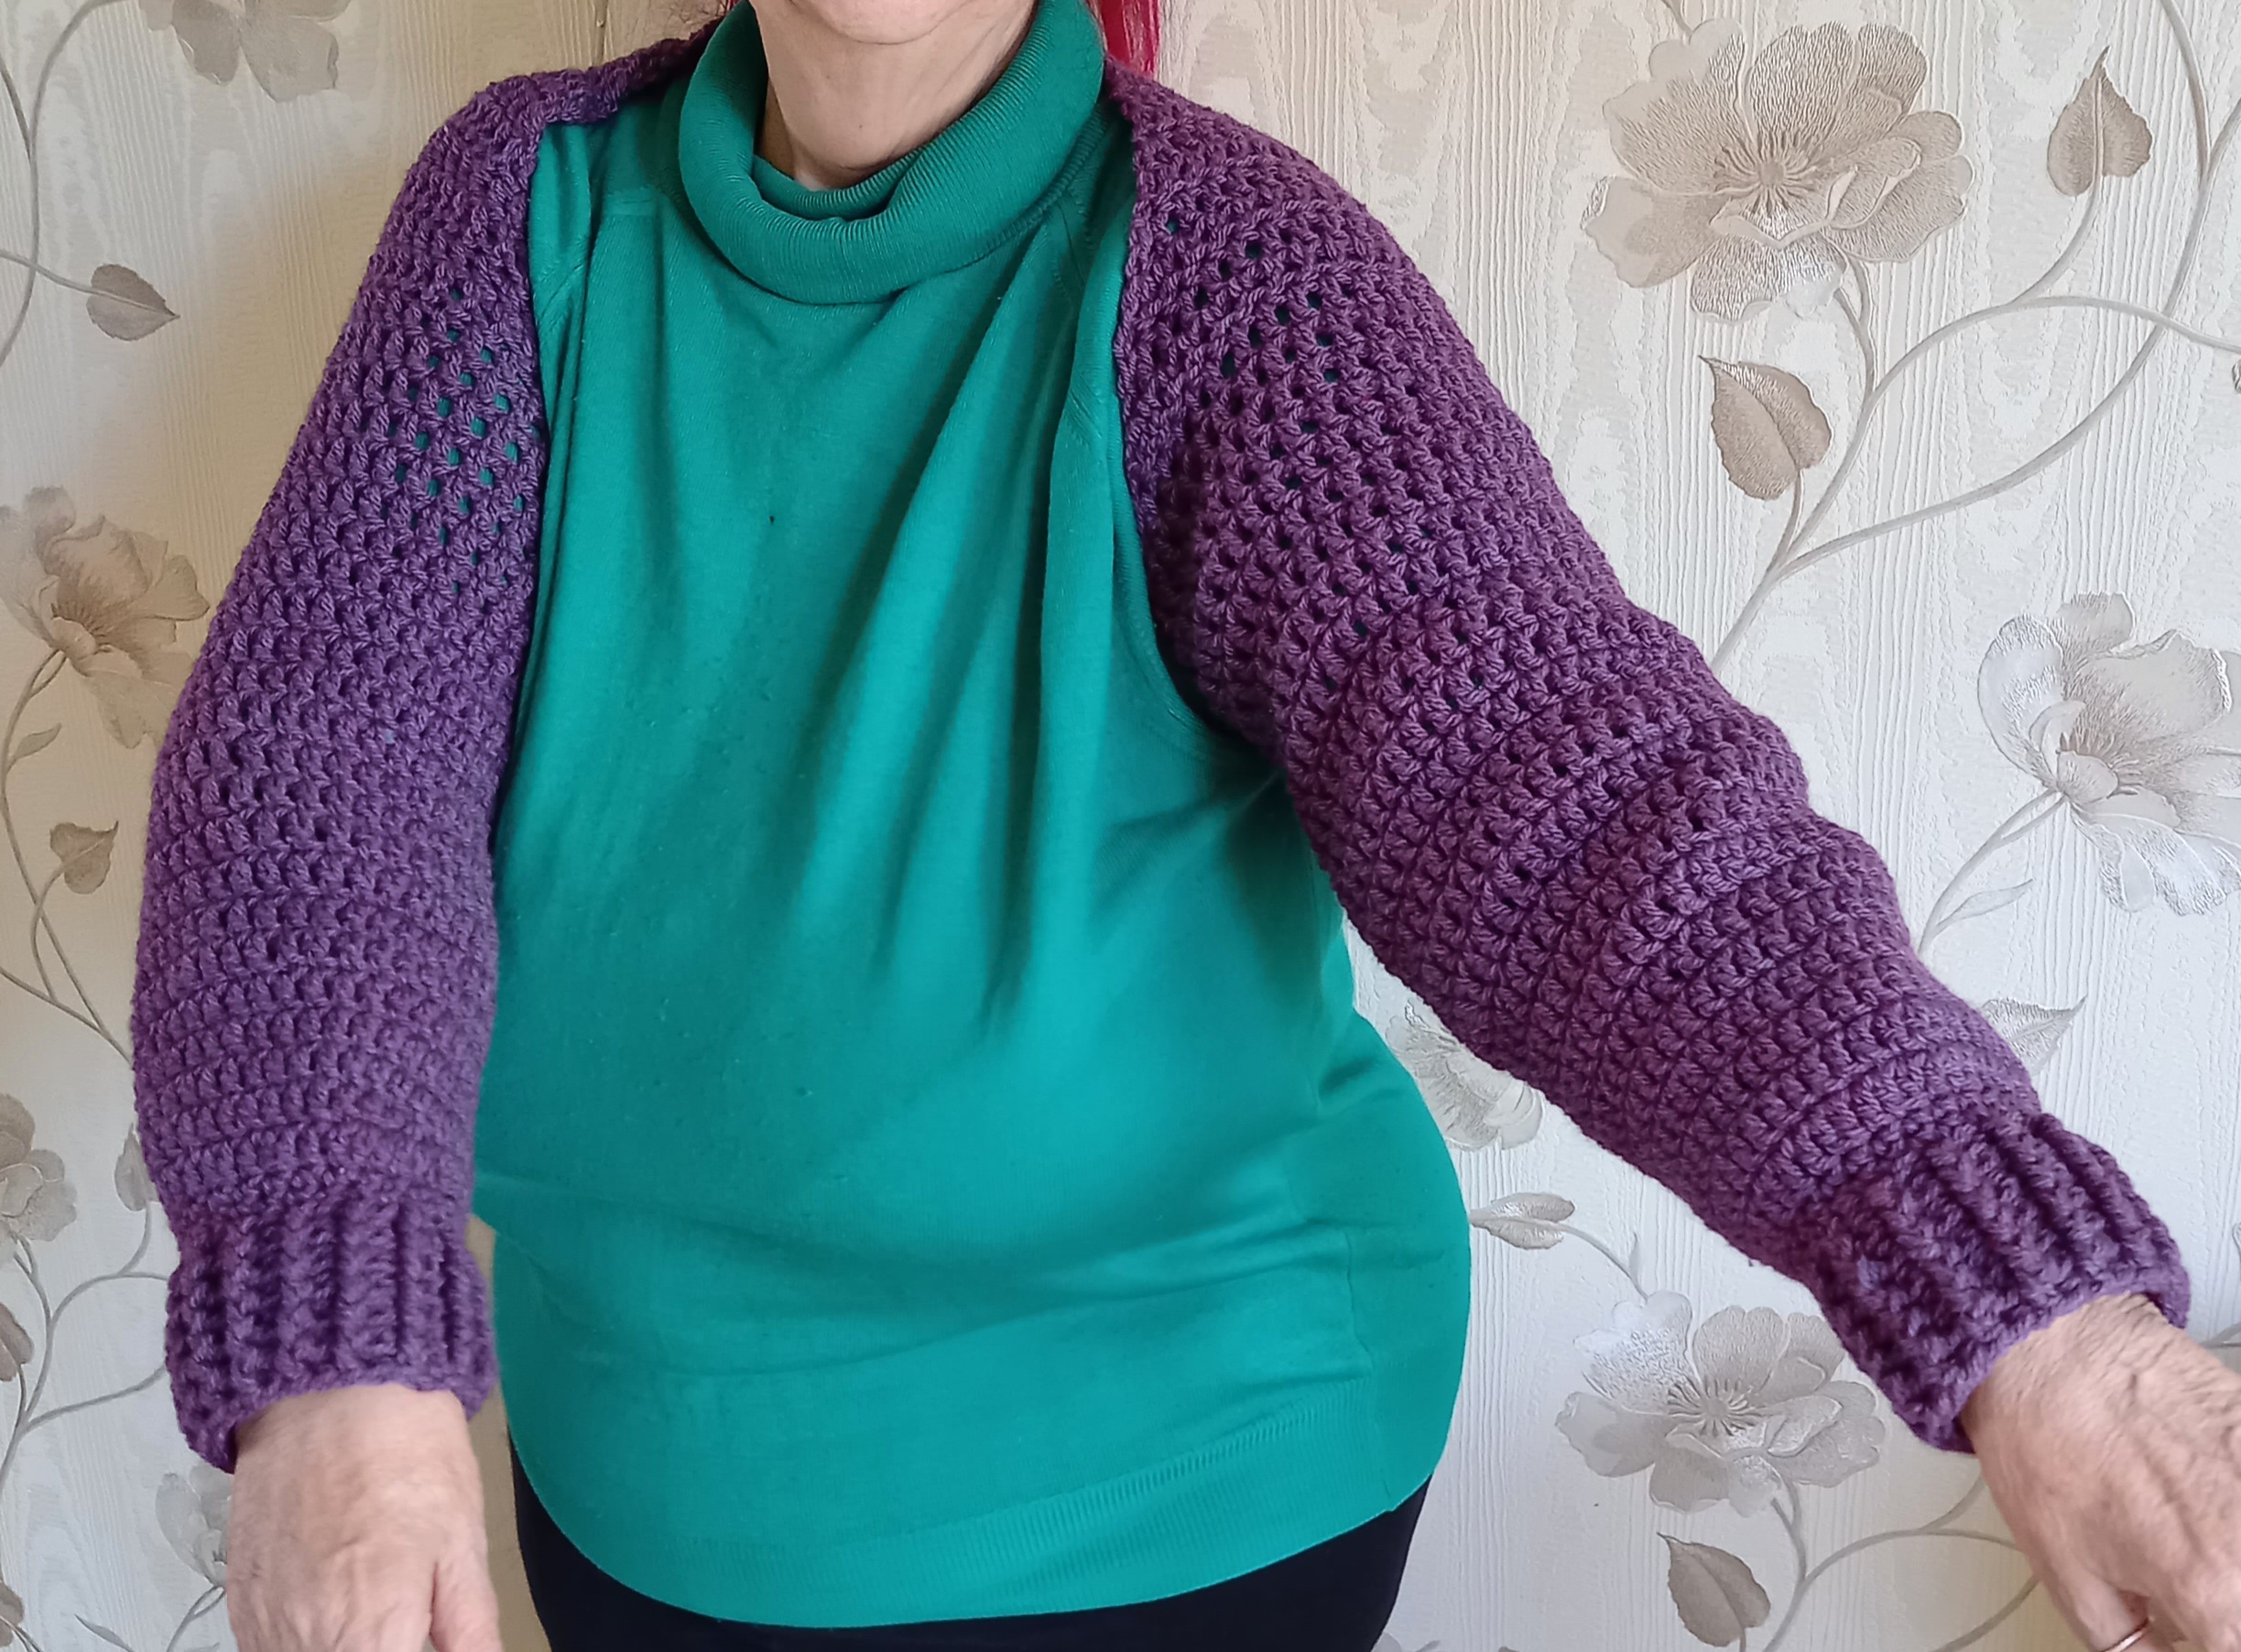
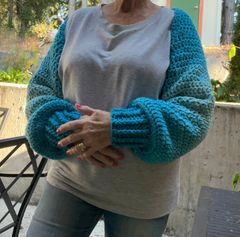
Samantha Sleeves Shrug Pics From My Wonderful Testers.
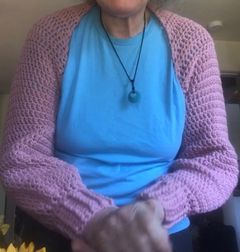
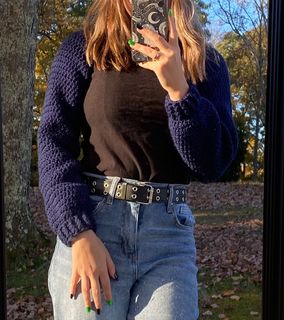
I sent the Samantha Sleeves Shrug pattern out to my testing group and you should see what they came up with. So many amazing colour choices and each was so special in its own way. You can really stamp your own personality on this cardigan. I could not do what I do without the amazing support and feedback from these wonderful women. I am so grateful to each and everyone of them. The other photos on this page are also from my marvellous testers.

Sign up for my Newsletter
Get the latest info on free patterns and fun blog hops. Sign up here.
Join Me on Facebook.
Follow me on Facebook for lots of great crochet news and all the latest videos and free patterns coming from Carroway Crochet.
And Join our Carroway Crochet Group.
Get the latest updates on free patterns and new designs and also share your crochet projects with our Carroway Crochet Community on Facebook. You will also get the updates on new blog hops I host or new pattern releases.

Samantha Sleeves Shrug video tutorial on my YouTube Channel.
And here is the left handed version.
Pin this for Later.
Samantha Sleeves Shrug
Pattern by Pam Carr ©2022
Introducing the Samantha’s Sleeves Shrug. This shrug is made with double crochet stitches so it is a great beginner friendly garment pattern. It is versatile and from XS-5X.
Supplies you will need:
Yarn: worsted weight yarn (4)
You can use any worsted weight yarn. (4)
XS/S: approximately 290-320 yds,
Medium: approximately 377-400 yds,
Large: approximately 480-520 yds.,
XL: approximately 580-630 yds,
2X: approximately 670-720
3/4X: approximately 730-860 yds,
5X: approximately 900-950 yds
Hook: Size K/10.5 – 6.5mm
Size J/10 – 6.00mm
Size H/8 – 5.00 mm
Notions: Scissors, tapestry needle.
Gauge: 10 dc – 6 dc rows = 4” (10 cm) with a K./6.5mm hook
(Feel free to go up or down a hook size to get the correct gauge.)
Abbreviations (uses US conventions)
-
Ch = chain
-
st = stitch
-
sc = single crochet
-
dc = double crochet
-
sl st = slip stitch
-
Sp = space
Special stitch for this pattern.
For the sleeve cuffs you will do Front Post Double Crochet and Back Post Double Crochet.
Here is a great video tutorial to learn this technique.
https://www.youtube.com/watch?v=5S2D25Aa5oA
FPDC or front post double crochet.
Yarn over, insert hook from the front side of the work to back and then to front again, around the post of the indicated stitch on the previous row; yarn over and pull up a loop (3 loops on hook), yarn over and draw through two loops, (2 loops on hook), yarn over and draw through two loops, (1 loop on hook).
BPDC or back post double crochet.
Yarn over, insert hook from the back side of the work to front and to back again around the post of the indicated stitch on the previous row; yarn over and pull up a loop (3 loops on hook), yarn over and draw through two loops (2 loops on hook), yarn over and draw through two loops (1 loop on hook)
A tip to remember when working this ribbed cuff.
When you work 1 front post double crochet (FP DC) around the post of the double crochet in the row below, this stitch is raised on the surface of the fabric facing you. Always make sure that the post stitches are raised to the same side in each successive row or round. Keep an eye on the ribs and remember: If the stitch you’re working is raised to the front, work a front post stitch; if the stitch is raised to the back, work a back post stitch.
This pattern uses US terminology.
The US and UK crochet terms are different, but they use the same terms to describe different stitches. Here is a simple conversion chart for anyone in the UK.
USDouble Crochet (dc)Single Crochet (sc) |
UKTreble crochet (trc)Double Crochet (dc) |
Sizes/Measurements: To fit bust measurement.
XS/S: 28”-34” [71-86.5]
Medium: 36-38″ [91.5-96.5 cm]
Large: 40-42″ [101.5-106.5 cm]
XL: 44-46″ [112-117 cm]
2X: 48-54″ [122-137 cm]
3/4 X: 52” [58” [132-147 cm]
5X: 60-62” [152-157cm]
Finished size for the sections.
Note: I have included instructions that allow you to customize your sleeves so they can be made longer or shorter
Size |
Width of back |
Sleeve length |
XS/S |
16” |
17” |
M |
17” |
18” |
L |
18” |
19” |
XL |
19” |
20” |
2XL |
20” |
21” |
3/4XL |
21” |
21” |
5XL |
22” |
22” |
Instructions:
There are two pieces for this pattern, each piece is the back and sleeve portion of the shrug. They will be sewn together with a back seam.
Do not count the turning ch as a stitch.
This first row is the centre seam at the back of the shrug and not the sleeve. The sleeve is formed at the point where you are asked to chain.
Using the K/ Hook, Chain 18, ( 20 , 22, 24, 26, 30, 34)
Row 1: DC in 3rd ch from your hook, dc into each ch to the end. Turn work. 16 (18, 20, 22, 24, 28, 32)
Row 2: Ch2, DC into the first st and into each st across 16 (18, 20, 22, 24, 28, 32)
Row 3: As Row 2
Row 4: As Row 2.
Row 5: Ch2, Make 2dc into the first st, dc into each stitch until the last st, make 2dc into the last st, turn work. 18 (20, 22, 24, 26, 30, 34)
Row 6: Ch 2, DC into the first st and into each st across. Turn work. 18 (20, 22, 24, 26, 30, 34)
Row 7: Ch2, Make 2dc into the first st, dc into each stitch until the last st, make 2dc into the last st, turn work. 20 (22, 24, 26, 28, 32, 36)
Row 8: Ch 2, DC into the first st and into each st across. Turn work. 20 (22, 24, 26, 28, 32, 36)
Row 9: Ch2, Make 2dc into the first st, dc into each stitch until the last st, make 2dc into the last st, turn work. 22 (24, 26, 28, 30, 34, 38)
Row 10: Ch2, Make 2dc into the first st, dc into each stitch until the last st, make 2dc into the last st, turn work. 24 (26, 28, 30, 32, 36, 40)
Row 11: Ch2, Make 2dc into the first st, dc into each stitch until the last st, make 2dc into the last st, turn work. 26 (28, 30, 32, 34, 38, 42)
Row 12: Ch2, Make 2dc into the first st, dc into each stitch until the last st, make 2dc into the last st, turn work. 28 (30, 32, 34, 36, 40, 44)
Stop here for XS/S. Go to instructions for Creating the Armhole.
Row 13: Ch2, Make 2dc into the first st, dc into each stitch until the last st, make 2dc into the last st, turn work. 30 (32, 34, 36, 38, 42, 46)
Stop here for Medium. Go to instructions for Creating the Armhole.
Row 14: Ch2, Make 2dc into the first st, dc into each stitch until the last st, make 2dc into the last st, turn work. 32 (34, 36, 38, 40, 44, 48)
Stop here for Large. Go to instructions for Creating the Armhole.
Row 15: Ch2, Make 2dc into the first st, dc into each stitch until the last st, make 2dc into the last st, turn work. 34 (36, 38, 40, 42, 46, 50)
Stop here for Extra Large. Go to instructions for Creating the Armhole.
Row 16: Ch2, Make 2dc into the first st, dc into each stitch until the last st, make 2dc into the last st, turn work. 36 (38, 40, 42, 44, 48, 52)
Stop here for 2XL. Go to instructions for Creating the Armhole.
Row 17: Ch2, Make 2dc into the first st, dc into each stitch until the last st, make 2dc into the last st, turn work. 38 (40, 42, 44, 46, 50, 54)
Stop here for 3/4 XL. Go to instructions for Creating the Armhole.
Row 18: Ch2, Make 2dc into the first st, dc into each stitch until the last st, make 2dc into the last st, turn work. 40 (42, 44, 46, 48, 52, 56)
Stop here for 5XL. Go to instructions for Creating the Armhole.
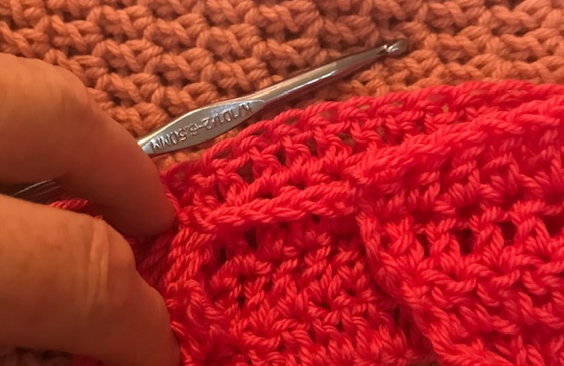
Creating the Armhole
Now ch 4, (6, 8, 10, 10, 12, 12) and join with a sl st to the beginning of this row, making the armhole.
Here is a photo to show how it looks once you have made the ch and joined it to the beginning of the row with a slip stitch.
Sleeves.
We will now be working in the round and not turning our work at the end of each round.
Round 1: Ch2, dc into the first stitch and into every stitch across to the end and then dc across the ch 4, (6, 8, 10, 10, 12, 12), join with a sl st to the top of the beginning ch2.
Note:
Note: Your sleeve now has 32 (38, 44, 50, 54, 62, 68) stitches
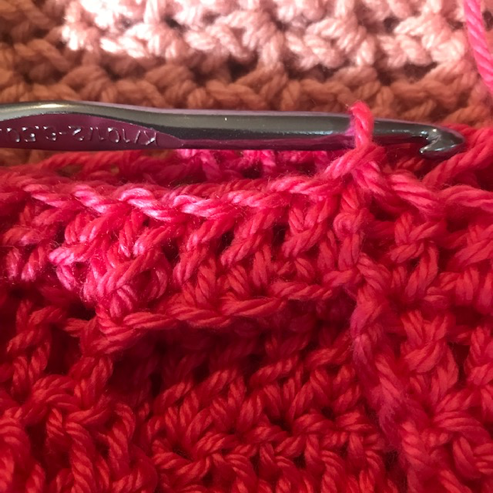
Now we will work the rest of this part of the sleeve in a spiral.
Round 2: Place a stitch marker and then sc into the first st, hdc into the next st, dc into the next st and into each st until you reach the stitch marker.

This photo shows you how the start of the spiral will look. It will be under the arm and not show when you are wearing your shrug.
Rounds 3-10, (11, 12, 13, 14, 14, 15): Continue to dc into each stitch around, moving the stitch marker up at the end of each round.
Note: You do not ch2 at the beginning of each new round Just keep working in a spiral and moving up the stitch mark to show where each round ends.
Change to a J-6mm hook.
Rounds 11(12, 13, 14, 15. 15, 16) – 17 (18, 19, 20, 21, 21, 22): Continue to dc into each stitch around, moving the stitch marker up at the end of each round.
Change to an H-5mm hook
Rounds 18, (19, 20, 21, 22, 22, 23) – 21 (22, 23, 24, 25, 25, 26): Continue to dc into each stitch around, moving the stitch marker up at the end of each round.
Note: Sleeve lengths can vary from person to person to please feel free to add extra rounds at this point if you need longer sleeves. Also if you find them too long this is where you can choose to make them shorter by pulling out a few rounds.
Round 22 ( 23, 24, 25, 26, 26, 27): Dc into the first st and into each st around until the last three stitches before the st marker, hdc into the next st, sc into the next st and sl st into the final st.
Now we will no longer be working in a spiral so you can remove the stitch marker.
Cuff:
Note: The decrease row creates a snug cuff that stretches with wear to be a bit looser. If you want customize your cuff and make a looser cuff then do an even number of dc stitches (the more you make the looser the cuff will be) at the start of the decrease row before beginning the dc2tog decrease stitches. Make sure you have an even number of stitches at the end of the decrease row. This is important for the ribbing to work. I would recommend 2 or 4 dc would be enough before beginning to do the dc2tog.
The decrease row:
Round 23 (24, 25, 26, 27, 27, 28): Ch2, *dc2tog* repeat this decrease for the entire round. Join to the top of the beginning ch2.
Round 24 ( 25, 26, 27, 28, 28, 29): ch1, sc into the first st and into each stitch around. Join with a sl st into the top of the beginning Ch 1.
Round 25, (26, 27, 28, 29, 29, 30): Ch2, Dc into the first st and into each stitch around. Join with a sl st into the top of the beginning Ch 2.
Note: Instructions for doing the cuff using the alternating FPDC and BPDC are above, along with a link to a video tutorial.
Round 26 (27, 28, 29, 30, 30, 31): Ch 2, *FPDC into DC in row below, BPDC into next DC in row below* repeat around, join with a sl st to top of Ch2.
Rounds 27 (28, 29, 30, 31, 31, 32) – 33 (34, 35, 36, 37, 37, 38): Ch 2, *FPDC into DC in row below, BPDC into next DC in row below* repeat around, join with a sl st to top of Ch2.
You will have a cuff with 8 rows of fpdc/bpdc ribbing when finished.
If you want a longer cuff you can do more rounds of this ribbing pattern.
Fasten off and weave in the ends.
Construction.
Place one panel with the right side facing up and lay the second panel on top of it with the right side facing down. (right sides together). Line up the centre back seam.
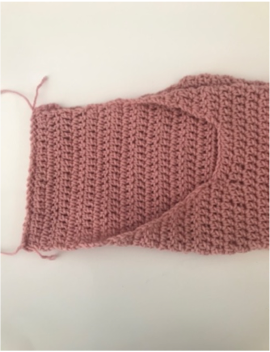
Back seam.
Use pins or stitch markers to join the back seam matching up the stitches.
Using the whip stitch or your preferred method, of sewing, start at the bottom and sew the back seam together. Make sure you are matching the stitches as you go. Make sure to do several stitches at the top and bottom to secure the seams.
This is what it will look like when you open it up. The seam is virtually invisible from the right side.
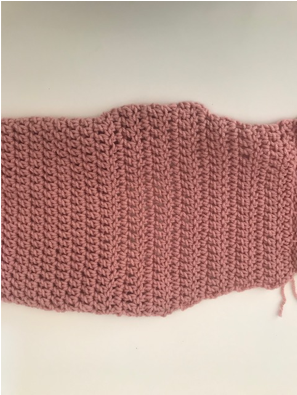
Finish off and weave in the ends.
Your Samantha Sleeves Shrug is done. !
If you have any questions or need help with the patterns, please email me at carrowaycrochet@outlook.com, and Iʼll be glad to help you.
The Summer Crochet Style Freebie Event.
Join me in the Summer Crochet Style Freebie event happening in the final week of May 2026. I will be sharing 8 free crochet pattern downloads to welcome in the Summer.
Day 3 of the Summer Crochet Style Freebie Event is May 26-27th 2026.
I leave the pattern coupon code active for two days to allow for all the time zones.
This pattern is free for May 26-27th 2026
How to get your Summer Crochet Style Freebie PDF download.
Click on the image below and it will take you to the pattern listing on Ravelry.
Next click on ‘Buy Now”
At the checkout enter the coupon code SUMMERSTYLE26
Click on the apply coupon code.
DOWNLOAD YOUR FREE PATTERN.
Sign up for my newsletter to find out when the next Friday’s Freebie is.

Other Patterns You May Like.
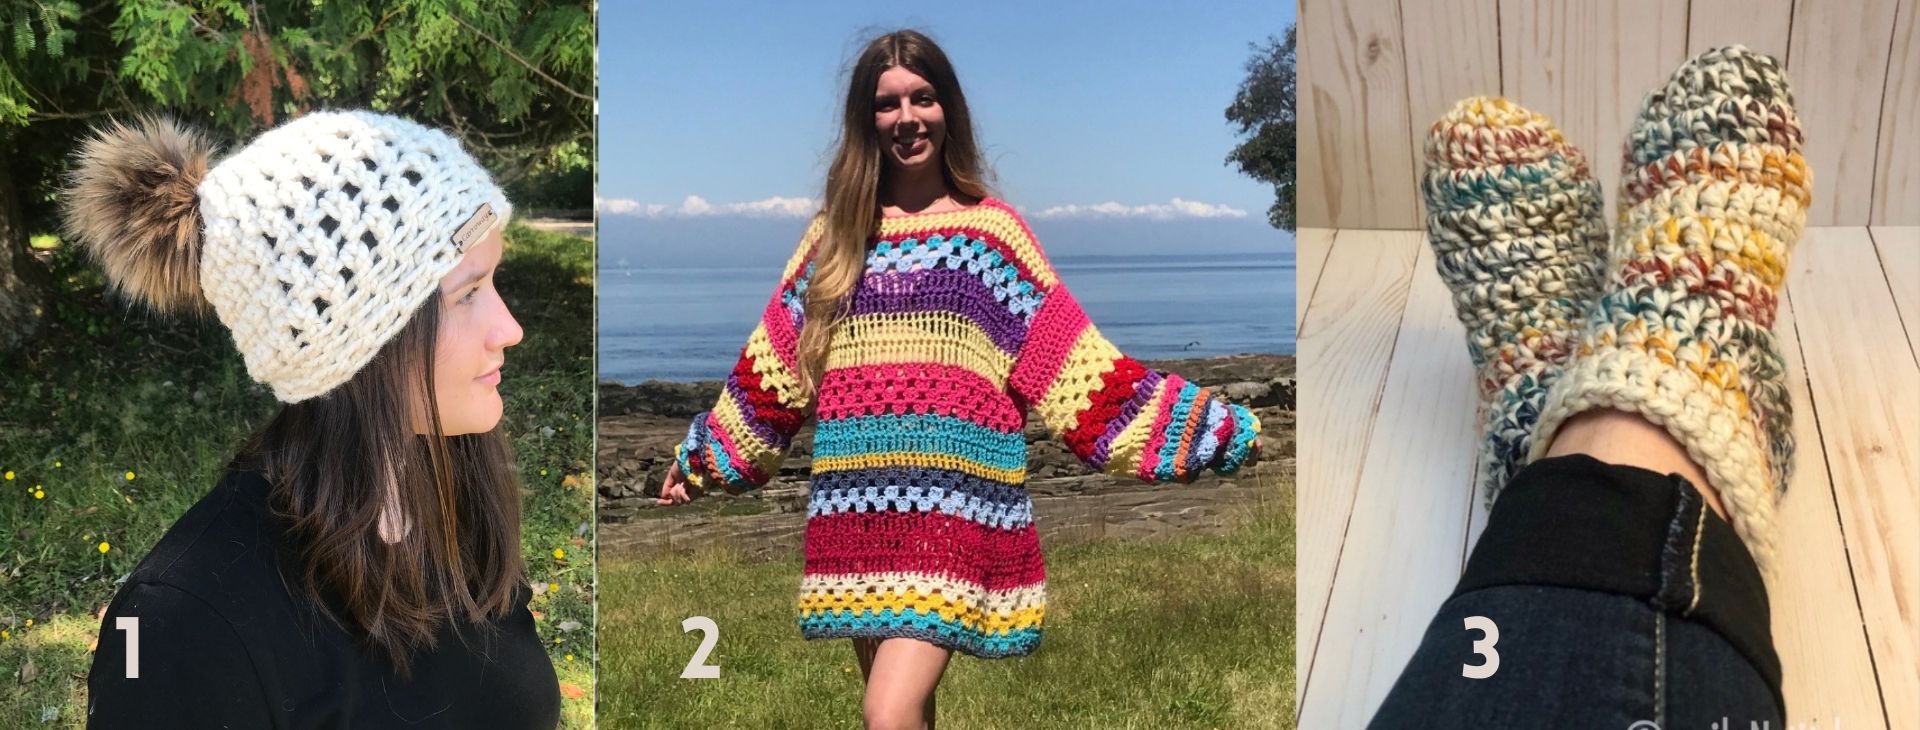
3. The Warmest Feet Ever Slipper Socks.
More Places to Find Crochet Free Patterns:
If you love crochet, you can find over a thousand free crochet patterns including some for crop tops and bralettes over at All Free Crochet
I am honoured to have my free crochet bralette pattern, the Earth Mother Bralette Pattern added to the All Free Crochet site.
 It is a great resource for crochet lovers and I am proud to also have my Take Me Outside Infinity Scarf Pattern posted over on the All Free Crochet Site.
 It is a great resource for crochet lovers and I am proud to also have my
Selling items made from my patterns?
You are more than welcome to se items made from my pattern. Please do share my link and tag and help promote it on social media. Thank you.
If you have any questions or need help with the patterns, please email me at carrowaycrochet@outlook.com, and Iʼll be glad to help you.
Find other patterns by Carroway Crochet in my Etsy Shop and on Ravelry.
Let’s Share and Connect!
Thank you for trying my free crochet cardigan pattern, I hope you enjoyed it! Please share pictures of your completed Happy Hippy Cardigan on Instagram and Facebook. Tag them @carrowaycrochet #carrowaycrochet and #samanthasleeves on Instagram.
Thank you so much for visiting me here at Carroway Crochet .
Find other patterns by Carroway Crochet in my Etsy Shop and on Ravelry.
Other places you can find me are:
YouTube
Ravelry
TikTok
This design, written work and images are a copyright of
©CarrowayCrochet and may not be copied or reproduced in any way.
You have permission to sell finished products made from this pattern, but please leave a link to my blog, www.carrowaycrochet.com in your product listing specifying that I am the designer of this pattern.
Thank you.
Please follow and like us:
One thought on “Samantha Sleeves Shrug: Free Crochet Pattern”
Comments are closed.