
Snuggly Ripple Baby Blanket How to Crochet a Ripple Baby Blanket

How to Crochet a Ripple Baby Blanket
The Snuggly Ripple Baby Blanket
Follow along with this easy Ripple Baby Blanket pattern and learn how to make a gorgeous baby blanket.

About the Snuggly Ripple Baby Blanket.
A few years ago I wanted to learn the Ripple Stitch and made a couple of ripple baby blankets in different colours as I fell in love with the stitch and the pastel colours used to make these beautiful crochet blankets for babies.
Of course I wasn’t writing patterns at the time and it is only now that I have finally gotten around to writing up the pattern.
This Ripple Baby Blanket is a free beginner friendly baby blanket and you will be surprised how easy it is. I used three colour plus an accent colour for ones in these pictures. You can skip the accent colour and just use three colours or switch things up according to the yarn you have on hand if you want to use up your stash.
I used alternating three row stripes for this blanket. FIt makes for a beautiful baby blanket.
You can customize this blanket by adding more rows to make if bigger or using less rows to make it smaller.
Also you could use a chunkier yarn and the appropriate hook to make a heavier blanket.
**This post contains affiliate links. If you make a purchase using some of my links I may receive a small commission at no extra cost to you.**
Please consider signing up for my newsletter and joining me over on facebook so you are always in the loop for what is happening with Carroway Crochet.
Sign up for my Newsletter
Get the latest info on free patterns and fun blog hops.
Join Me on Facebook.
Follow me on my Facebook Page for the latest video news and what I am up to.
Join our Crochet Community Group.
Get the latest updates on my free patterns, latest pattern release and share your crochet projects with our Carroway Crochet Community on Facebook. You will also get the updates on new blog hops I host or new pattern releases.

Here you can see the alternating rows used for this ripple baby blanket.

If you want the ad free PDF you can get it on Ravelry

Here is a video for One of my Other Baby Blankets.
If you are a visual learner here is a great video tutorial showing you how to make the Super Soft Baby blanket
How to Crochet the Super Soft Baby Blanket Right Handed Version
How to Crochet the Super Soft Baby Blanket Left handed version

Snuggly Ripple Baby Blanket
Pattern by Pam Carr ©2025

Introducing my Snuggly Ripple Baby Blanket Pattern. This ripple baby blanket is a beginner friendly baby blanket made with worsted weight yarn (4)
This baby receiving blanket is soft and snuggly and features soft pastel stripes. It has a beautiful texture and the soft curves of the ripple are so pretty. It is a striped ripple blanket made with alternating colours.
This modern contemporary design is easy once you get the hang of the ripple stitch pattern.
For those new to crochet, I have a video tutorial on youtube that will demonstrate how to make double crochet stitches. I have right and left handed tutorials there.
So here we go, good luck.
The Snuggly Ripple Baby Blanket Pattern.

Finished Size:
This blanket is a receiving blanket: 29″ by 27″ approximately.
Supplies you will need:
Yarn: Worsted Weight Yarn. I used soft pink, soft grey and white for my stripes. I added in a hot pink for fun but this is optional.
Hook: US I/9 -5.50 mm crochet hook or size needed to obtain gauge
Notions: Yarn Needle, Scissors.
Gauge:. 5.25” between the dc valleys of the ripple stitch.
Abbreviations (uses US conventions)
-
Ch = chain
-
st = stitch
-
sc = single crochet
-
dc = Double crochet
This pattern uses US terminology. The US and UK crochet terms are different, but they use the same terms to describe different stitches. Here is a simple conversion chart for anyone in the UK.
USDouble crochet (dc) |
UKTreble (tr) |
How to DC2 Decrease.
The dc2tog is a decrease stitch that combines two stitches into one
Here is how to make a double crochet two together (dc2tog).
-
Yarn over
-
Insert your hook into the next stitch
-
Yarn over and pull through
-
Yarn over and pull through two loops
-
Yarn over
-
Insert your hook into the next stitch
-
Yarn over and pull through
-
Yarn over and pull through two loops
-
Yarn over and pull through the remaining three loops
How to Make the Ripple Stitch.
Note: The foundation chain for this ripple stitch is in multiples of 14, plus an extra 3 added on for turning.
Before you begin your ripple project you can make a small ripple sample to get used to the pattern. Make a chain of 45 (3×14 +3) so you can practice and get confident with making the hills and valleys that make the ripple stitch so special.
Row 1: make a dc into the 4th chain from the hook.
Now make 1dc into each of the next 4 chains, so there are 5 in total (you count the chain-3 as a st), now dc2tog and then dc2tog again, make 1dc into each of the next 4 chains
(You have just made the “valley”. The 4dc’s are the sides and the dc2tog’s create the valley bottom.)
Now make 2dc’s into the next chain, then make 2 more dc’s into the next chain.
These four stitches create the top of the “mountain”.
Now make 1 dc crochet into each of the next 4 chains.
Now we are back at the bottom and you will dc2tog decrease, and then do another dc2tog decrease (another valley).
Then make 1 dc into each of the next 4 chains.
There will be one chain left at the end of your foundation chain. Make 2 dc’s into this last chain to end the row.
Turn work
Row 2: Ch 3,
Make a dc stitch in same stitch,
make 1dc into each of next 4 stitches.
dc2tog (this is a decrease), dc2tog (another decrease),
* make 1 dc into each of next 4 stitches,
make 2dc’s into the next stitch (increase), make 2dc’s into the next stitch (another increase),
make 1dc into each of next 4 stitches,
dc2tog (this is a decrease), dc2tog (another decrease)*
* Repeat between * and *to the end,
then make 1 dc into each of the next 4 chains.
make 2 dc’s into the top of the ch3 from the previous row. Turn your work.
Repeat Row 2
Blanket Instructions:
Note: To change colors, work to last 2 loops on hook of 1st color. Draw new color through last 2 loops and proceed with new color. Leave 5 or 6 inch ends of each color of yarn to weave in.
Stripe Pattern: Work 3 rows with colour each colour to complete a stripe.
Note: This ripple stitch pattern uses multiples of 14, plus 3 for turning.
With white yarn chain 87.
Row 1: make a dc in the 4th chain from the hook, make 1dc into each of the next 4 chains, dc2tog (this is a decrease), dc2tog (another decrease), *work 1dc into each of the next 4 chains, make 2dc’s into the next chain (an increase), make 2 more dc’s into the next chain (another increase), make 1 dc crochet into each of the next 4 chains, dc2tog decrease into next ch, make another dc2tog decrease,* Repeat between * and * to the end, then make 1 dc into each of the next 4 chains. You should have 1 chain left at the end of your foundation chain. Make 2 dc’s into this last chain to end the row. Turn your work.
Row 2: Ch 3, Make a dc stitch in same stitch, make 1dc into each of next 4 stitches. dc2tog (this is a decrease), dc2tog (another decrease),* make 1 dc into each of next 4 stitches, make 2dc’s into the next stitch (increase), make 2dc’s into the next stitch (another increase), make 1dc into each of next 4 stitches, dc2tog (this is a decrease), dc2tog (another decrease)* repeat across to the end, Make a dc stitch into each of next 4 stitches, make 2 dc’s into the top of the ch3 from the previous row. Turn your work.
Rows 3: repeat row 2
Change to pink.
Rows 4-6: repeat row 2
Change to white.
Rows 7-9: repeat row 2
Change to grey.
Rows 10-12: repeat row 2
Change to white.
Rows 13-15: repeat row 2
Change to hot pink. (in my prototype I used hot pink as an accent, you can use your soft pink instead if you want just the three colours in your baby blanket.
Rows 16-18: repeat row 2
Change to white.
Rows 19-21: repeat row 2
Change to grey.
Rows 22-24: repeat row 2
Change to white
Rows 25-27: repeat row 2
Change to pink.
Rows 28-30: repeat row 2
Change to white
Rows 31-33: repeat row 2
Change to grey.
Rows 34-36: repeat row 2
Change to white
Rows 37-39: repeat row 2
To make a longer blanket you just carry on in this colour stripe pattern.
Fasten off and weave in the ends securely.
If you have any questions or need help with the patterns, please email me at carrowaycrochet@outlook.com, and Iʼll be glad to help you.
OTHER FREE CROCHET PATTERNS YOU MIGHT LOVE!
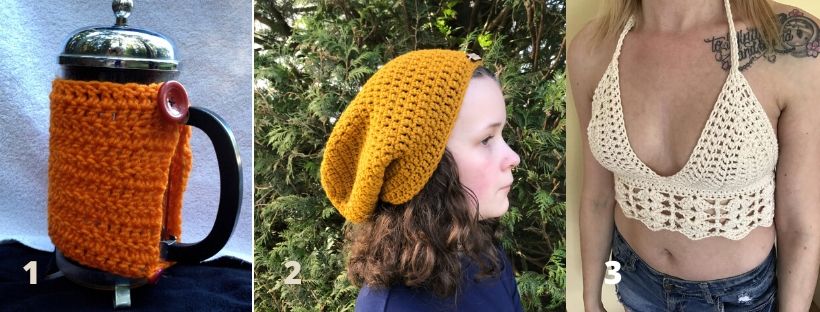
1. French Press Cozy
2. The Dreamer Beanie
3. The Ivory Lace Bralette
More Places to Find Crochet Free Patterns:
If you love crochet, you can find over a thousand free crochet patterns including some for crop tops and bralettes over at All Free Crochet
I am honoured to have my free crochet bralette pattern, the Earth Mother Bralette Pattern added to the All Free Crochet site.
 It is a great resource for crochet lovers and I am proud to also have my Take Me Outside Infinity Scarf Pattern posted over on the All Free Crochet Site.

Selling items made from my patterns?
You are more than welcome to se items made from my pattern. Please do share my link and tag and help promote it on social media. Thank you.
If you have any questions or need help with the patterns, please email me at carrowaycrochet@outlook.com, and Iʼll be glad to help you.
Find other patterns by Carroway Crochet in my Etsy Shop and on Ravelry.
Let’s Share and Connect!
Thank you so much for visiting me here at Carroway Crochet .
Find other patterns by Carroway Crochet in my Etsy Shop and on Ravelry.
Other places you can find me are:
YouTube
Ravelry
This design, written work and images are a copyright of
©CarrowayCrochet and may not be copied or reproduced in any way.
You have permission to sell finished products made from this pattern, but please leave a link to my blog, www.carrowaycrochet.com in your product listing specifying that I am the designer of this pattern.
Thank you.
Please follow and like us: