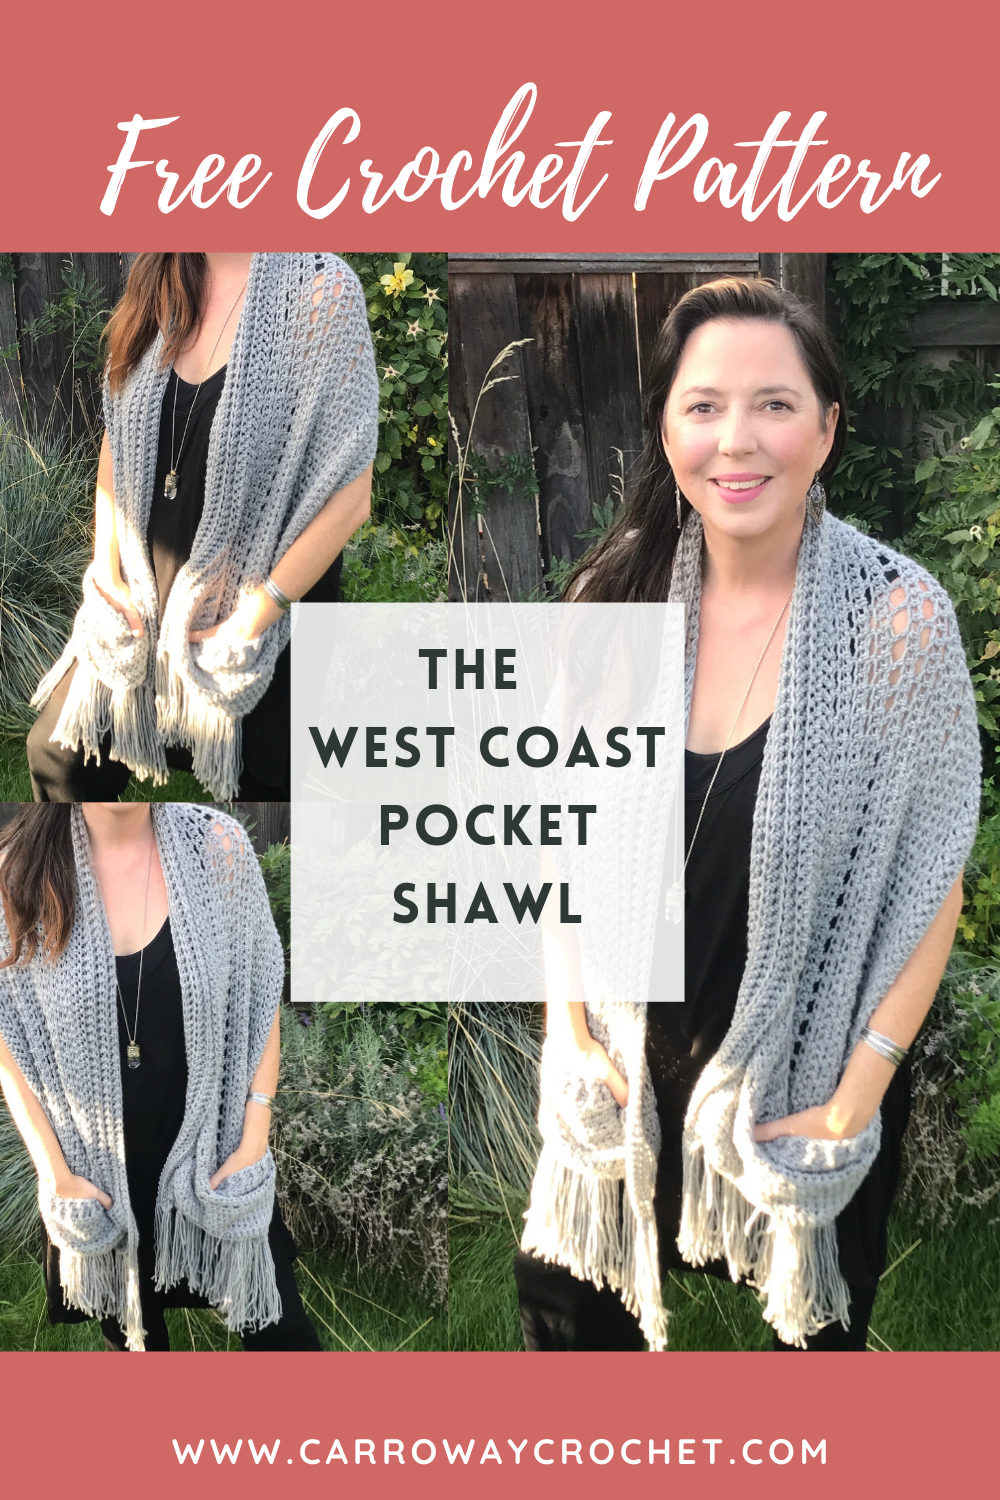
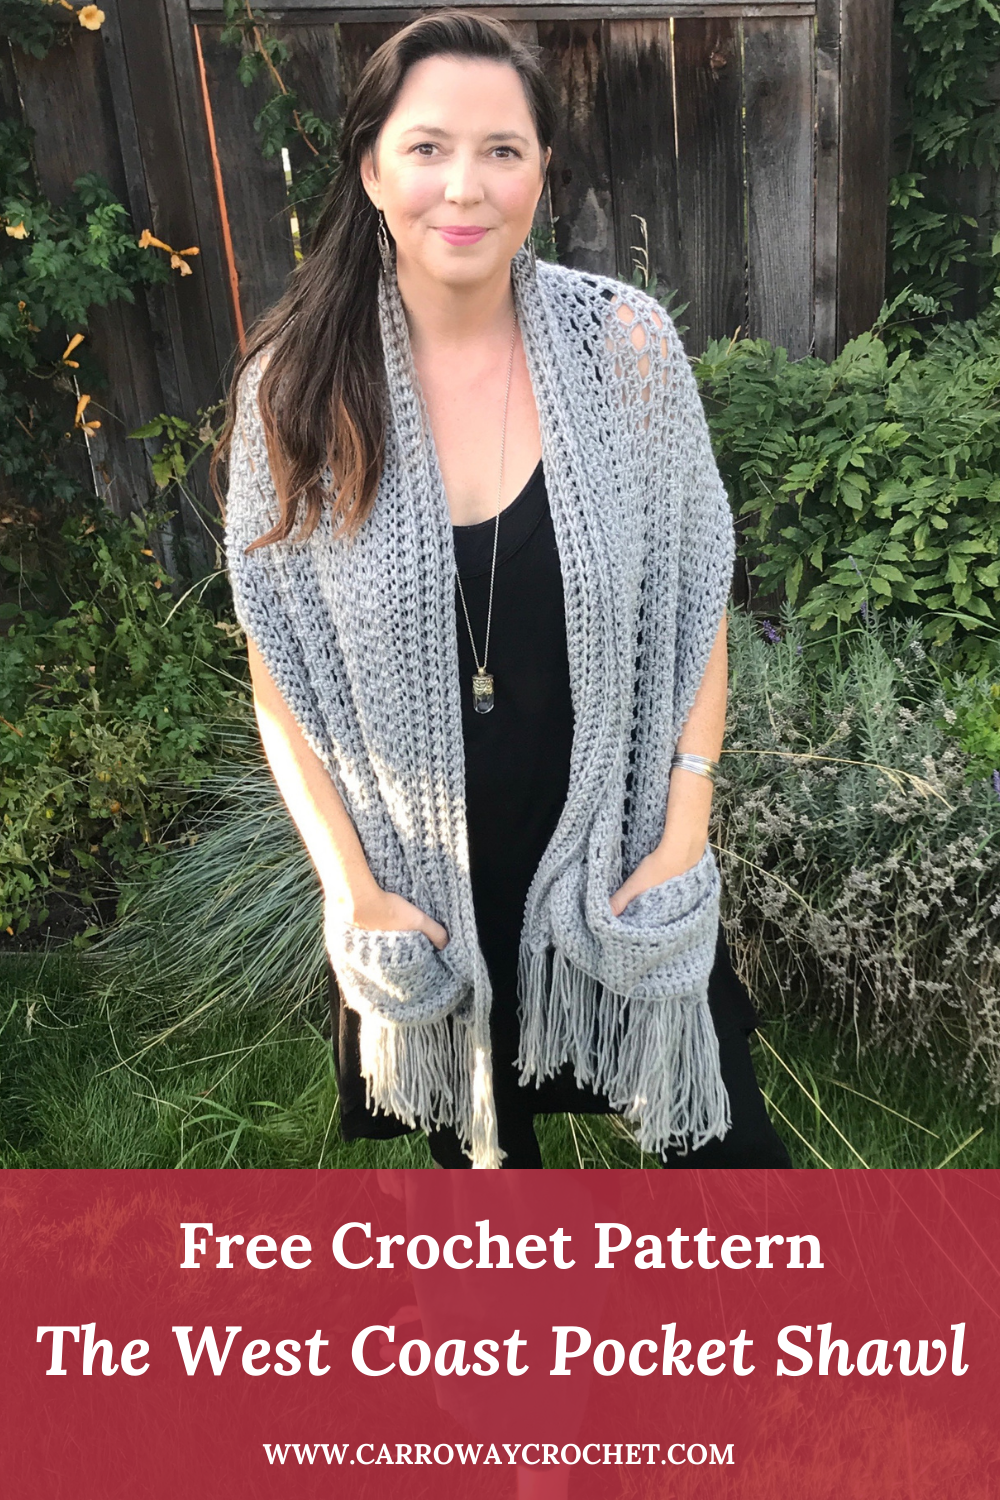
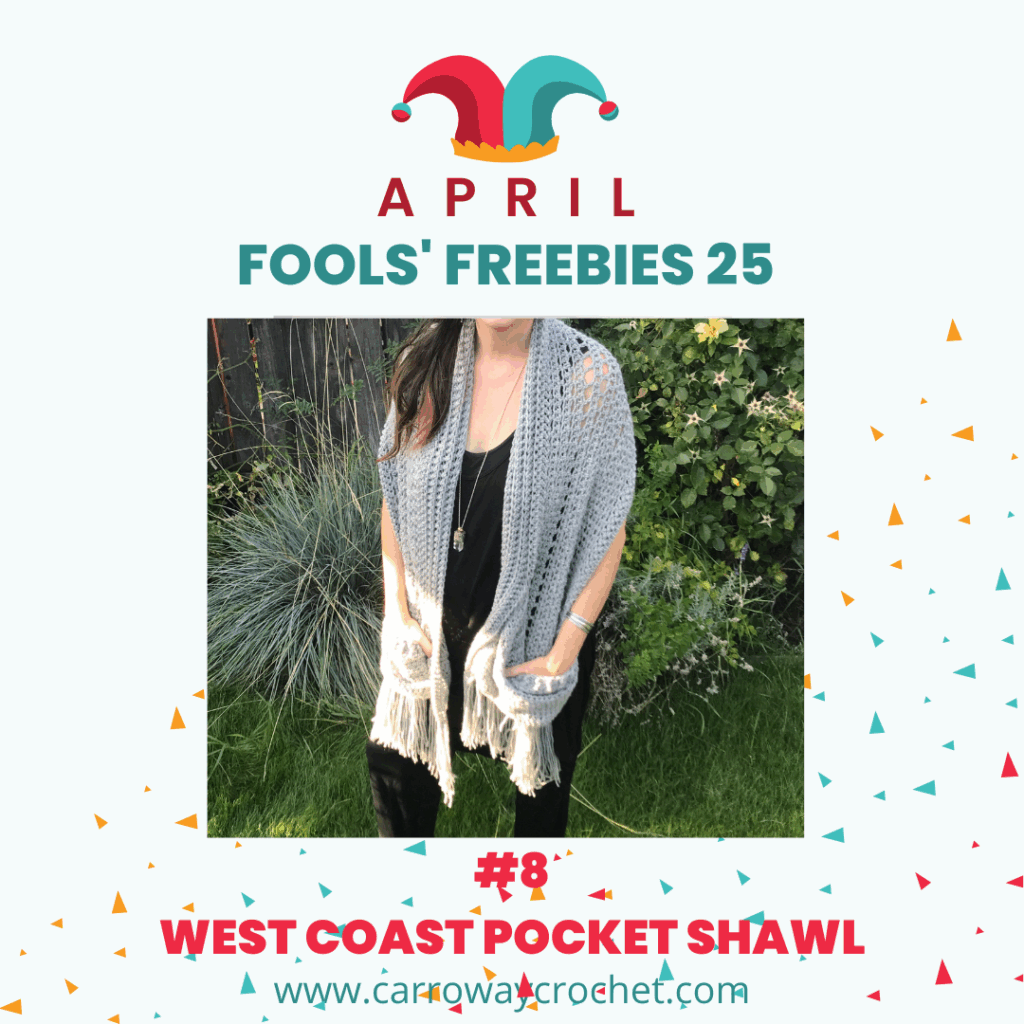
The West Coast Pocket Shawl: FREE Pattern

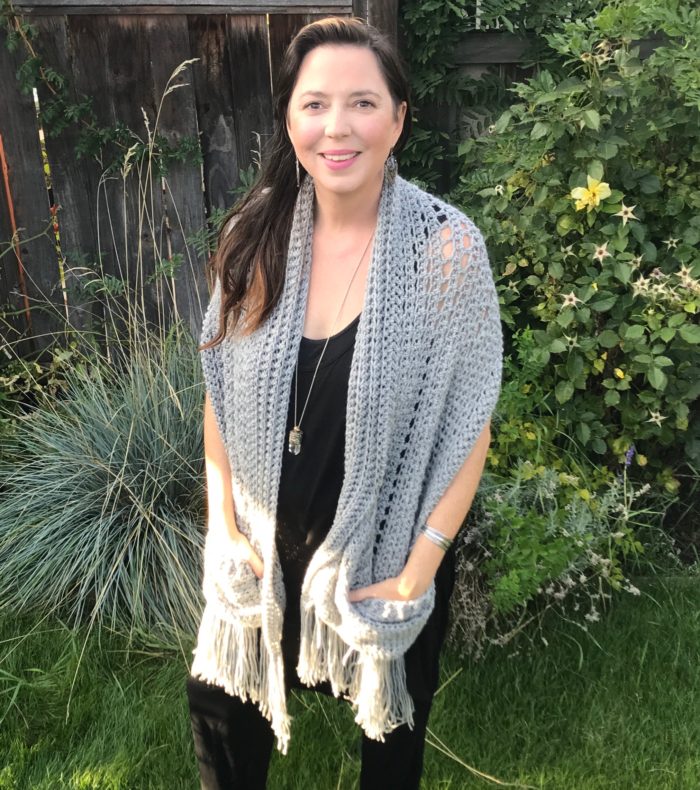
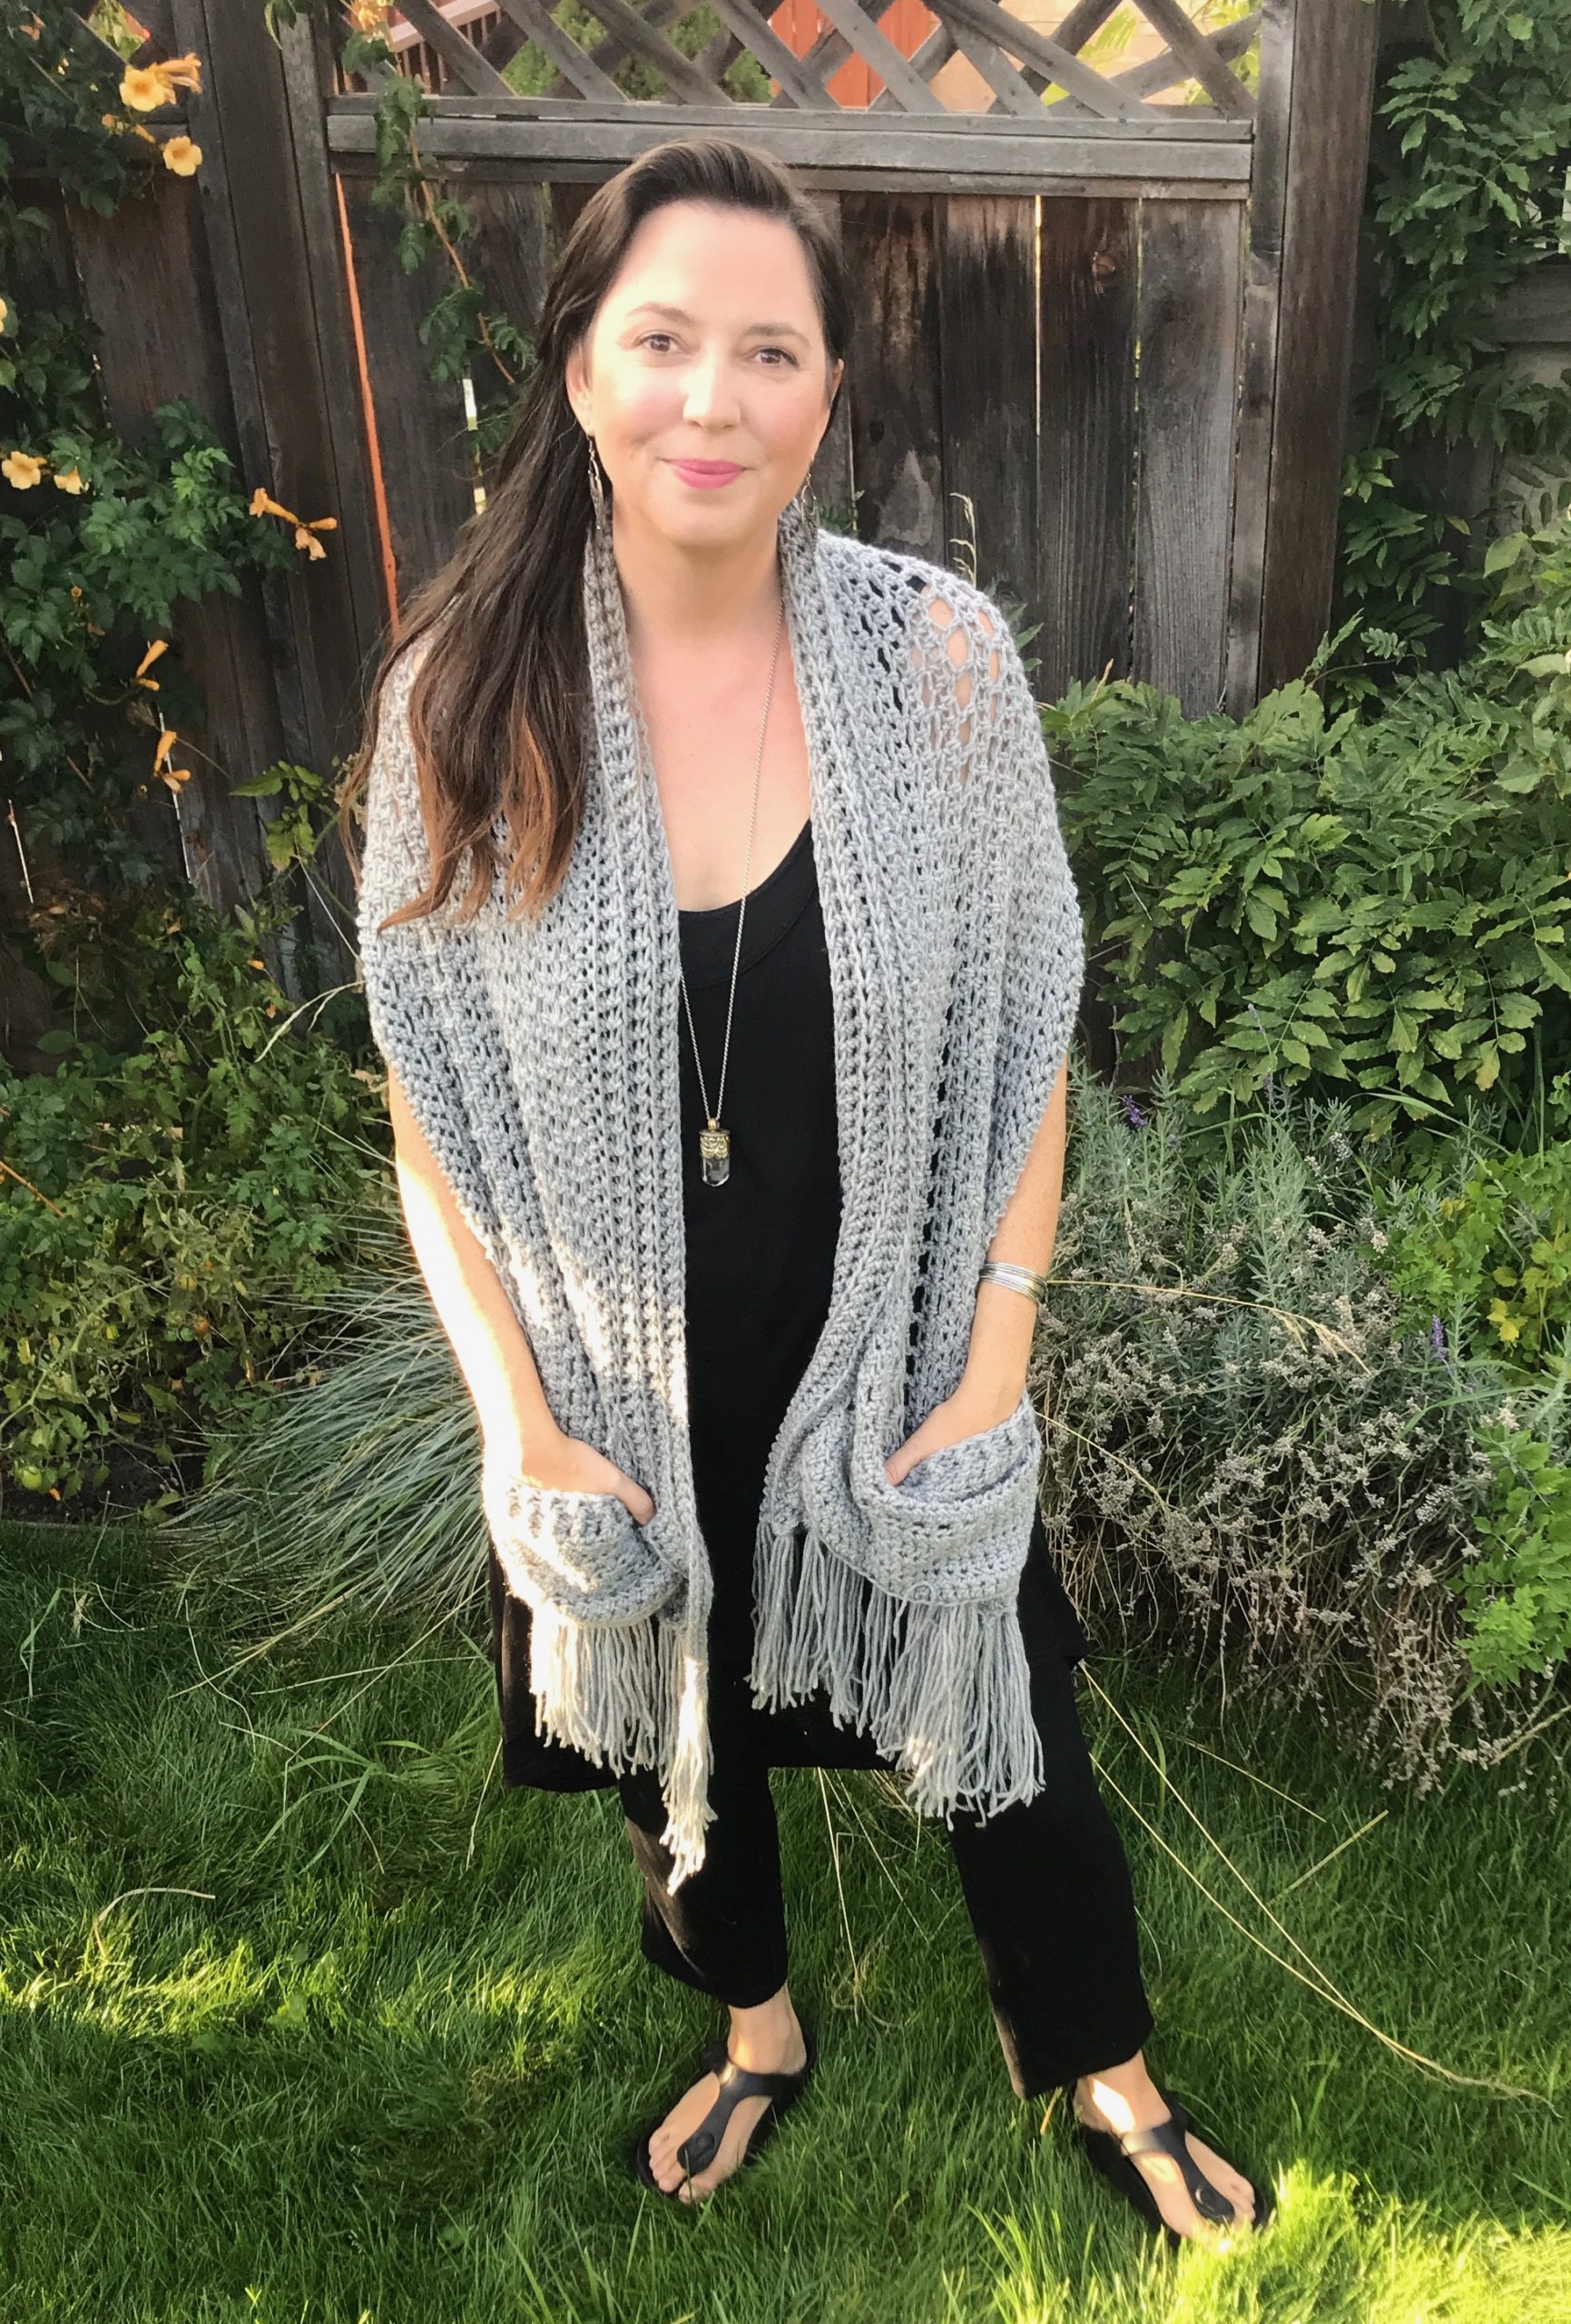
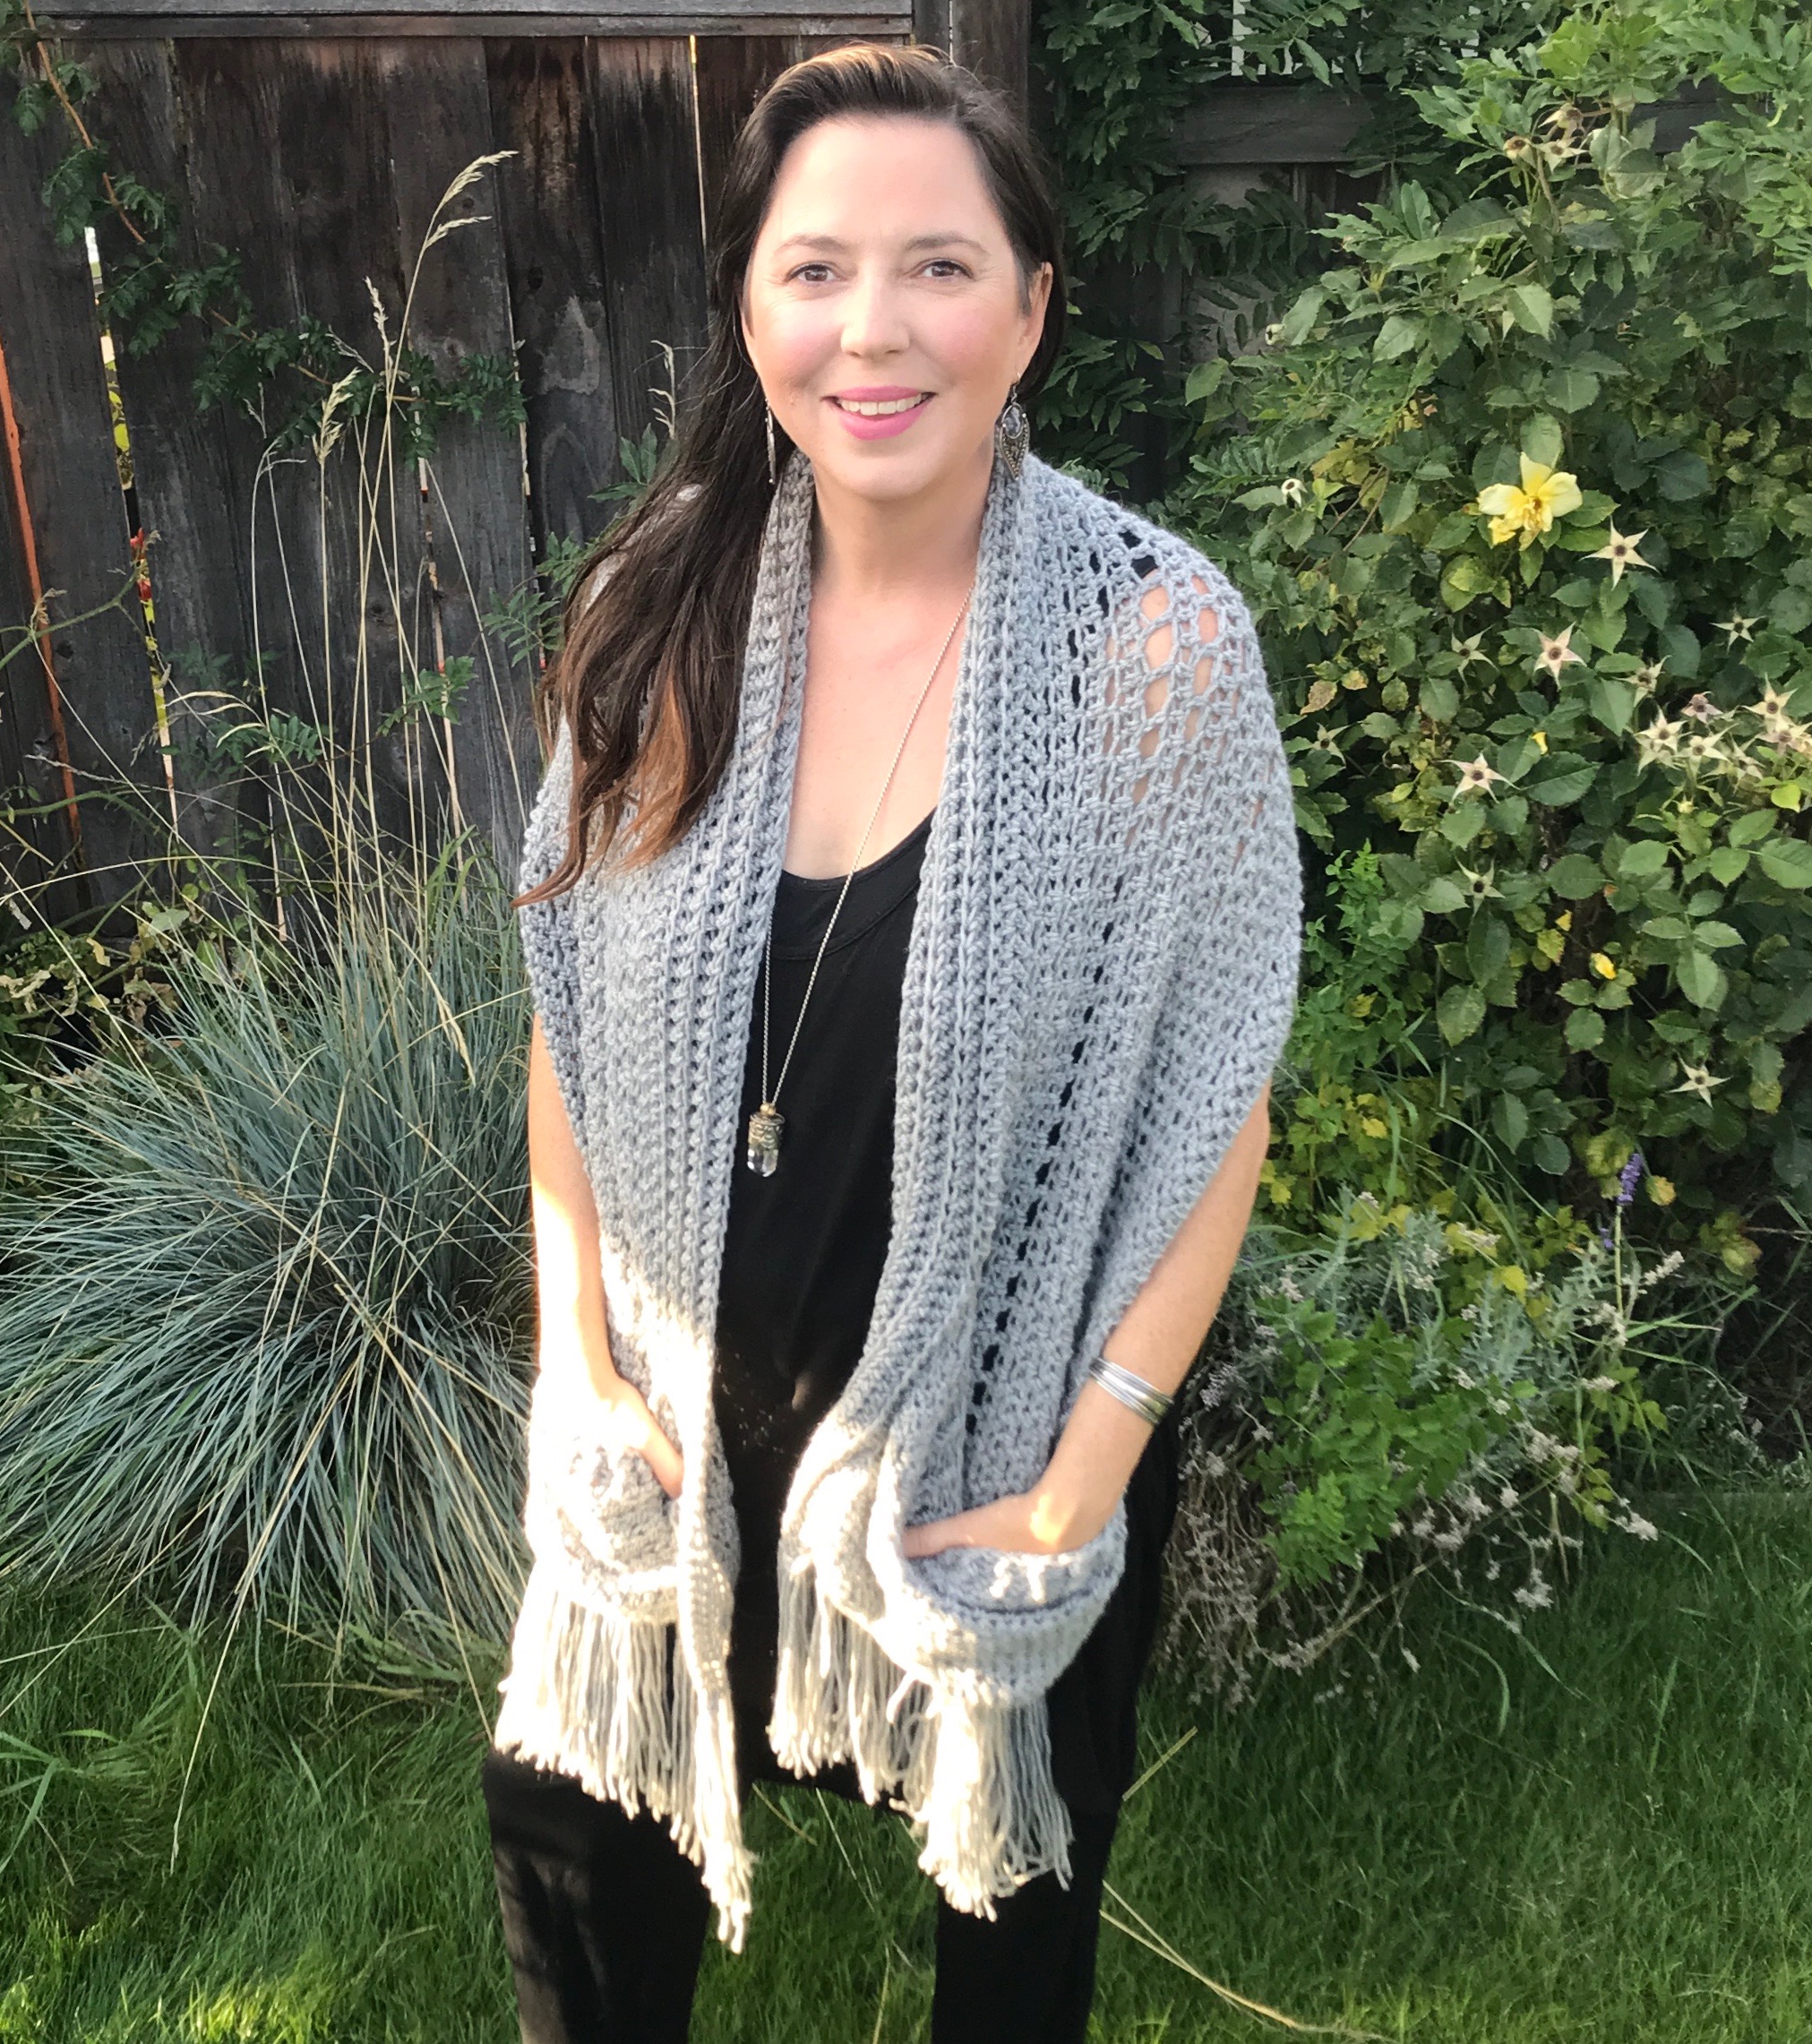
The West Coast Pocket Shawl is a free crochet pattern and perfect for autumn days when things begin to cool down. It has delicate stitch work and deep pockets so it keeps you snug and warm while it looks elegant and stylish.
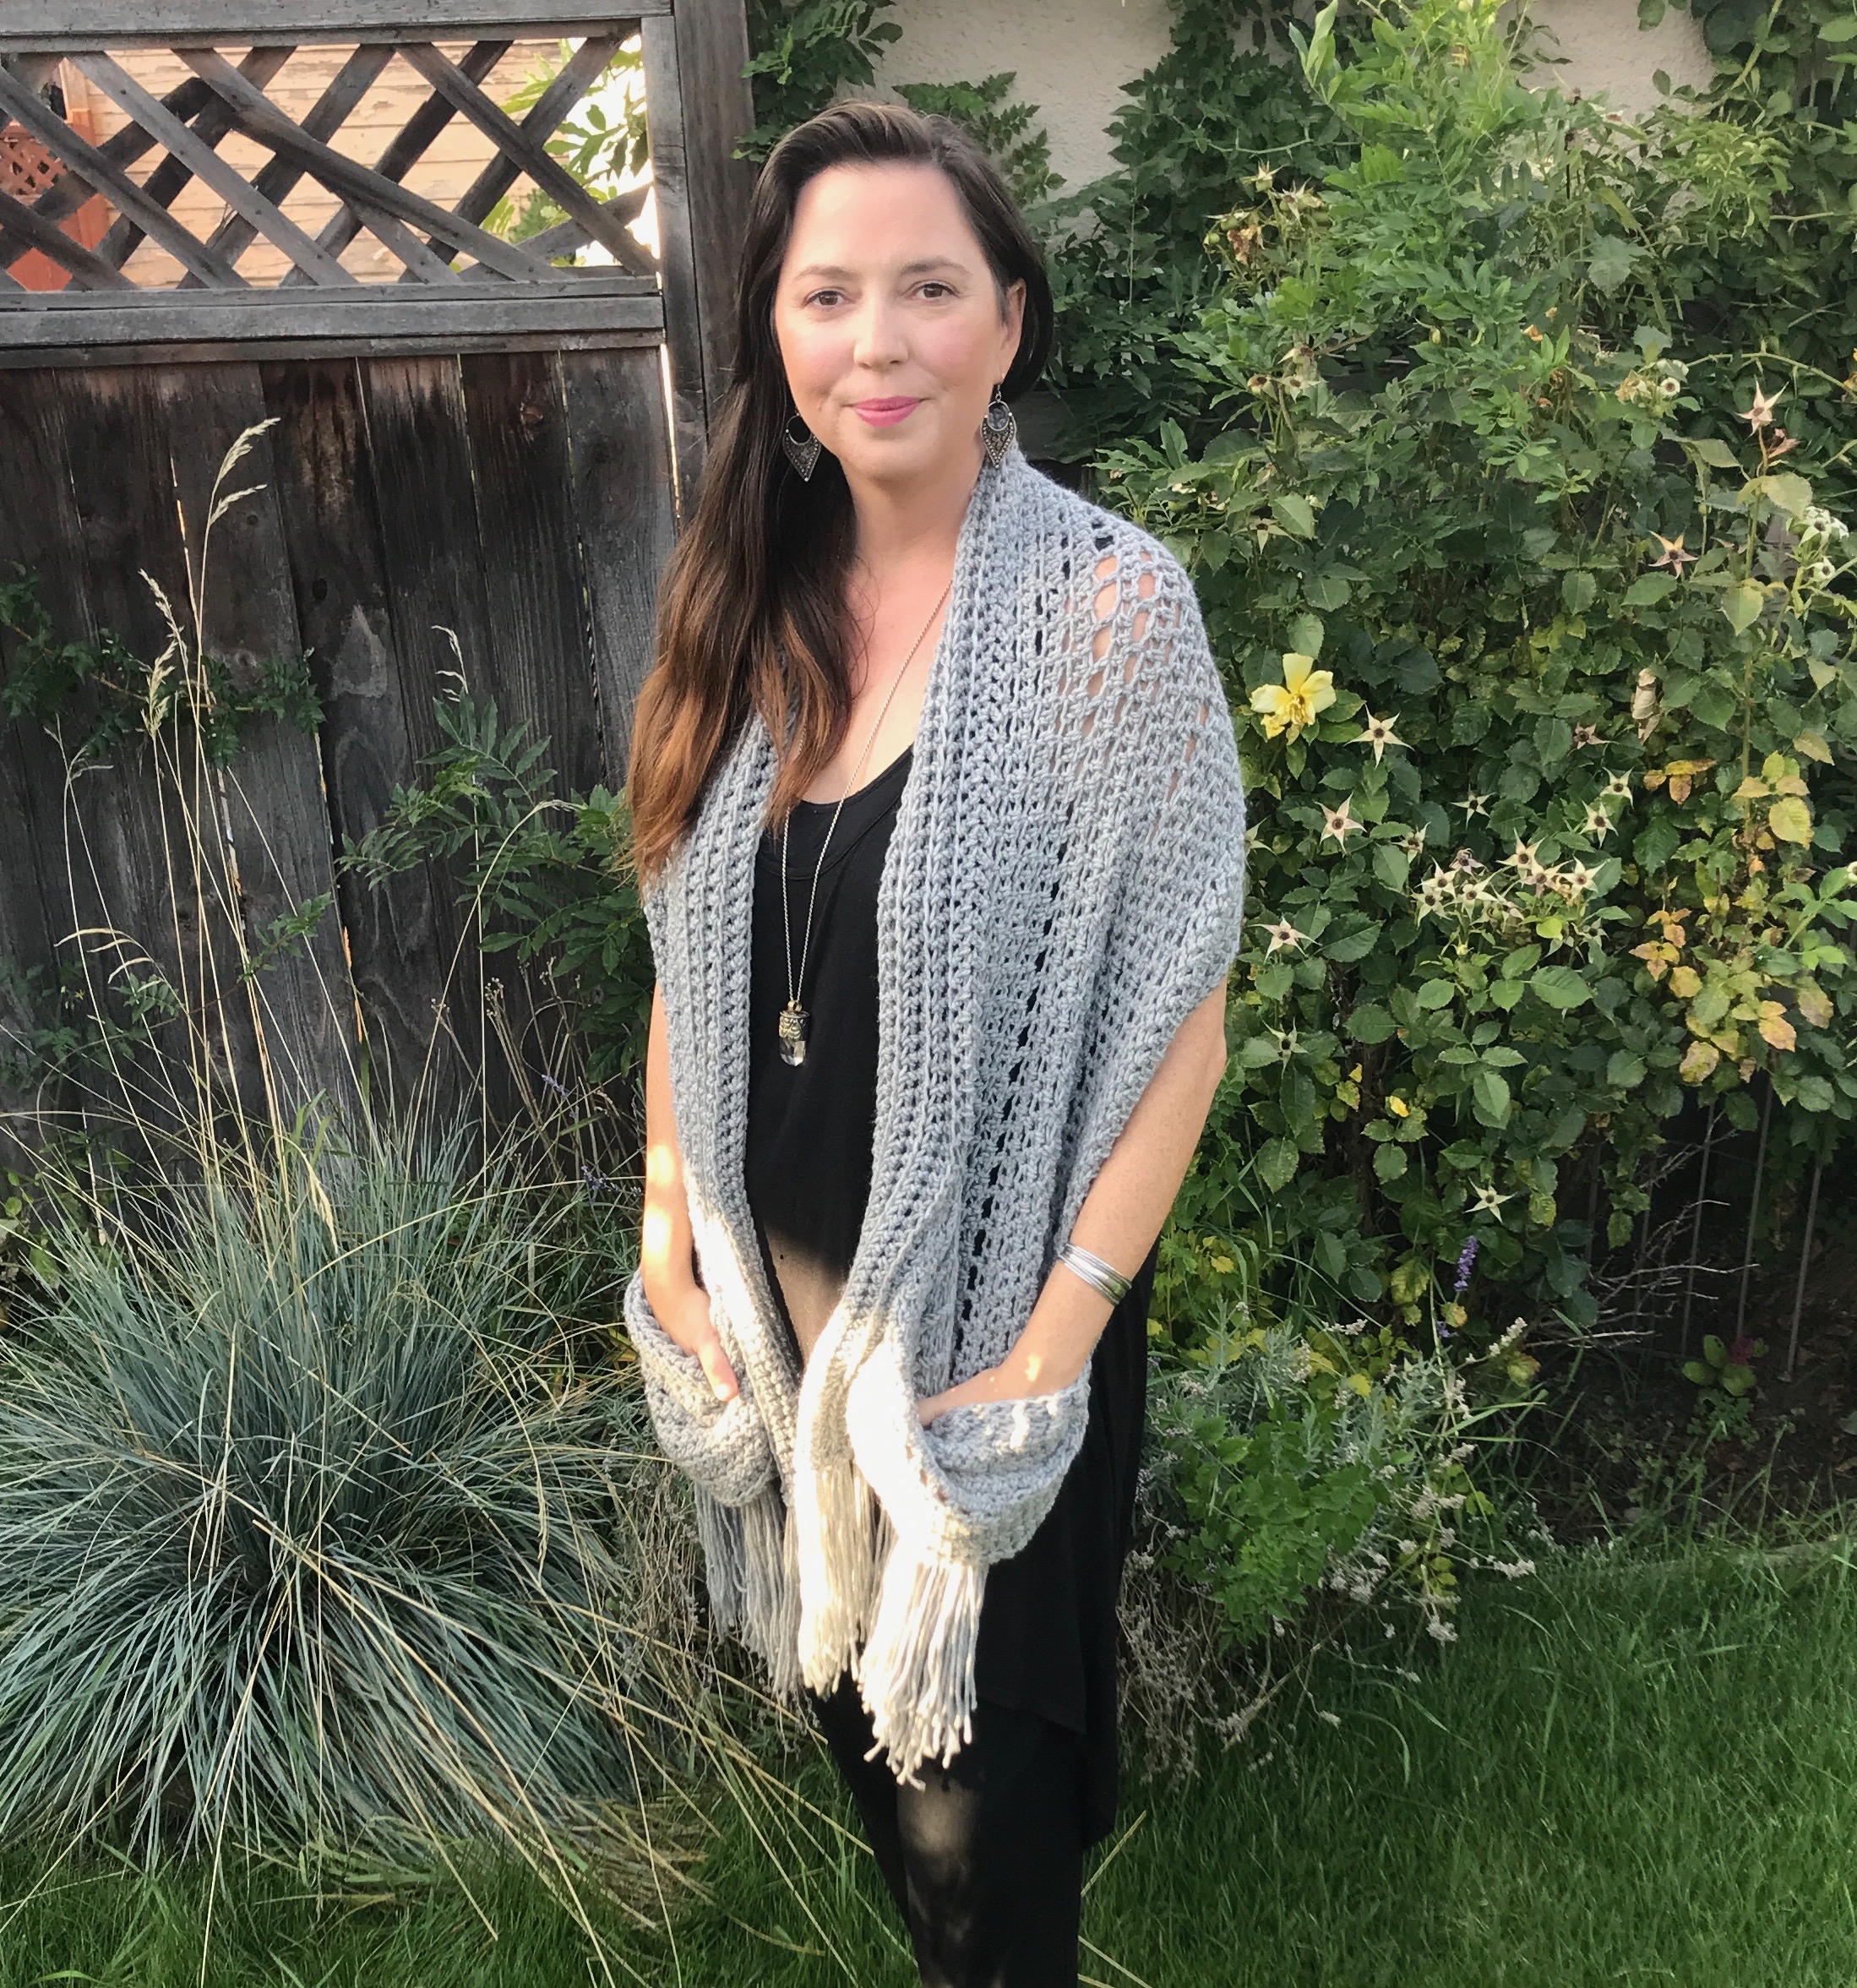
I love modern crochet projects with a little boho style and the West Coast pocket shawl, with its optional fringe, is a truly modern shawl design. Pocket shawls are the latest crochet craze and so popular right now.
**This post contains affiliate links. If you make a purchase using some of my links I may receive a small commission at no extra cost to you.**
I love the lacy quality of the West Coast Pocket Shawl.

Check out my Newsletter.
Please consider signing up for my newsletter and joining me over on facebook so you are always in the loop for what is happening with Carroway Crochet.
Sign up for my Newsletter
Get the latest info on free patterns and fun blog hops.
Join Me on Facebook.
Follow me on my Facebook Page for the latest video news and what I am up to.
Get the latest updates on Freebie Fridays by clicking on the image below to join my Carroway Crochet Community on Facebook.

Description of The West Coast Pocket Shawl.
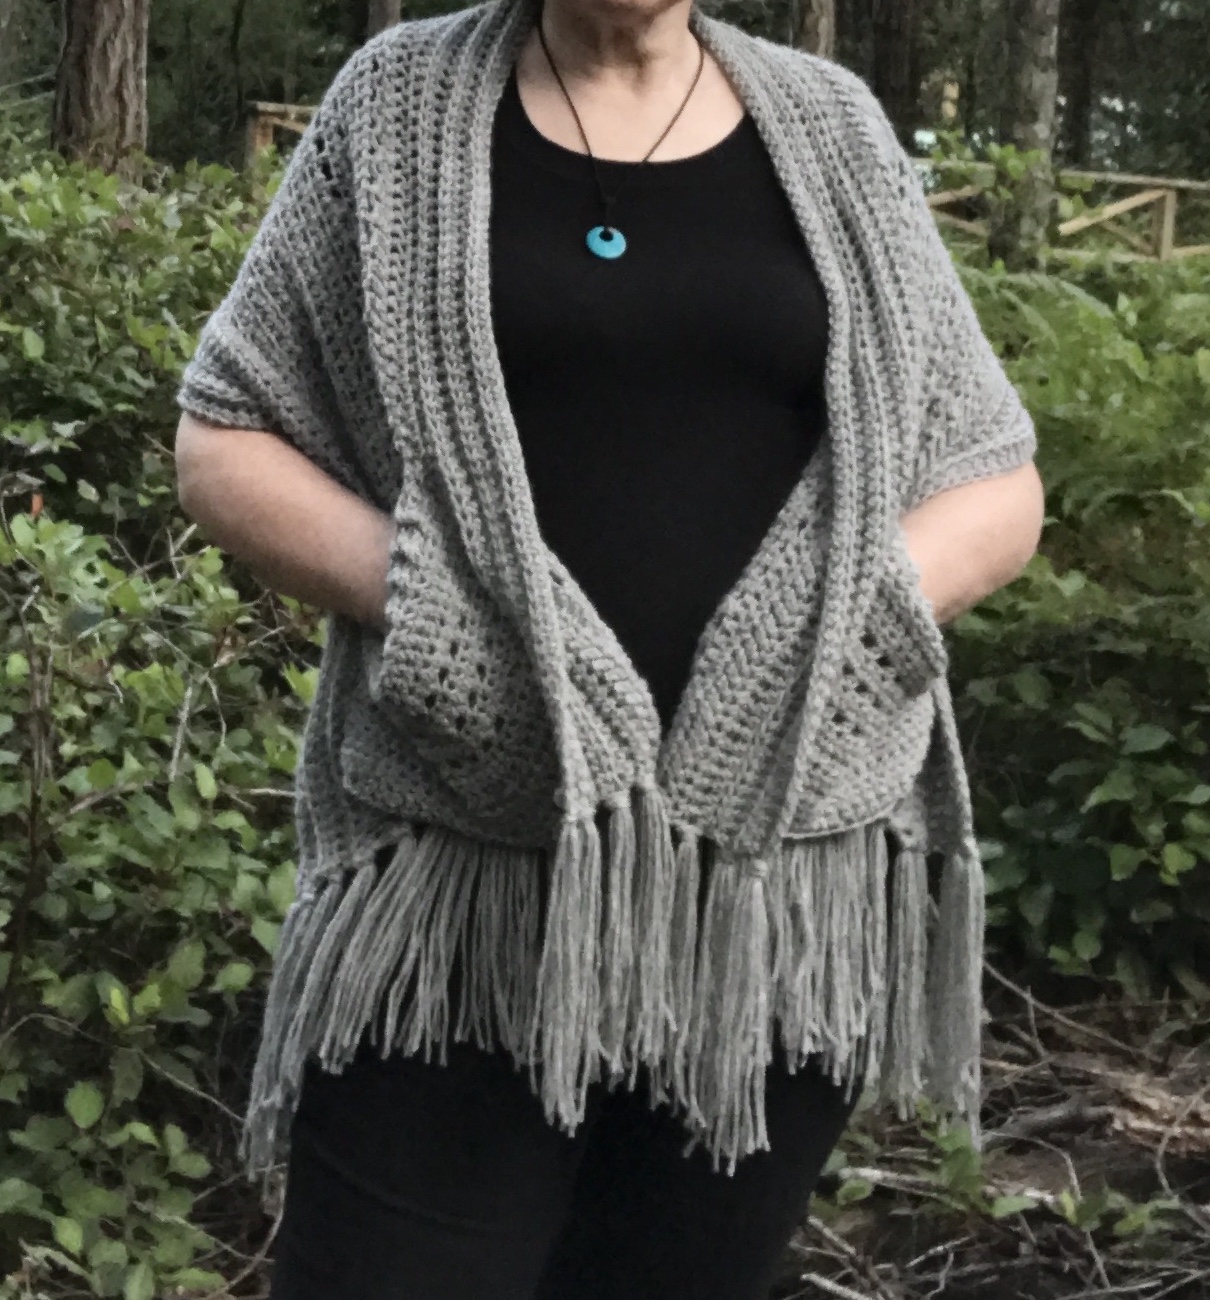
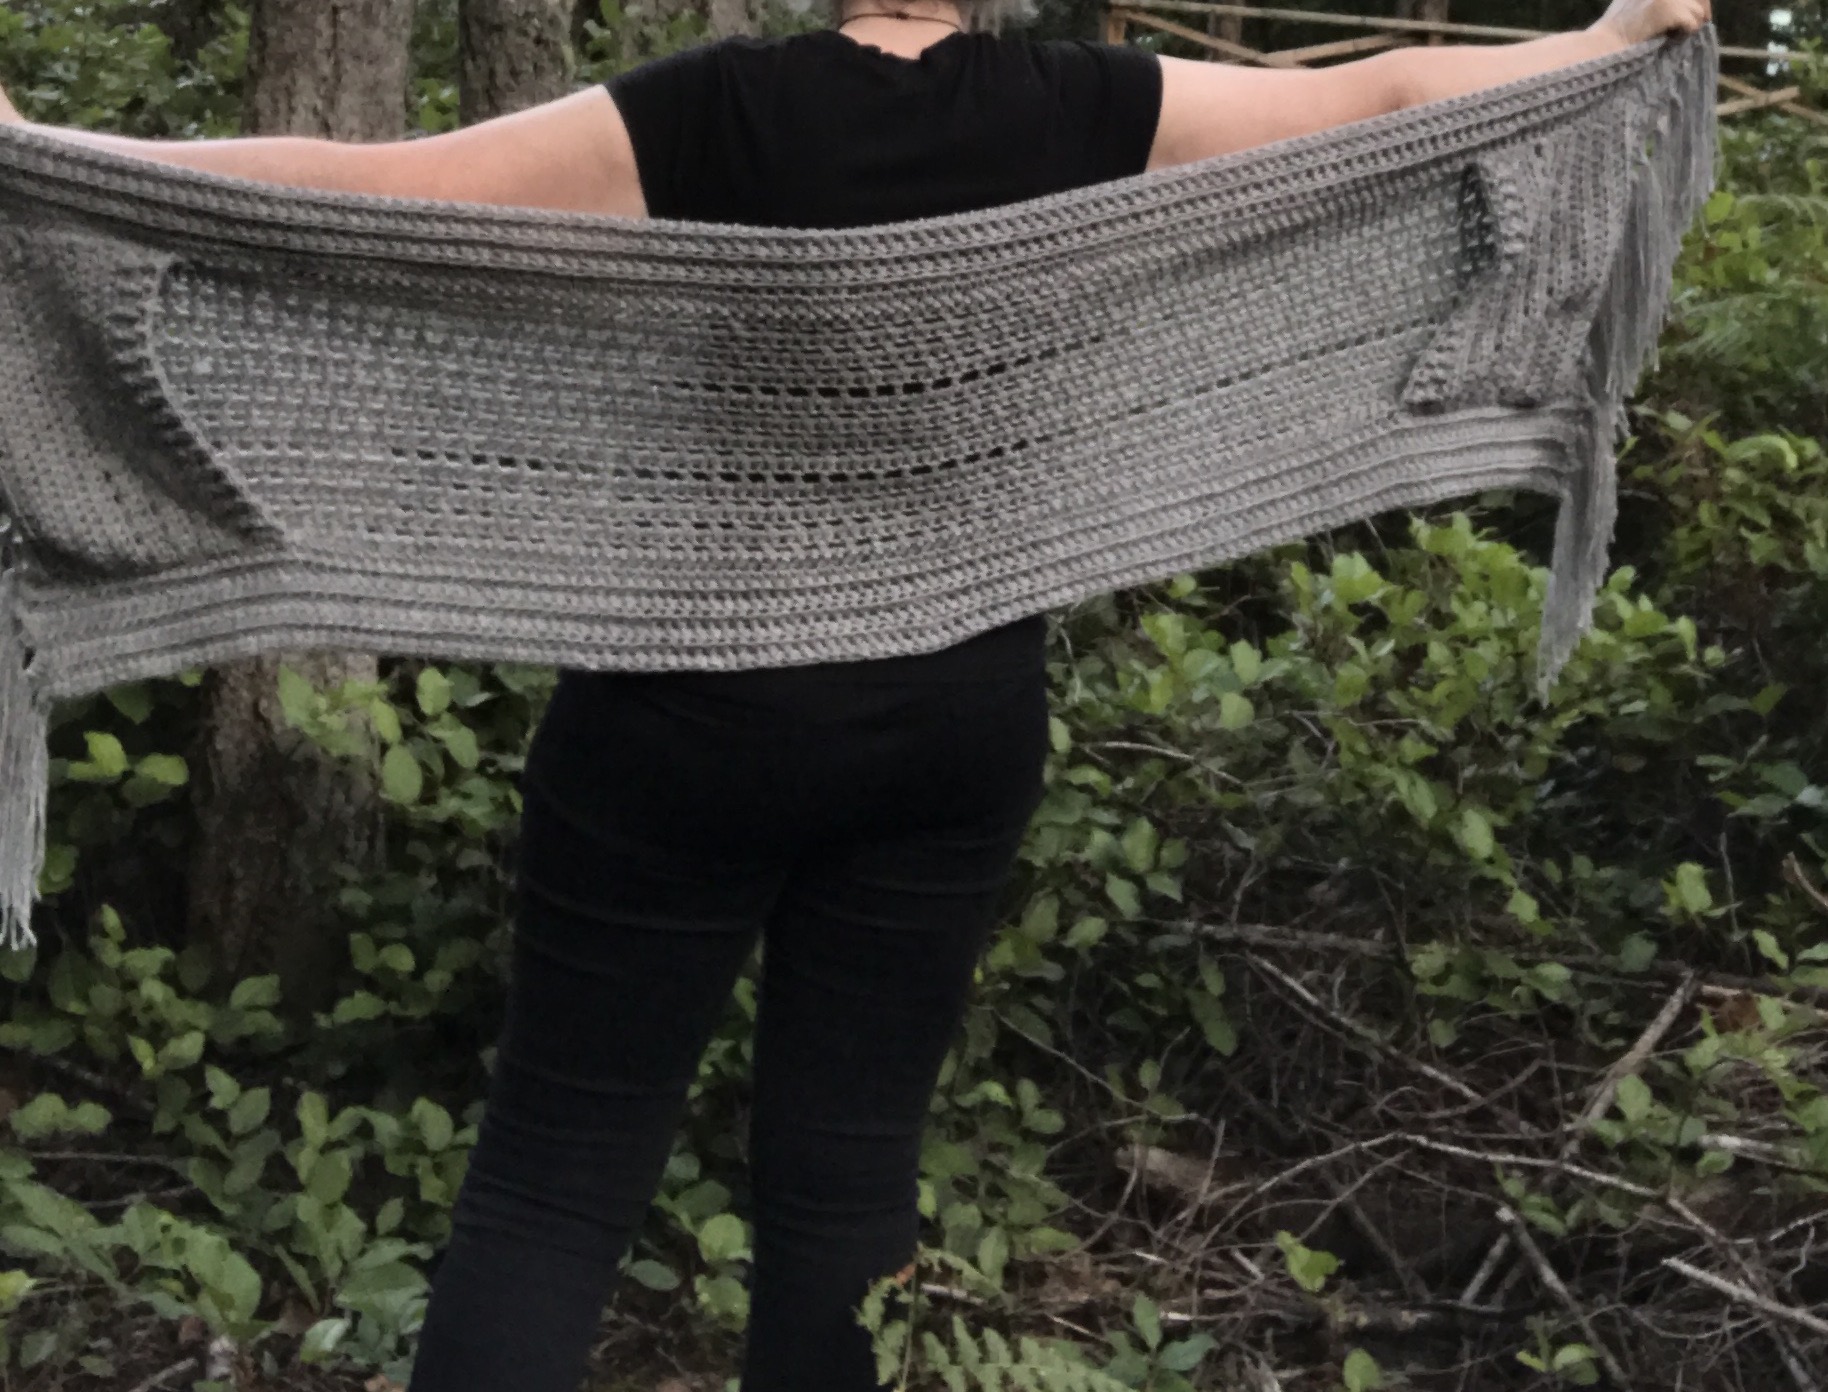
The West Coast Pocket Shawl is made up of one long rectangle. There are two large pockets added to either end of the shawl and a generous fringe is added to each end to give you a fun finish. To make this West Coast Pocket Shawl pattern you use double crochet and herringbone half double crochet stitches as well as front post and back post double crochet stitches.
You will need to do a little sewing when you add the pockets, but there are very detailed instructions and pictures for you as you will see in the pattern below. There are also instructions on how to add the fringe with pictures to help illustrate the process.


Get the ad free West Coast Pocket Shawl PDF on Etsy.

You can also get it on Ravelry.

You may also love my videos for the Samantha Sleeves Shrug.
Here is the right handed version.
And here is the left handed version.
Don’t forget to pin this free West Coast Pocket Shawl pattern for later so you don’t lose it.
Design Inspiration for The West Coast Pocket Shawl.
The inspiration for my West Coast Pocket Shawl was the stitch pattern. I wanted to create something delicate and feminine, yet warm and cozy when worn in the chilly fall season. I was really happy when I came up with this series of stitches for this special shawl. The pockets are super cozy too.
I used Bernat Cozy Style yarn in the colourway Soft Grey and I love the soft dusky grey for this shawl. The neutral tones are always a good classic colour choice as they work with everything in your wardrobe.
If you like Ponchos or Wraps you might want to check out my Summer Wrap
or Pacific Poncho Pattern. Both are modern crochet patterns I am sure you will love. I also have a hooded pocket shawl you might like.
PIN ME FOR LATER

The West Coast Pocket Shawl
Pattern by Pam Carr ©2020
Introducing the West Coast Pocket Shawl, which is a beginner friendly pocket shawl made with the double crochet and herringbone half double crochet stitches. I used Bernat Cozy Style yarn that comes in a huge 16 oz skein. I chose the soft grey for my pocket shawl.
Size: 19” x 56” or 70” with the fringe added.
Supplies you will need:
Yarn: worsted weight yarn (4) I used one skein of Yarnspirations Bernat Cozy Style yarn in soft grey. It comes in a large 16 oz/454 g skein with 1015 yards or 928m of yarn. You will have some yarn left over. You can use any worsted weight yarn. (4)
Hook: Size L- 8 mm and a K- 6.5 mm
Notions: Scissors, tapestry needle.
Gauge: 10 hdc – 8 hdc rows = 4”x 4″ (10 cm) with a K hook
Abbreviations (uses US conventions)
- Ch = chain
- st = stitch
- sc = single crochet
- hhdc = herringbone half double crochet
- sl st = slip stitch
- hdc = half double crochet
- fpdc = front post double crochet
- bpdc = back post double crochet

Special stitch for this pattern.
Herringbone Half Double Crochet (HHDC)
To make the HHDC stitch:
You work either into a foundation chain or the row below.
- Ch 1, Yarn over, insert hook into first stitch and pull up a loop (3 loops on hook)
- Pull first loop straight through the second (similar to a slip stitch)
- Yarn over, pull through two remaining loops on hook.
That’s it! How easy is that, and this stitch creates a beautiful texture.
Special Stitch for the Pockets.
At the top of the pockets there is a ribbing created by using alternating fpdc and bpdc.
Here are the written instructions for how to do the FPDC or front post double crochet.
Ch2, Yarn over, insert hook from the front side of the work to back and then to front again, around the post of the indicated stitch on the previous row; yarn over and pull up a loop (3 loops on hook), yarn over and draw through two loops, (2 loops on hook), yarn over and draw through two loops, (1 loop on hook).
And for the BPDC or back post double crochet.
Yarn over, insert hook from the back side of the work to front and to back again around the post of the indicated stitch on the previous row; yarn over and pull up a loop (3 loops on hook), yarn over and draw through two loops (2 loops on hook), yarn over and draw through two loops (1 loop on hook)
A tip to remember when working this ribbed brim.
When you work 1 front post double crochet (FPDC) around the post of the double crochet in the row below, this stitch is raised on the surface of the fabric facing you. Always make sure that the post stitches are raised to the same side in each successive row. Keep an eye on the ribs and remember: If the stitch you’re working is raised to the front, work a front-post stitch; if the stitch is raised to the back, work a back-post stitch.
US Terms.
This pattern uses US terminology. The US and UK crochet terms are different, but they use the same terms to describe different stitches. Here is a simple conversion chart for anyone in the UK.
| US
Half Double Crochet (hdc) Single Crochet (sc)
|
UK
Half Treble crochet (htr) Double Crochet (dc)
|
Instructions:
The turning chain does not count as a stitch.
Use the L hook to create the foundation chain. This prevents your first row of the shawl being tight.
Chain 141.
Change to the K hook.
Row 1: HDC into second chain from the hook, hdc across. Ch1 and turn. (140 st) This is the right side of the pocket shawl.
Work into the back loop only for Rows 2-6, the edging rows.
Row 2: HDC BLO into the first st and every st across, ch 1 and turn, (140 st)
Rows 3-6: HDC BLO into the first st and every st across, ch 1 and turn, (140 st)
Row 7 and 8: HHDC (see special stitch instructions above) across to the end. and turn. (140 st)
Row 9: Ch3, (this acts as a hdc and ch1), sk 1 st, hdc in next st, *ch1, sk 1, hdc in next st. * Repeat between the * and * to the end. Turn work.
Row 10: Ch1, *hdc into ch1 sp, hdc into top of hdc in the previous row*. Repeat between * and * to the end. Hdc into the space created by the ch3 turning chain from the previous row. Turn work. (140 st)
Row 11: Repeat row 9.
Row 12: Repeat row 10
Row 13: Repeat row 9.
Row 14: Repeat row 10
Row 15: Ch4 (this acts as a dc and ch 1), sk 1 st, dc in next st, *ch1, sk 1, dc in next st. * Repeat between the * and * to the end. Turn work.
Row 16: Ch1, *hdc into ch1 sp, hdc into top of dc in the previous row*. Repeat between * and * to the end. Hdc into the space created by the ch4 turning chain from the previous row. Turn work. (140 st)
Row 17: Repeat row 9.
Row 18: Repeat row 10.
Row 19: Repeat row 9.
Row: 20: Repeat row 10.
Row 21: Repeat row 9.
Row 22: Repeat row 10
Row 23: Ch4 (this acts as a dc and ch 1), sk 1 st, dc in next st, *ch1, sk 1, dc in next st. * Repeat between the * and * to the end. Turn work.
Row 24: h1, *hdc into ch1 sp, hdc into top of dc in the previous row*. Repeat between * and * to the end. Hdc into the space created by the ch4 turning chain from the previous row. Turn work. (140 st)
Row 25: Repeat row 9
Row 26: Repeat row 10
Row 27: Repeat row 9
Row 28: Repeat row 10
Row 29: Repeat row 9
Row 30-31: Ch 1 HHDC (see special stitch instructions above) across to the end. and turn work. (140 st)
Row 32: Ch 1 HDC into the first st and across. Ch1 and turn. (140 st)
Work into the back loop only for Rows 33-37, the edging rows.
Row 33: HDC BLO into the first st and every st across, ch 1 and turn, (140 st)
Row Rows 34–37: HDC BLO into the first st and every st across, ch 1 and turn, (140 st)
Fasten off and weave in the ends.
Pockets. (Make 2)
The turning chain does not count as a stitch.
Also note that for the pockets the rows for the mesh pattern are not the same numbers as in the shawl section.
With the K hook ch 31.
Row 1: HDC into second chain from the hook, hdc across. Ch1 and turn. This is the right side of the pocket. (30 st)
Row 2-4: HDC BLO into the first st and every st across, ch 1 and turn. (30 st)
Row 5-9: HDC into the first st and every st across. Ch1 and turn. (30 st)
Row 10: Ch3, sk 1 st, hdc in next st, *ch1, sk 1, hdc in next st. * Repeat between the * and * to the end. Turn work.
Row 11: Ch1, *hdc into ch1 sp, hdc into top of hdc in the previous row*. Repeat between * and * to the end. Turn work. (30 st)
Row 12-15: Repeat rows 10 and 11 twice
Rows 16-17: Ch1, HDC into the first st and every st across. Turn work. (30 st)
Row 18: Ch 2, DC into the first st and every st across. Turn work. (30 st)
Row 19: Ch 2, *FPDC into DC in row below, BPDC into next DC in row below* repeat across and dc into the last st, turn work.
Row 20: Ch 2, *FPDC into DC in row below, BPDC into next DC in row below* repeat around, and dc into the last st, turn work.
Row 21: Ch 2, *FPDC into DC in row below, BPDC into next DC in row below* repeat around, and dc into the last st, turn work.
Fasten off leaving a long tail to sew on the pocket and weave in any ends.
Now make your second pocket.
Construction.
The Fringe: Optional
Lay the shawl on a flat surface with the right side of your shawl facing you.
For the fringe to be approximately 7” long, cut strands of yarn that are 14” long.
Each fringe has five, 14” strands of yarn, which are folded, (put the ends together and create the loop that can be threaded into the bottom of the shawl and then knotted on. This creates a 10 stranded fringe.
I use a crochet hook to pull the loops through and then thread the long fringe through the loop and pull tight to create the knot.
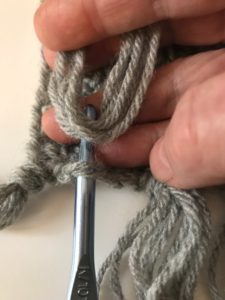
Insert your crochet hook up and through a loop on the bottom edge of the shawl, do this from the back of the work.
Grab the loop created by folding the strands of yarn. Use a hook that is big enough to hook the yarn and pull through the loop.
Always pull the fringe loop through from the same direction so the knots all match.
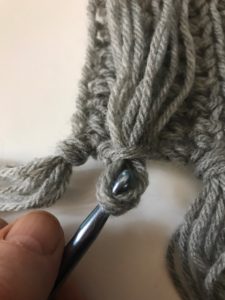
Enlarge the loop you have pulled down so it is big enough to bring the long strands down and thread them through this loop.
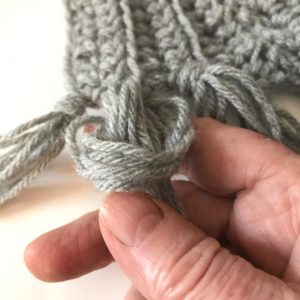
Pull the loop tight and move on to the next fringe.
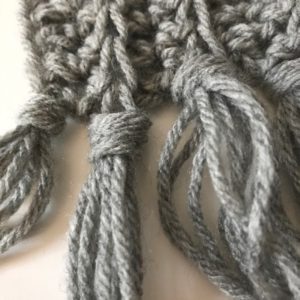
I spaced my fringes out so there were approximately 18 across, but you can do as many as you like.
The Pockets:
Lay down the shawl with the right side facing up.
Lay the pocket down on top of the end of the shawl with the right side facing up.
Centre the pocket directly above the fringe at one end of the shawl. I had the pocket sitting so each side was between the 2 rows of herringbone hdc. Use pins or stitch markers to hold the pocket in place.
Whip stitch the pocket on with the long tail you left when you fastened off the pocket. Start at the top corner and go down between the two rows of hhdc. This makes it easy to keep the pocket seam straight. Continue around the bottom and up the other side, also between the two rows of hhdc.
Now do the same on the other end of your Pocket Shawl.
Congratulations as this is a lot of crochet work and you deserve to be proud of your West Coast Pocket Shawl. I hope you enjoy your beautiful West Coast Shawl as you sit in the comfort of your home or go out on walks as the seasons change.
If you have any questions or need help with the patterns, please email me at carrowaycrochet@outlook.com, and Iʼll be glad to help you.

April Fools Freebie.
This is #8 of this years April Fools Freebies.
I will not be hosting all the patterns on one big blog post page dedicated to the April Fool’s Freebie Event as I have done in the past. This year I will be sharing the new free pattern downloads on my Social Media and in my newsletter.
Here is today’s April Fools Freebie Pattern for you.
This pattern is free for April 26th and Saturday April 27th.
How to Get Your April Fool’s Freebie PDF download.
Click on the image below and it will take you to the pattern listing on Ravelry.
Next click on ‘Buy Now”
At the checkout enter the coupon code APRILFOOLS25. Click on the apply coupon code.
DOWNLOAD YOUR FREE PATTERN.
Sign up for my newsletter to find out when the next Friday’s Freebie is.
Other Patterns You May Like.
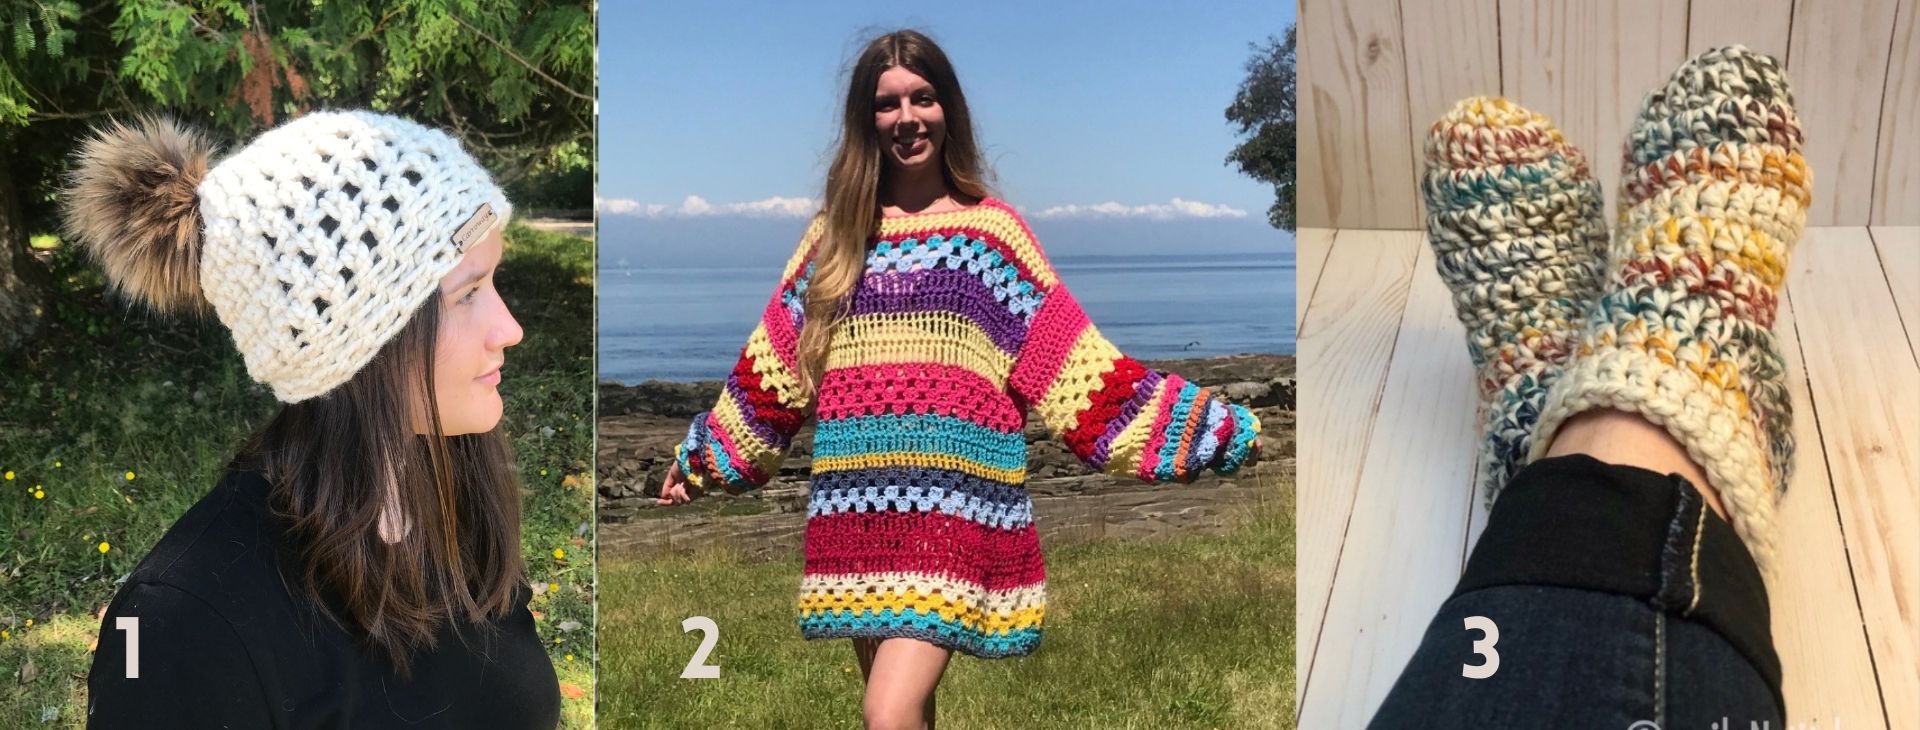
1. The Freedom Beanie.
2. The Happy Hippy Sweater
3. The Warmest Feet Ever Slipper Socks.
More Places to Find Crochet Free Patterns:
If you love crochet, you can find over a thousand free crochet patterns including some for crop tops and bralettes over at All Free Crochet
I am honoured to have my free crochet bralette pattern, the Earth Mother Bralette Pattern added to the All Free Crochet site.
 It is a great resource for crochet lovers and I am proud to also have my Take Me Outside Infinity Scarf Pattern posted over on the All Free Crochet Site.
Selling items made from my patterns?
You are more than welcome to se items made from my pattern. Please do share my link and tag and help promote it on social media. Thank you.
If you have any questions or need help with the patterns, please email me at carrowaycrochet@outlook.com, and Iʼll be glad to help you.
Thank you again for trying y pattern, I hope you enjoy it! Please share pictures of your completed Gloves on Instagram and Facebook. Tag them @carrowaycrochet #carrowaycrochet #shortandchunkygloves on Instagram.
Find other patterns by Carroway Crochet in my Etsy Shop and on Ravelry.
Let’s Share and Connect!
Thank you for trying my free crochet bralette pattern, I hope you enjoyed it! Please share pictures of your completed Bralettes on Instagram and Facebook. Tag them @carrowaycrochet #carrowaycrochet and #ivorylacebralette on Instagram.
Thank you so much for visiting me here at Carroway Crochet .
Find other patterns by Carroway Crochet in my Etsy Shop and on Ravelry.
Other places you can find me are:
This design, written work and images are a copyright of
©CarrowayCrochet and may not be copied or reproduced in any way.
You have permission to sell finished products made from this pattern, but please leave a link to my blog, www.carrowaycrochet.com in your product listing specifying that I am the designer of this pattern.
Thank you.