
Free Crochet Headband Pattern, The Honeysuckle Headband

How to Crochet a Skinny Headband with this Free Crochet Headband Pattern, The Honeysuckle Headband.
Do you love the look of a lightweight skinny headband? The Honeysuckle Headband Pattern is written up for Lightweight (3) yarn as well as for Worsted (4) weight yarn.

Today I am using one of my favourite crochet stitches to make a skinny crochet headband!
I love making headbands and this is my third skinny style headband, and it is written up for two different weights of yarn for your convenience.
Typically, when you mention a crochet headband you think of bulky weight ones. I have created the Simple Headband with a super bulky yarn for winter wear and the lighter weight Herringbone Twist Headband as well as the Velvet Twist Headband from worsted weight yarn.
This is my first headband pattern using lightweight (3) yarn.
I am happy to introduce my latest headband, it is the Honeysuckle Headband. It is a versatile pattern as it is written up for two different weights of yarn
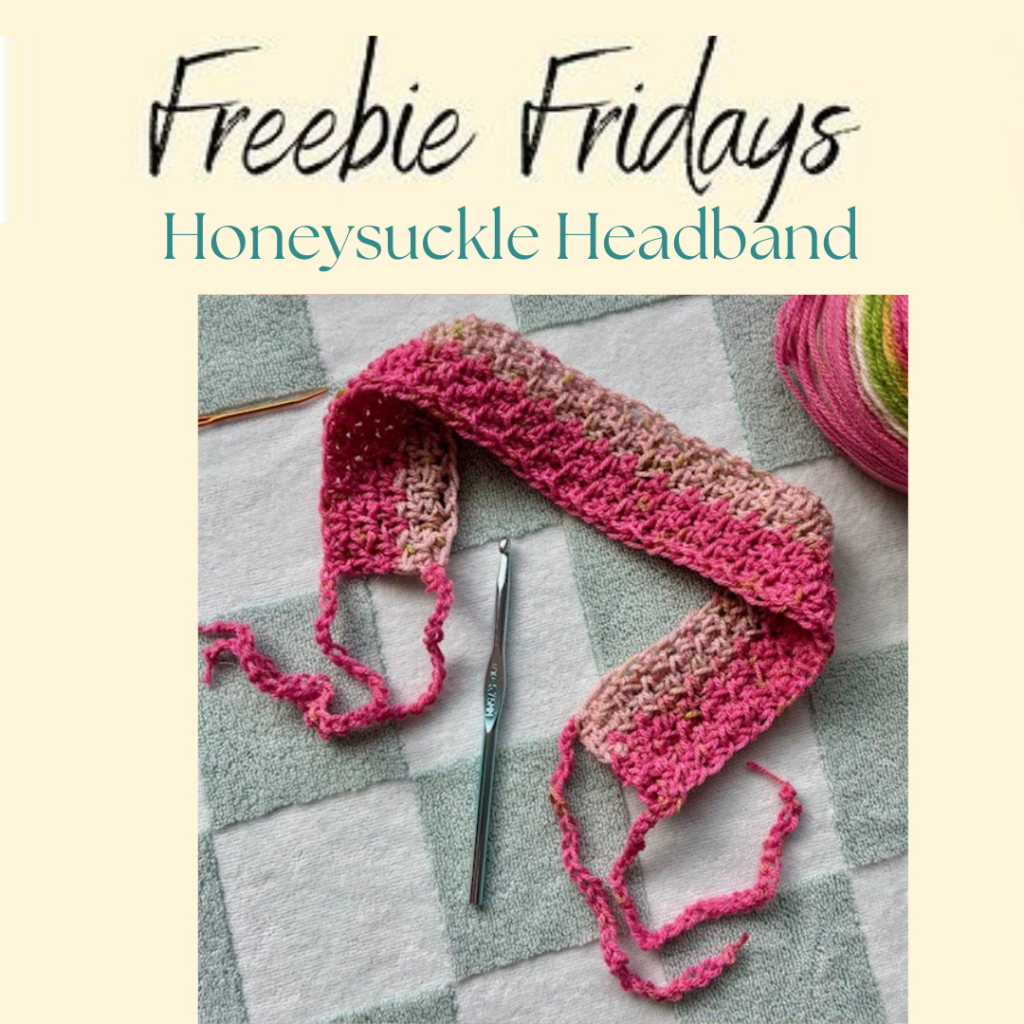
The Honeysuckle Headband is a modern style headband featuring four chained ties to allow you to fit it perfectly to your head.
It is so easy to make. Once you learn how to do the moss stitch, I am sure you will try many more patterns using this technique.
The Honeysuckle Headband is the perfect project for year round wear. I used some variegated yarn from my stash.
**This post contains affiliate links. If you make a purchase using some of my links I may receive a small commission at no extra cost to you.**
It is also available as an ad free pdf in my Ravelry Shop.


Sign up for my Newsletter!
If you want daily updates for the new FREE Patterns in this blog hop just sign up for my Newsletter.
Get the latest info on free patterns and fun blog hops.
Join Me on Facebook.
Follow me on my Facebook Page for the latest video news and what I am up to.
Get the latest updates on my free patterns, latest pattern releases and share your crochet projects with our Carroway Crochet Community on Facebook. You will also get the updates on new blog hops I host or new pattern releases.

Description of the Honeysuckle Headband Free Crochet Pattern.
The Honeysuckle Headband is crocheted flat and then ties are added to the four corners to allow you to tie it as tightly as you need it to be to fit you nicely.
It is made using the moss stitch and you create a beautiful texture with this beginner friendly stitch that is made with a single crochet and chain stitches I love the look of this subtle box like effect.

You can customize the length of the ties if you would like to. Some people love to have dangling ties while others prefer them to be shorter
Once you have made your headband and ties you can wear it many ways, Some like to tie it under their hair at the back while others like to wear it as a band around the top of their head over top of their hair.
Don’t Forget to Pin the Honeysuckle Headband so you Can Find It Later.

Are You a Visual Learner?
Here are the video tutorials on how to make my Honeysuckle Headband.
Here is the right handed tutorial.
And here is the left handed tutorial.

The Honeysuckle Headband
by Pam Carr ©2025
Introducing the Honeysuckle Headband, a great skinny headband accessory for you.
This pretty Honeysuckle headband is made with Lightweight (3) yarn. I used a cake of (3) weight yarn for this headband. Using a cake is a good way to get colour changes without all the loose ends to weave in. It works really well with the moss stitch.
You can also use any worsted weight (4) yarn if that is all you have, I have the option available for you.
You make this Honeysuckle Headband with the single crochet stitch and a ch1. It is so beginner friendly.
The Honeysuckle Headband.
Finished size
Teen/adult: Lightweight (3) version 2” x 17.5” approximately not counting the ties.
Worsted weight version 2” x 19” approximately not counting the ties.
The ties make this adaptable to smaller and larger head sizes. In the instructions I tell you how to make it longer or shorter should you choose to customize your headband.
Supplies you will need:
Yarn:
Version 1- Lightweight Yarn (3) 20 – 50 yards
Version 2: Worsted weight Yarn (4) 20-30 yds.
I used a cake of lightweight yarn that was in my stash. You can use any lightweight (3) yarn.
This was a variegated yarn so the colours changed randomly.
Hook:
For the Original Lightweight (3) yarn: J hook 5.75mm
For the Worsted Weight Yarn: K hook 6.5mm.
Notions: Tapestry needle and scissors.
Gauge:
Lightweight (3) Version: 8 sc /7 ch1 and 16 sc rows = 4” (10 cm) with a J 5.75 hook.
Worsted Weight Version: 7 sc /6 ch1 and 12 sc rows = 4” (10 cm) with a K 6.5mm hook.
Abbreviations (uses US conventions)
-
Ch = chain
-
st = stitch
-
St(s) – stitch(es)
-
Sp – space
-
Sk – skip
-
Ch – chain
-
Sc – single crochet
-
* –* – repeat instructions between asterisks
-
Rs – right side
Special Stitch for this pattern is The Moss Stitch.
The moss stitch is made with a combination of the single crochet and chain stitch) to create simple texture
How to make the Moss Stitch.
Note: the chain 2 at the beginning of each row counts as one moss stitch (sc and ch1).
Chain an even number of chain stitches.
Row 1: sc in 4th ch from hook, *ch1, skip 1ch, sc in next ch*, repeat between * and * to the end. The last stitch should be a sc. Turn work.
Row 2: ch2, sc in 1st ch1 space, *ch1, skip 1 stitch, sc in next ch1 space* repeat between * and * to the end . The last stitch should be a sc in the ch3 sp at the start of Row 1. Turn work.
Row 3: ch2, sc in 1st ch-1 space, *ch1, skip 1 stitch, sc in next ch1 space* – repeat between * and * to the end. The last stitch should be a sc in the ch2 sp at the start of Row 2. Turn work.
Repeat Row 3 to continue the moss stitch.
There are right and left handed video tutorials for the Moss Stitch on my Carroway Crochet YouTube channel.
This pattern uses US terminology. The US and UK crochet terms are different, but they use the same terms to describe different stitches. Here is a simple conversion chart for anyone in the UK.
USSingle crochet (sc) |
UKDouble crochet (dc) |
Version 1:
Instructions for the Lightweight (3) Yarn
The moss stitch always starts with an even number.
To make your headband bigger ch up in increments of 2, to make is smaller chain 2 less.
Ch 62 (For the worsted weight version ch 60)
Row 1: (This is the right side): Sc into the fourth ch from hook, *ch 1, sk 1 ch, sc into the next ch*, repeat between * and * to end of row. Turn work. (30sc stitches and 30 ch1 spaces)
Row 2: Ch 2, sc in first ch-1 sp, *ch 1, sk 1 st, sc in next ch1 sp* repeat between * and * to the end of the row. The last sc is made into the ch3 from the previous row. Turn work. (30sc stitches and 30 ch1 spaces)
Row 3: ch2, sc in 1st ch1 space, *ch1, skip 1 stitch, sc in next ch1 space* repeat between * and * to the end. The last stitch should be a sc in the ch2 sp at the start of Row 2. Turn work. (30sc stitches and 30 ch1 spaces)
Row 4: ch2, sc in 1st ch1 space, *ch1, skip 1 stitch, sc in next ch1 space* repeat between * and * to the end. The last stitch should be a sc in the ch2 sp at the start of Row 3. Turn work. (30sc stitches and 30 ch1 spaces)
Row 5-8: ch2, sc in 1st ch1 space, *ch1, skip 1 stitch, sc in next ch1 space* repeat between * and * to the end. The last stitch should be a sc in the ch2 sp at the start of Row 4. Turn work. (30sc stitches and 30 ch1 spaces)
Note: If you want a wider headband you can make more rows.
Do not fasten off.
Now you can make the first tie,
First tie: chain 30 (for a longer tie just make a longer chain)
Fasten off and weave in the ends.
Make the second tie.
Attach yarn to the other corner and ch30 for the second tie. (if you made your first tie longer than 30 chains, remember to make all your ties the same length.)
Fasten off and weave in the ends.
Making the Final Two Ties.
Attach yarn to the corner on the other side of the headband.
Ch30 for the third tie. (if you made your first tie longer than 30 chains, remember to make all your ties the same length.)
Fasten off and weave in the ends.
Go to the other corner
Attach yarn to the other corner and ch30 for the fourth tie. (if you made your first tie longer than 30 chains, remember to make all your ties the same length.)
Fasten off and weave in the ends

I hope you enjoy your Honeysuckle Headband
Version 2:
Instructions for Worsted Weight Option for the Honeysuckle Headband.
The moss stitch always starts with an even number.
To make your headband bigger ch up in increments of 2, to make is smaller chain 2 less.
Ch 60
Row 1: (This is the right side): Sc into the fourth ch from hook, *ch 1, sk 1 ch, sc into the next ch*, repeat between * and * to end of row. Turn work. (29sc stitches and 29 ch1 spaces)
Row 2: Ch 2, sc in first ch-1 sp, *ch 1, sk 1 st, sc in next ch1 sp* repeat between * and * to the end of the row. The last sc is made into the ch3 from the previous row. Turn work. (29sc stitches and 29 ch1 spaces)
Row 3: ch2, sc in 1st ch1 space, *ch1, skip 1 stitch, sc in next ch1 space* repeat between * and * to the end. The last stitch should be a sc in the ch2 sp at the start of Row 2. Turn work. (29sc stitches and 29 ch1 spaces)
Row 4: ch2, sc in 1st ch1 space, *ch1, skip 1 stitch, sc in next ch1 space* repeat between * and * to the end. The last stitch should be a sc in the ch2 sp at the start of Row 3. Turn work. (29sc stitches and 29 ch1 spaces)
Row 5: ch2, sc in 1st ch1 space, *ch1, skip 1 stitch, sc in next ch1 space* repeat between * and * to the end. The last stitch should be a sc in the ch2 sp at the start of Row 4. Turn work. (29sc stitches and 29 ch1 spaces)
Row 6: ch1, sc into the first stitch and into each stitch across. (58 sc st)
Do not fasten off..
Now you can make the first tie,
First tie: chain 30 (for a longer tie just make a longer chain)
Fasten off and weave in the ends.
Make the second tie.
Attach yarn to the other corner and ch30 for the second tie. (if you made your first tie longer than 30 chains, remember to make all your ties the same length.)
Fasten off and weave in the ends.
Making the Final Two Ties.
Attach yarn to the corner on the other side of the headband and ch30 for the third tie. (if you made your first tie longer than 30 chains, remember to make all your ties the same length.)
Fasten off and weave in the ends.
Go to the other corner
Attach yarn to the other corner and ch30 for the fourth tie. (if you made your first tie longer than 30 chains, remember to make all your ties the same length.)
Fasten off and weave in the ends
I am happy to answer any questions you may have, just message me at carrowaycrochet@outlook.com
Friday’s Freebie.
Here is today’s Friday’s Freebie Pattern for you.
This pattern is free for Friday July 10th and Saturday July 11th.
How to Get Your Friday’s Freebie PDF download.
Click on the image below and it will take you to the pattern listing on Ravelry.
Next click on ‘Buy Now”
At the checkout enter the coupon code FREEBIE26 Click on the apply coupon code.
DOWNLOAD YOUR FREE PATTERN.
OTHER FREE CROCHET PATTERNS YOU MIGHT LOVE!
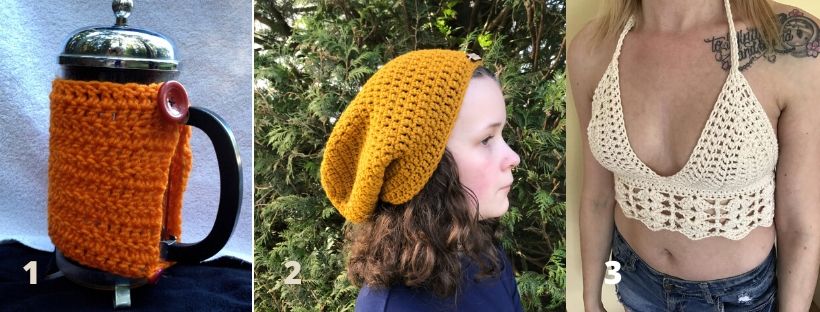
1. French Press Cozy
2. The Dreamer Beanie
3. The Ivory Lace Bralette
More Places to Find Crochet Free Patterns:
If you love crochet, you can find over a thousand free crochet patterns including some for crop tops and bralettes over at All Free Crochet
 I am honoured to have my free crochet bralette pattern, the Earth Mother Bralette Pattern added to the All Free Crochet site.

It is a great resource for crochet lovers and I am proud to also have my Bella B Shorts posted over on the All Free Crochet Site.
Selling items made from my patterns?
You are more than welcome to se items made from my pattern. Please do share my link and tag and help promote it on social media. Thank you.
Let’s Share and Connect!
Thank you so much for visiting me here at Carroway Crochet .
Other places you can find me are:
Ravelry
This design, written work and images are a copyright of
©CarrowayCrochet and may not be copied or reproduced in any way.
You have permission to sell finished products made from this pattern, but please leave a link to my blog, www.carrowaycrochet.com in your product listing specifying that I am the designer of this pattern.
Thank you.
Please follow and like us: