Granny Mug Rug Free Crochet Pattern

How to Crochet a Granny Mug Rug.
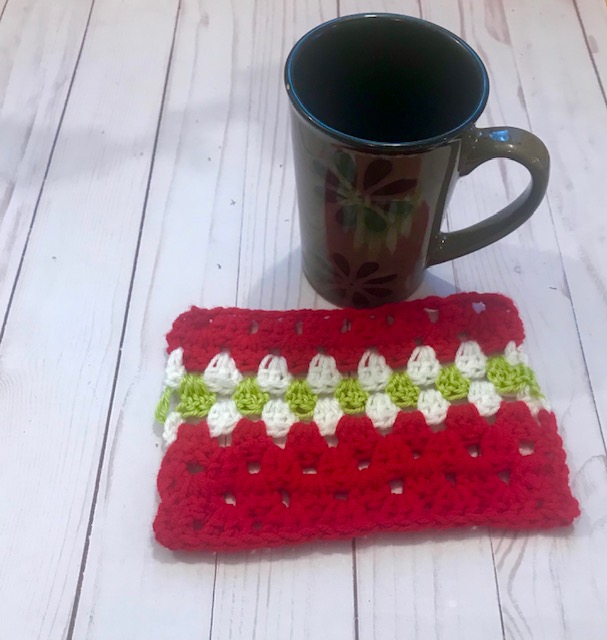
This Granny Mug Rug Free Crochet Pattern uses the popular granny stitch to create this multi-coloured striped mug rug. Mug Rugs are a great beginner crochet project as they can be competed so quickly and they add a bit of practical fun into your home. Mug Rugs are a great way to protect your table surfaces in your home. Make sure you use a washable yarn for your mug rugs as they are made to catch the occasional drips from the cups etc that are placed on them.
Hi everyone. I am so excited to share this Winter Mug Rug crochet pattern with you. This attractive mug rug is called the Granny Mug Rug because it is made with the Granny Stitch, sometimes called the granny stripe stitch. It make for an interesting crochet project.
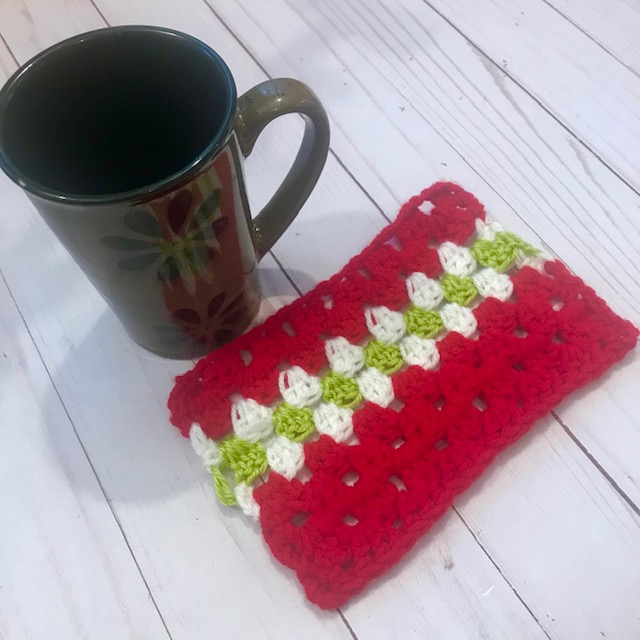
All the granny stitch uses is double crochet stitches, but they are made into shells or clusters to give it the distinctive granny stitch look. It truly looks so good and just shows how simple things can be so stylish and useful too.
Colour Changes in the Winter Mug Rug.
This mug rug changes colours in order to create stripes. I used red, white and green as this mug rug was designed with Christmas in mine. I also chose to not have the stripes evenly distributed as I like the way it looked this way. Something a little different.
If you don’t want to make the striped Granny mug rug you can just choose to work in one colour only.
**This post contains affiliate links. If you make a purchase using some of my links I may receive a small commission at no extra cost to you.*
Join me in the Carroway Crochet Community.
Share your crochet projects with our Carroway Crochet Community on Facebook. You will also get the updates on new blog hops I host or new pattern releases.

Do you prefer an ad free pdf download to work from.
There is an ad free pdf download available in my Ravelry Shop.

What is a Mug Rug?
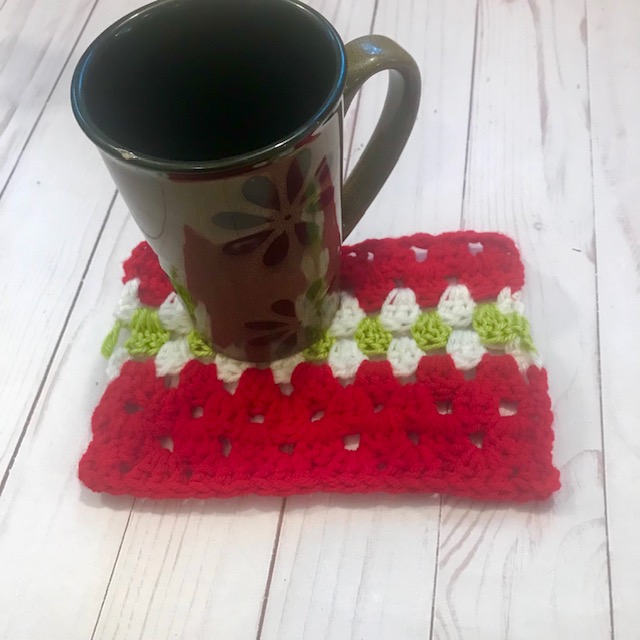
If you are new to mug rugs and wonder just what they are, they are exactly what the name describes, they are rugs for your mugs. They are a slightly larger than the regular coasters we usually make for our cups. Coasters are meant for your glasses and cups, a mug rug is slightly larger. You can even make one big enough so there is room to place a some snacks beside your favourite mug.
Join me in the new rage for crochet Mug Rugs. They have recently become a very popular crochet project with makers as they work up so quickly and are so useful. Be careful because they can become addictive as they are so quick and easy to make and are perfect gifts any time of the year. Combining them with a dish cloth or pot holder also makes for a great housewarming gift.
Description of the Winter Mug Rug Crochet Pattern.
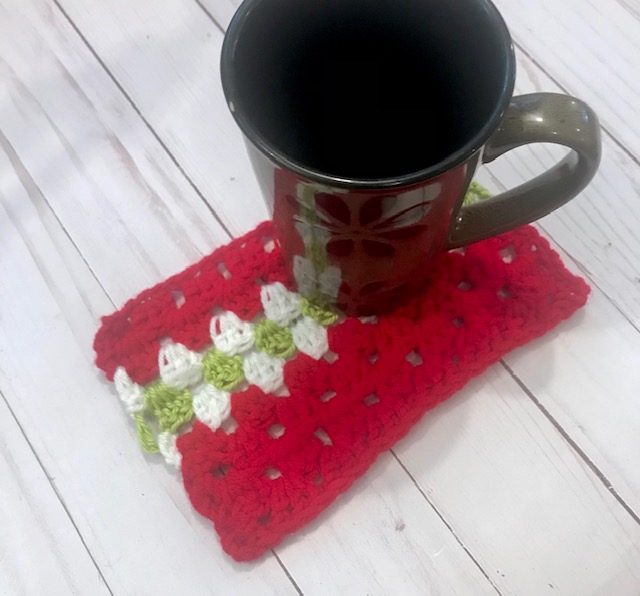
The Winter Mug Rug is an easy crochet mug rug that you can use for placing your coffee or tea cups on, or even your cold beverages.
This beginner friendly crochet mug rug pattern makes up into a 5″ by 7.5″ mug rug.
To make this easy crochet mug rug you will need worsted weight yarn, acrylic or cotton with both work. You will also need a 5mm H crochet hook and a yarn needle.
The stitch used in this easy mug rug is the double crochet stitch and it is used to make clusters of three stitches into one stitch or space. This is a technique called the granny stitch or granny stripe stitch.
I love how the granny stripe stitch look.
Some Other Kitchen Projects You Can Make for Yourself.
If you enjoy making mug rugs and something useful for your home, I have a pattern for a lovely Super Simple Dish Cloth. This can also double as a spa face cloth. Something else you can make for your kitchen is my Practically Perfect Potholder. These fun patterns are great as they are a nice sized project that you can pick up and make quite quickly and they don’t need much yarn.
I have some other mug rug patterns you might like to check out tool
For those new to crochet, I have video tutorials on my Carroway Crochet YouTube Channel that will demonstrate how to crochet the single crochet stitch as well as other beginner crochet stitches. I have both left and right handed version available to help beginner crocheters.
Are You a Visual Learner.
Here is another fun mug rug project you might like to look at.
I have video tutorials for the Scrappy Fun Mug Rug on my YouTube Channel.
Here is the right handed tutorial
Here is the left handed tutorial for all you lefties out there.
The Granny Mug Rug
by Pam Carr ©2023
Introducing the “Granny Fun Mug Rug” Pattern.
The Granny Mug Rug is a beginner friendly pattern and it is a great project for practicing the granny stitch, with ‘easy to follow’ instructions. This mug rug looks great and has the lovely granny stitch texture.
Mug Rugs are such a fun and easy project to make for your home. This mug rug features red, white and green stripes in an interesting pattern as I designed it with Christmas in mind.
You can make The Granny Mug Rug with random colours of yarn from your stash if you choose. Each one will be different depending on which yarn you have available.
A set of four tied up with a piece of yarn in a bow would make a unique and thoughtful gift idea.
You are also more than welcome to contact me with any questions you have about the instructions at carrowaycrochet@outlook.com
The Granny Mug Rug Pattern
Size: 5”x 7.5”
Supplies you will need:
Yarn: Category (4) Worsted Weight Yarn in any color of your choosing. This pattern was designed using Christmas colours but you are free to make it with worsted weight yarn that you have in your stash.
Hook: H-5.00mm
Notions: Yarn Needle, Scissors.
Gauge: 4 (3dc shells) x 8 (3dc shell) rows = 4” x 4” square
Abbreviations (uses US conventions)
-
Ch = chain
-
st = stitch
-
dc = double crochet
-
Sp = space
Special stitch for this pattern. The Granny Stripe Stitch.
The Granny Stripe Stitch is worked into a chain of multiples of 3 plus 2.
Row 1: Right Side. DC into the 3rd chain from hook. (this acts as 2 dc) *Skip 2 stitches, then work 3dcs into the next ch*, (this is your first shell). Repeat between * and * until there are two chain stitches left, sk 1 ch, work 2 dc into the last ch st. Turn work.
You should have a row that begins and ends with 2dc’s. on either side of all your shells.
NOTE: For the next row you will be working into the spaces between the 3dc shells of the previous row.
Row 2: Ch 3, then work 3dc stitches (a shell) into the first sp between the 2dcs at the end of the previous row and the next 3 dc shell. Work a 3dc shell into each space across. At the end of the row, work 1 dc into the top of the ch3 made at start of previous row. Turn work.
Row 3: Ch 3, 1 dc in same space as the ch 3, work a 3dc shell into each space to the end of the row, work 2 dc into the top of the turning chain from the previous row. Turn work.
Rows 2 and 3 form the pattern.
This pattern uses US terminology. The US and UK crochet terms are different, but they use the same terms to describe different stitches. Here is a simple conversion chart for anyone in the UK.
USSingle Crochet (sc)Double Crochet (dc) |
UKDouble crochet (dc)Treble Crochet (tr) |
Instructions for the Granny Mug Rug.
Note:
Shell or cluster are terms sometimes used to refer to the combination of 3 dc into one stitch or space.
With Red yarn.
Chain 23
Row 1: Right Side. DC into the 3rd chain from hook. (you now have a ch3 and a dc, together they act as 2dc) *Skip 2 ch stitches, then work 3dcs into the next ch*, (this is your first shell). Repeat between * and * until there are two chain stitches left, sk1 st, work 2 dc into the last ch st. Turn work.
You should have a row that begins and ends with 2dc’s. on either side of all your shells.
Special Note.
For the next row you will be working into the spaces between the 3dc shells of the previous row.
Row 2: Ch 3, then work 3dc stitches (a shell) into the first space between the 2dcs at the end of the previous row and the next 3 dc shell. Work a 3dc shell into each space across. At the end of the row, work 1 dc into the top of the ch3 at start of previous row. Turn work.
Change to white
Row 3: Ch 3, 1dc in same space as the ch 3, work a 3dc shell into each space to the end of the row, work 2 dc into the top of the turning chain from the previous row. Turn work.
You should have a row that begins and ends with 2dc’s. on either side of all your shells.
Change to. Green
Row 4: Ch 3, then work 3dc stitches (a shell) into the first sp between the 2dcs at the end of the previous row and the next 3 dc shell. Work a 3dc shell into each space across. At the end of the row, work 1 dc into the top of the ch3 made at start of previous row. Turn work.
Change to white
Row 5: Ch 3, 1dc in same space as the ch 3, work a 3dc shell into each space to the end of the row, work 2 dc into the top of the turning chain from the previous row. Turn work.
You should have a row that begins and ends with 2dc’s. on either side of all your shells.
Change to Red
Row 6: Ch 3, then work 3dc stitches (a shell) into the first sp between the 2dcs at the end of the previous row and the next 3 dc shell. Work a 3dc shell into each space across. At the end of the row, work 1 dc into the top of the ch3 made at start of previous row. Turn work.
Row 7: Ch 3, 1dc in same space as the ch 3, work a 3dc shell into each space to the end of the row, work 2 dc into the top of the turning chain from the previous row. Turn work.
You should have a row that begins and ends with 2dc’s. on either side of all your shells.
Row 8: Ch 3, then work 3dc stitches (a shell) into the first sp between the 2dcs at the end of the previous row and the next 3 dc shell. Work a 3dc shell into each space across. At the end of the row, work 1 dc into the top of the ch3 made at start of previous row. Turn work.
Row 9: Ch 3, 1dc in same space as the ch 3, work a 3dc shell into each space to the end of the row, work 2 dc into the top of the turning chain from the previous row. Turn work.
You should have a row that begins and ends with 2dc’s. on either side of all your shells.
Fasten off your yarn and weave in the ends.
You now have a beautiful Granny Mug Rug.
Counting the Days To Christmas
December 14th you can download this pattern for free as part of the Counting The Days To Christmas event.
Just click on the button below and enter the coupon code CHRISTMAS2023 at the checkout for your free pattern pdf download.
Don’t forget to go to the Counting the Days To Christmas blog post for more great patterns.
OTHER FREE CROCHET PATTERNS YOU MIGHT LOVE!
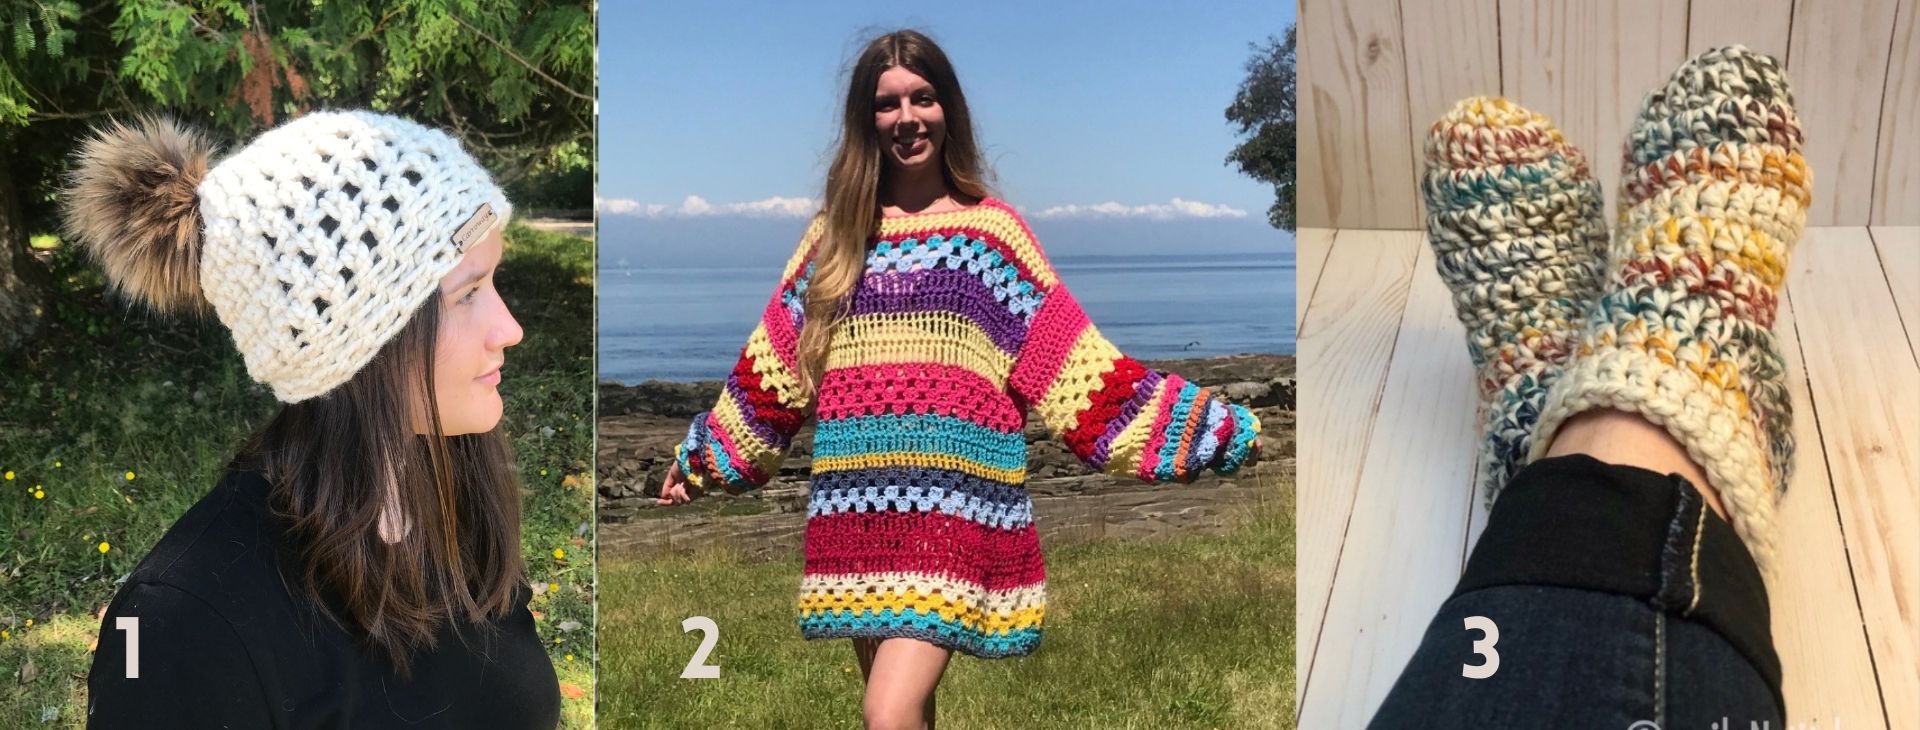
1. The Freedom Beanie.
2. The Happy Hippy Sweater
3. The Warmest Feet Ever Slipper Socks.
More Places to Find Crochet Free Patterns:
If you love crochet, you can find over a thousand free crochet patterns including some for crop tops and bralettes over at All Free Crochet
I am honoured to have my free crochet bralette pattern, the Earth Mother Bralette Pattern added to the All Free Crochet site.
 It is a great resource for crochet lovers and I am proud to also have my Take Me Outside Infinity Scarf Pattern posted over on the All Free Crochet Site.
 It is a great resource for crochet lovers and I am proud to also have my
Selling items made from my patterns?
You are more than welcome to se items made from my pattern. Please do share my link and tag and help promote it on social media. Thank you.
If you have any questions or need help with the patterns, please email me at carrowaycrochet@outlook.com, and Iʼll be glad to help you.
Find other patterns by Carroway Crochet in my Etsy Shop and on Ravelry.
Let’s Share and Connect!
Thank you so much for visiting me here at Carroway Crochet .
Find other patterns by Carroway Crochet in my Etsy Shop and on Ravelry.
Other places you can find me are:
Ravelry
This design, written work and images are a copyright of
©CarrowayCrochet and may not be copied or reproduced in any way.
You have permission to sell finished products made from this pattern, but please leave a link to my blog, www.carrowaycrochet.com in your product listing specifying that I am the designer of this pattern.
Thank you.
Please follow and like us:
One thought on “Granny Mug Rug Free Crochet Pattern”
Comments are closed.