
How To Make A Slip Knot for Crochet

How to Make a Slip Knot for Crochet.
Welcome to my beginner step by step tutorial for how to make a slip knot for crochet.
What is a slip knot?
When you crochet you will find that most projects start with making a slip knot. A slip knot can also be called a long knot or a chain knot. It is an adjustable loop or starting knot that it is crucial to learn in order to learn to crochet.
We need a way to attach the yarn to the crochet hook so we can proceed with our project. The slip knot is the most popular way to attach the yarn to your hook. It is the first thing we need to learn how to do so we can get started on our crochet projects. It is made by creating a simple loop at the end of the yarn, then this loop is placed on the crochet hook. A slip knot is a special kind of knot as it can be pulled tight, yet it can be opened enough to slide your hook in to start making a crochet chain.
This slip knot tutorial is for beginners to crochet. It is the first thing you need to learn how to do and it is very easy to learn how to make a slip knot.
Note: The photos for this step by step how to make a slip knot for crochet tutorial are for right-handed crocheters. I also have a video showing this technique for how to make a slip knot for crochet.
If you’re left-handed, I have a how to make a slip knot for crochet video tutorial that demonstrates making a slip knot and how to make a chain.
Which Slip Knot Is For You?
There are many ways to create a slip knot, and some can be a very confusing. I am demonstrating a simple method I learned when I first started to crochet. I think this is a simple method and. hope it works for you. If you find it is not for you, there are many other methods demonstrated on YouTube or by other crochet teachers.
This technique of tying a slip knot is a great way to get you started on your crochet journey. As soon as you make your first slip knot, you are ready to start making chain stitches and your are well and truly on. your way.
Supplies to Make A Slip Knot For Crochet.
When your first decide to start learning crochet its a good idea to start with a mid-size hook and yarn. I would recommend you get an H/8 (5.0mm) crochet hook and some worsted weight yarn. You can get either acrylic, wool, or cotton yarn for when you first start learning. To find a worsted weight (4) yarn in the shop you need to look at the label on the skein and look for the number (4). This label will also have information on what hook size you should use with the yarn being sold.
If you choose to start with a chunkier yarn you can find out which hook you will need by checking the label on the yarn you select.
Pin This for Later
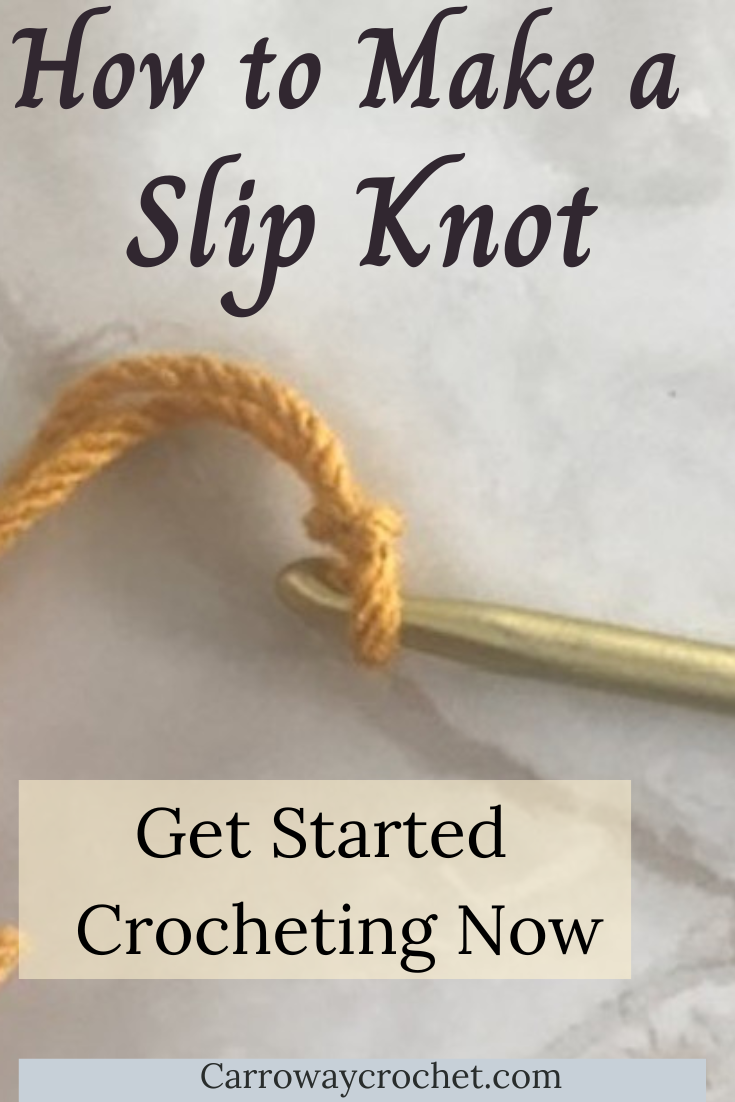
How to Make a Slip Knot for Crochet
Here are the steps you will be completing when you make a slip knot.
-
Lay the yarn tail across the palm of your hand so the tail extends over the pointer finger.
-
Take the end of the tail of yarn and wrap it over and around the pointer finger twice. Use the middle finger to pinch the yarn between the pointer and middle finger.
-
Using the fingers of the other hand, pick up the loop furthest from the tip of the finger and lift it over the strand of yarn nearest the end of the finger and drop it down onto the end of your finger.
-
Now pinch the loop furthest away from the end of your finger and lift it over the first loop and off the end of your pointer finger.
-
Take your hook and slip it under the loop left on your finger and gently lift if off of your finger. Now pull the tail of the yarn to tighten the knot.
Here is the Step By Step Photo Tutorial to Show How to Make a Slip Knot For Crochet.
Follow this photo tutorial to learn how to make this slip knot so you will be on your way to crocheting.
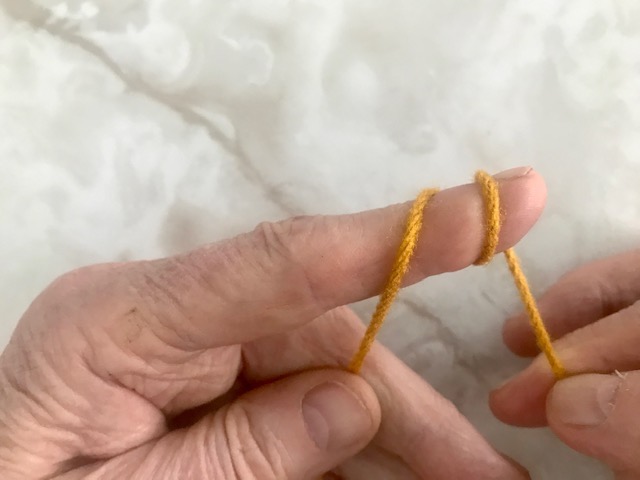
Step 1: How to hold the yarn
Lay the yarn tail across the palm of your left hand, holding the yarn tail with your right hand.
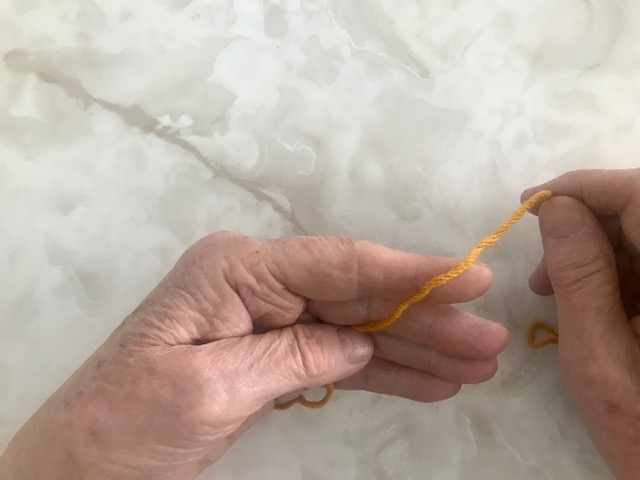
Straighten your pointer finger.
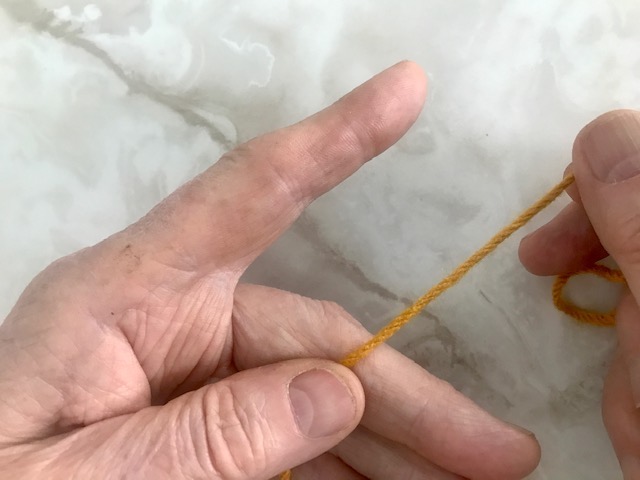
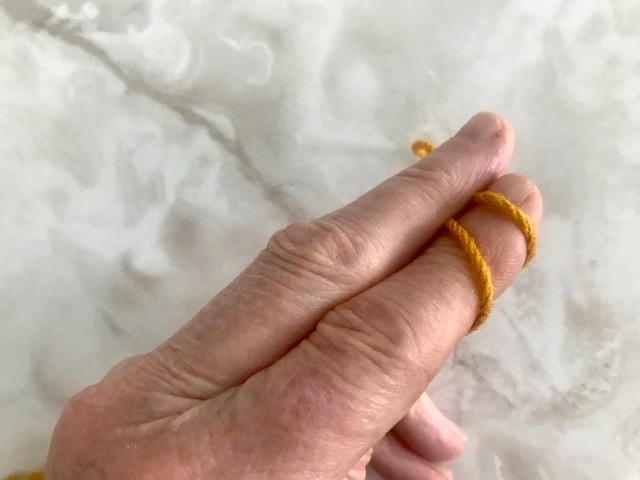
Step 2: Wrap the yarn twice around your pointer finger.
Hold the yarn tail taut with your left hand as shown above, wrap the yarn over the pointer finger, working from the front and around the back of the finger. Do this twice. Hold the loops taut with your right hand fingers.
Step 3: Pinch the yarn.
Close your index finger so it presses up against your pointer finger and holds the yarn in place without you needing to use your right hand.
Step 4: Loop the yarn over.
With. your right hand pinch the loop furthest from the tip of your finger and lift it over the loop closest to the tip of your finger.
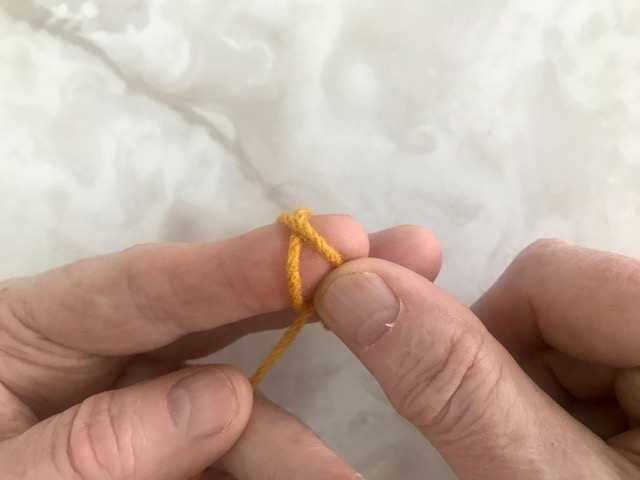
Step 5: Pull over the second loop.
Now take the loop you just skipped over and lift it up and over the loop nearest the tip of the finger and let it drop down.

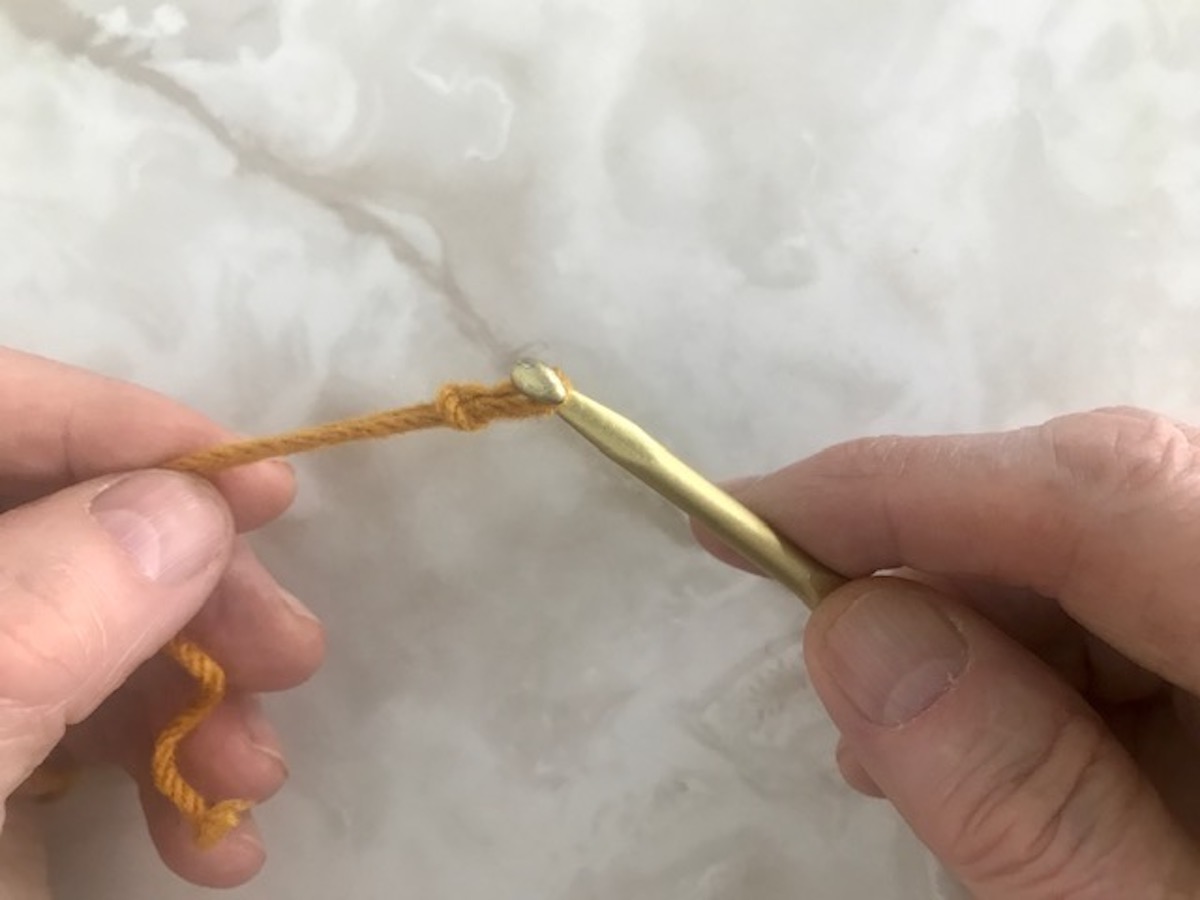
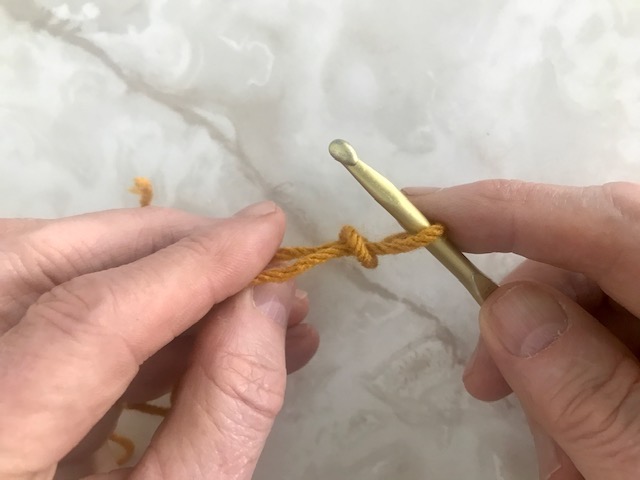
Step 6: Begin to move the loop onto your crochet hook.
Take your crochet hook and slip it under the loop left on your finger.
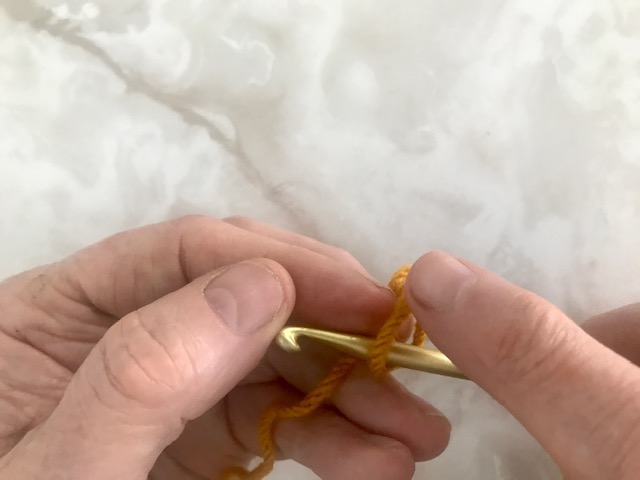
Step 7: How to complete moving your slip knot onto your crochet hook.
Catch the yarn on your hook and pull the loop off the finger still holding the tail and working yarn tight in your fingers of the left hand.
Step 8: Tightening your slip knot.
Now you can pull the long tail of the yarn to tighten the knot.
Step 9:
Now you have completed your slip knot.
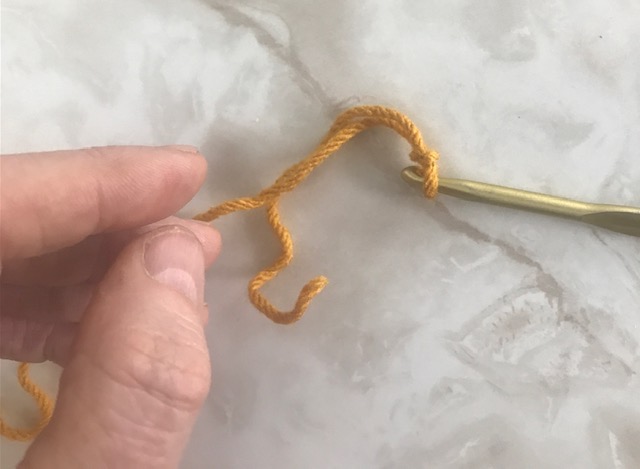
You are ready to begin to make the chain. This is the next step on your journey to be able to crochet.
I hope this tutorial has helped you learn how to make a slip knot for crochet. The videos might make it easier for those who find learning from videos to be easier than photographs.
I am so excited your are beginning your dream of learning to crochet and hope you share your creations as you move on to a Super Simple Dishcloth and more.
-
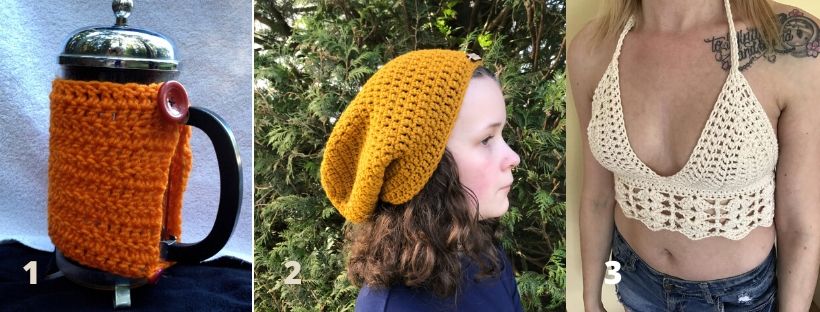
HERE ARE SOME FREE CROCHET PATTERNS YOU MIGHT LOVE!

1. French Press Cozy
2. The Dreamer Beanie
3. The Ivory Lace Bralette

More Places to Find Crochet Free Patterns:
If you love crochet, you can find over a thousand free crochet patterns including some for crop tops and bralettes over at All Free Crochet
I am honoured to have my free crochet bralette pattern, the Earth Mother Bralette Pattern added to the All Free Crochet site.
It is a great resource for crochet lovers and I am proud to also have my Take Me Outside Infinity Scarf Pattern posted over on the All Free Crochet Site.
 It is a great resource for crochet lovers and I am proud to also have my
 Selling items made from my patterns?
You are more than welcome to sell items made from my pattern. Please do share my link and tag and help promote it on social media. Thank you.
If you have any questions or need help with the patterns, please email me at carrowaycrochet@outlook.com, and Iʼll be glad to help you.
Find other patterns by Carroway Crochet in my Etsy Shop and on Ravelry.

Let’s Share and Connect!
Thank you so much for visiting me here at Carroway Crochet. Your support and visits help me to grow and add more and more great content to my blog.
Other places you can find me are:
Ravelry
Thank you and happy crocheting.
Please follow and like us: