
Free Crochet Bralette Pattern: The Freya Fringe Bralette

Looking for an easy free crochet bralette pattern?
You need look no further. Summer is on its way. One thing we can be sure of is that summer days will soon be here and it seems to perfect time to lift our spirits with some new fashion ideas. This free crochet bralette pattern is a great way to prepare for summer days.

I thought I’d share this free crochet bralette pattern at this time as it is so elegant and fun Perfect for fun and finery.
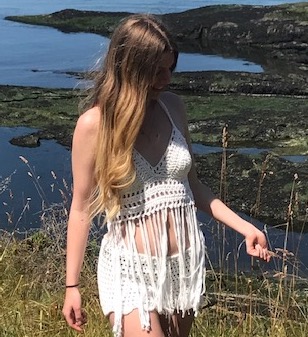
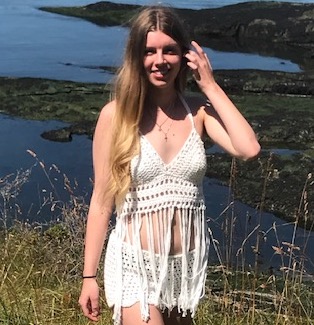
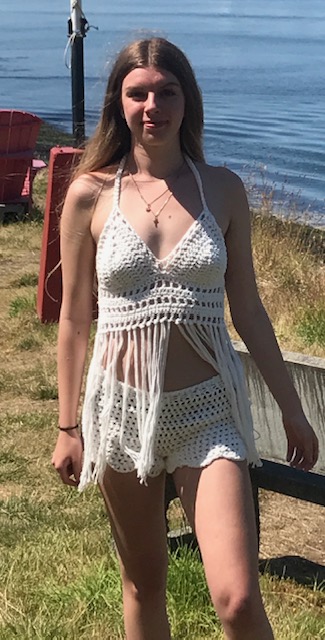
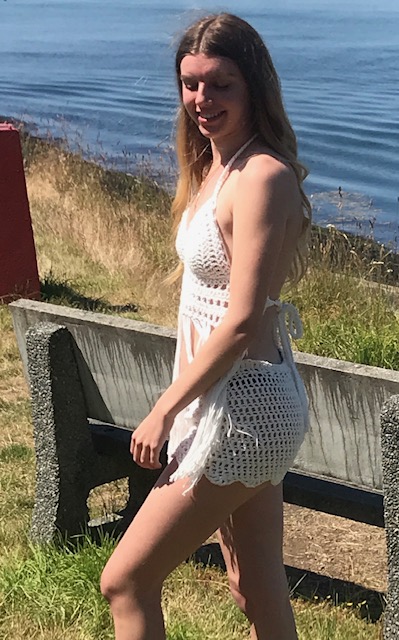
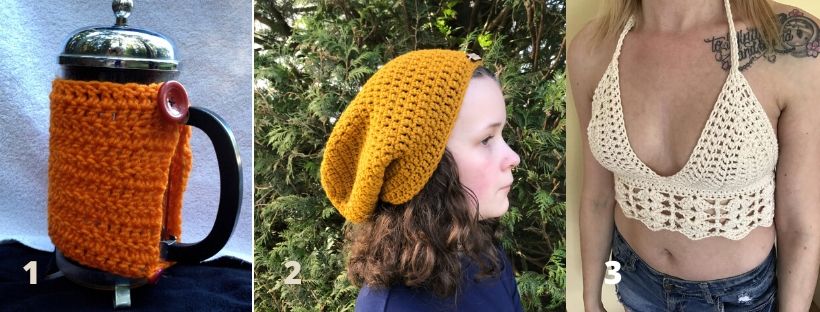
The “Freya Fringe” Bralette Top is perfect for those looking for something different. The fringes add a real carefree vibe to your summer wardrobe. I managed to get a photo shoot organized at one of our beautiful spots by the ocean here on Mayne Island. I am excited to share a few of those pics with you here today.The Freya Fringe Bralette is an elegant fringed bralette that also has an element of funky. You can make this free crochet bralette pattern with or without the fringe. The choice is yours.
Hi everyone. I am so excited to share this free crochet bralette pattern with you. The Freya Bralette is super cute and so much fun to swirl and twirl in with all the delicious fringes.
You can find the ad free, super affordable PDF version of this pattern from my etsy shop. It is printer friendly. :-). Keep on reading to get to the free bralette pattern.

It can also be found on Ravelry.

**This post contains affiliate links. If you make a purchase using some of my links I may receive a small commission at no extra cost to you.**
Don’t forget to Pin this free crochet bralette pattern so you can always find it.

Are You Getting My Newsletter.
Please consider signing up for my newletter and joining me over on facebook so you are always in the loop for what is happening with Carroway Crochet.
Sign up for my Newsletter
Get the latest info on free patterns and fun blog hops.
Join Me on Facebook.
Follow me on my Facebook Page for the latest video news and what I am up to.
Join our Crochet Community Group.
Get the latest updates on my free patterns, latest pattern release and share your crochet projects with our Carroway Crochet Community on Facebook. You will also get the updates on new blog hops I host or new pattern releases.

Description of The Freya Fringe Bralette:
Introducing this funky summer crochet pattern by Carroway Crochet. This boho inspired Freya Fringe bralette crop top is perfect for summer days on the beach and for magical festival experiences. You will have a sense of freedom and fun as the fringes swirl to your movements.
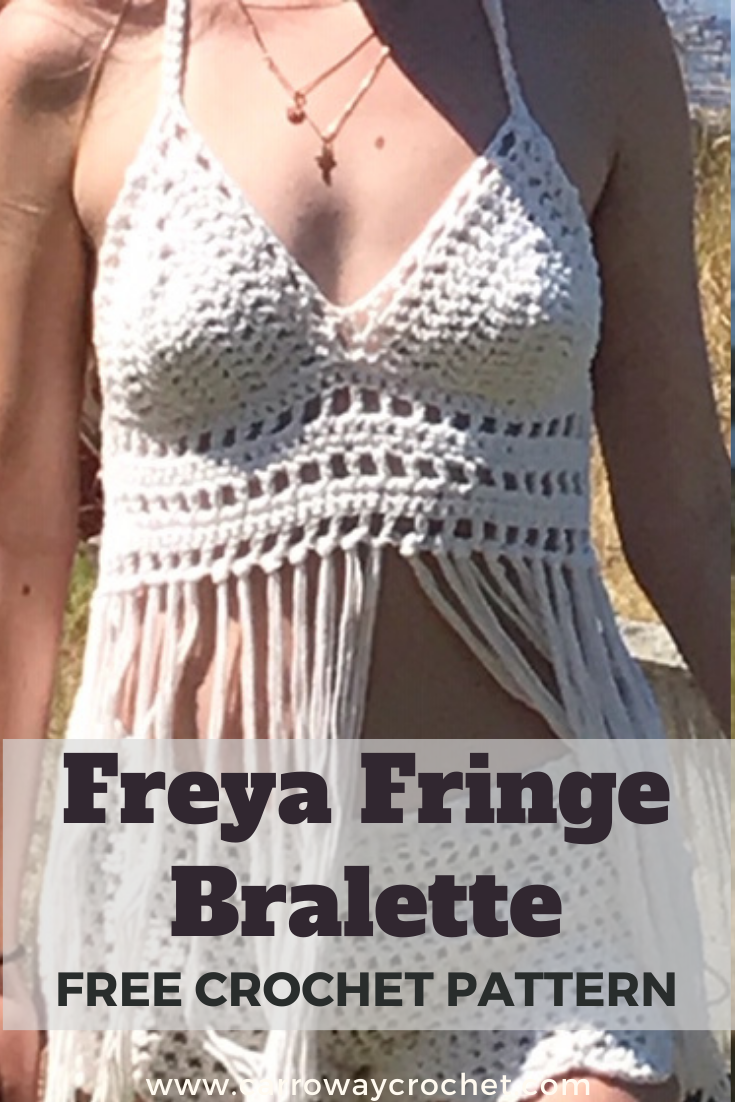
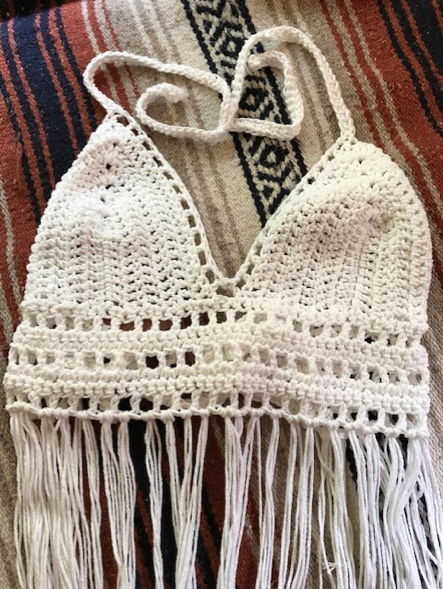
It is made with two cups made using double crochet stitches and then you add the bodice that uses chains and skipping stitches to create a net like texture. All the stitches used in this bralette are beginner stitches.
After adding the straps and attaching the bodice to the cups you add the fringes.
Can you Customize Your Freya Fringe Bralette?
Yes!
One of the reasons I love this free crochet bralette pattern is how the bodice section of this bralette is designed.
It is designed so you can create the perfect top to fully meet your needs. You just keep on repeating the pattern if you want your bralette to have a longer bodice.
Also you can choose to add the fringe or go without. You can totally customize it to meet your needs.
About the Cups on this Free Crochet Bralette Pattern.
The cups on this bralette are a basic cup design. It is perfect for advanced beginner crocheters. The cups are made using the Double Crochet stitch. Some sizes require the half double crochet stitch. The cups come in sizes from Extra Small to Extra Large.
The bodice is made separately and then sewn on to the cups. using the whip stitch.
How to Style your Crochet Bralette.
Once you have made your beautiful bralette you might be wondering how to wear it. You can wear it with your favourite denim shorts or even make the matching Shell Shorts as seen in the picture below.
For an evening out you can layer your bralette with a cute jacket or a floaty crochet top or light weight cardigan.
Another great idea for when the weather is cooler or you don’t want to show so much skin is to wear your bralette top laced over a cami or even a cute summer shirt. Layering is a great stying option and you can experiment with what you have in your wardrobe.
You can feel so elegant as you wear this top. Make one for a friend or if you have an etsy shop, they are very popular there.
Looking for some other cool free crochet bralette patterns?
You might also be interested in my Earth Mother Bralette Pattern and the Ivory Lace Bralette, if you like summer crochet crop tops.
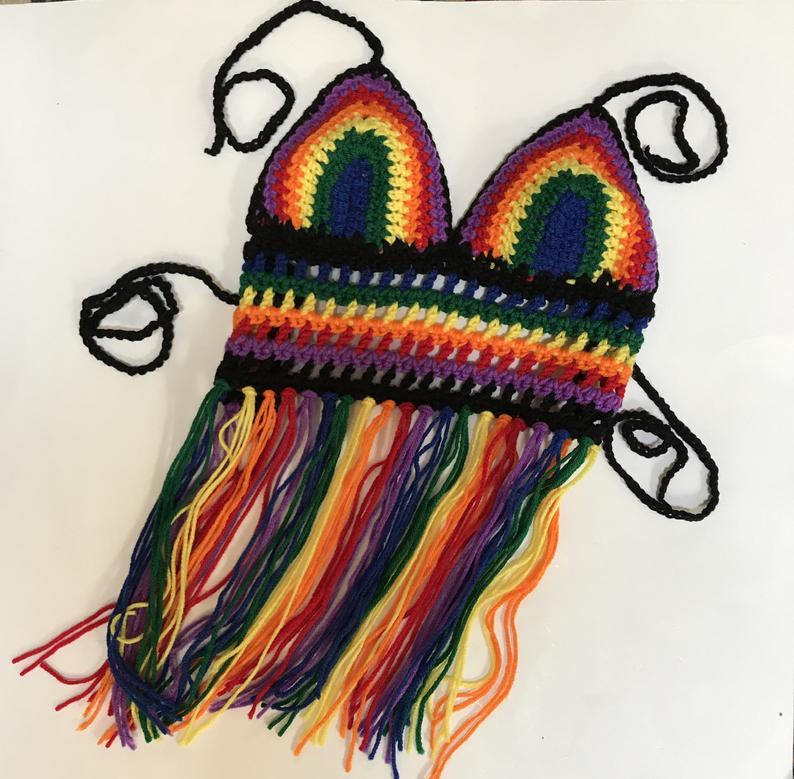
I also have another fringe style bralette in rainbow colours. The Rainbow Fringe Bralette is so beautiful.

Design Inspiration for the Freya Fringe Free Crochet Bralette.
The inspiration for my free Freya Fringe Bralette pattern came from memories of my youth when I used to live in England and we all went to folk festivals. The big one near where I was living at the time was the Cambridge Folk Festival. We used to take a tent and camp for the weekend. So much fun.
I arrived at this design after creating the the Rainbow Fringe Bralette. I wanted a bralette that had the fun fringes, but that was more mainstream and elegant.
I sell my bralettes at my market stall at the local Farmer’s Market on Mayne Island here in BC and people love them.
Are You A Visual Learner?
Here is a video tutorial on how to make the Earth Mother Bralette.
There are both left and right handed versions of this bralette tutorial on my YouTube Channel.
About this Free Crochet Bralette Pattern.
Bralettes are so trendy right now. I made my Freya Fringe Bralette with 100% cotton as it is a great yarn for summer. You can however make this top with your choice of any worsted weight yarn, either acrylic or cotton, just look for the number (4) on the yarn label.
It is an intermediate crochet pattern, with easy to follow instructions. It is in US terms.
This bralette style top has an elegant pattern on the bodice. You can make it as long as you like according to your style preference.
The pattern is written for Extra Small, Small, Medium, Large and Extra Large.
It is an advanced beginner crochet pattern, with easy to follow instructions. It is in US terms
For those new to crochet, I have videos on my Carroway Crochet youtube Channel that will demonstrate the different stitches you will nee. I have both left and right handed versions available to help beginner crocheters.
The Freya Bralette
Pattern by Pam Carr ©2018
This bralette style top has an elegant pattern on the bodice. You can make it as long as you like according to your style preference.
This free crochet bralette pattern is written for Extra Small, Small, Medium, Large and Extra Large.
It is an intermediate crochet pattern, with easy to follow instructions. It is in US terms.
You can make it with or without the fringe.
Supplies you will need:
Yarn: Any worsted weight (4) yarn. I have used cotton for the one in the pictures shown here.
You will need between 119 – 161 yards (109 – 147 m) of yarn depending on the size you make.
Hook: Size H/8 -5mm
Notions: Scissors , tapestry needle.
Gauge: 13 sc – 14 rows = 4” (10 cm)
Abbreviations (uses US conventions)
-
Ch = chain
-
st = stitch
-
dc = Treble crochet
-
sc = Double crochet
-
HDC = Half Double crochet
-
Sk st = Skip stitch
-
Sl st = slip stitch
This pattern uses US terminology. The US and UK crochet terms are different, but they use the same terms to describe different stitches. Here is a simple conversion chart for anyone in the UK.
| US
Double (dc) Half Double (hdc) Single (sc)
|
UK
Treble (tr) Half Treble (htr) Double (dc) |
Instructions:
Sizes: Extra Small, Small, Medium, Large, Extra Large
Instructions:
Cups: make two.
I have included the pattern for each of the different sizes mentioned above.
Ch 2 at start of each row does not count as a stitch.
For Extra Small Cup: Make two
Fits: 32A, 34A, 32B
Finished cup should measure 5″- 5.5” approx
Ch 9
Row 1: Dc into 3rd ch from the hook and into the next 5 chain stitches, (2 Dc, ch1, 2dc) into the last chain, dc down other side of the chain, (there will be 8 st each side of the ch1 space)
Row 2: Ch2 and turn, dc into next 8 st, (dc, ch 1, dc) into ch1 sp, dc 8 down other side, (9 stitches each side of the ch1 space)
Row 3: ch2, turn, dc into next 9 st, (dc, ch1, dc) into ch1 sp, dc 9 down other side (10 stitches each side of the ch1 space)
Row 4: ch2, turn, dc into next 10 st, (dc, ch1, dc) into ch1 sp, dc 10 down other side (11 stitches each side of the ch1 space)
Row 5: ch2, turn, hdc into next 11 st, (hdc, ch1, hdc) into ch1 sp, hdc 11 down other side (12 stitches each side of the ch1 space)
Finish off and weave in the ends.
For small cup: Make two
Fits: 36A, 34B, 36B, 32C, 34C, 32D
Finished cup should measure 6″- 6.5” approx.
Ch 11
Row 1: dc into 3rd ch from the hook and into the next 7 chain stitches, (2 dc, ch1, 2dc) into the last chain, dc 8 stitches down the other side of the chain, (there will be 10 st each side of the ch1 space)
Row 2: ch2 and turn, dc into next 10 st, (dc, ch1, dc) into ch1 sp, dc 10 down other side, (11 stitches each side of the ch1 space)
Row 3: ch2, turn, dc into next 11 st, ( dc, ch1, dc) into ch1 sp, dc 11 down other side (12 stitches each side of the ch1 space)
Row 4: ch2, turn, dc into next 12 st, (dc, ch1, dc) into ch1 sp, dc 12 down other side (13 stitches each side of the ch1 space)
Row 5: ch2, turn, dc into next 13 st, (dc, ch1, dc) into ch1 sp, dc 13 down other side (14 stitches each side of the ch1 space)
Finish off and weave in the ends.
For medium cups: Make two
Fits: 34C, 32D, 34D, 36D, 32DD
Finished cup should measure 7″- 7.5” approx.
Ch 13
Row 1: dc into 3rd ch from the hook and next 9 chain stitches, (2 dc, ch1, 2dc) into the last chain. Then dc 10 stitches down the other side of the chain. There will be 12 st each side of the ch1 space
Row 2: ch2 and turn, dc 12 st, (dc, ch1, dc) into ch1 sp, dc 12 down other side, (13 stitches each side)
Row 3: ch2, turn, dc into next 13 st, (dc, ch1, dc) into ch1 sp, dc 13 down other side (14 stitches each side)
Row 4: ch2, turn, dc into next 14 st, (dc, ch1, dc) into ch1 sp, dc 14 down other side (15 stitches each side)
Row 5: ch2, turn, dc into next 15 st, (dc, ch1, dc) into ch1 sp, dc 15 down other side (16 stitches each side)
Row 6: ch2, turn, dc into next 16 st, (dc, ch1, dc) into ch1 sp, dc 16 down other side (17 stitches each side)
Finish off and weave in the ends.
For large cups: Make two
Fit: 36C, 32D, 34D, 36D, 32DD, 38C
Finished cup should measure 8” – 8.5” approx.
Ch 15
Row 1: dc into 3rd st from the hook and next 11st, (2 dc, ch1, 2dc) into the last chain, dc down other side. There will be 14 st each side of the ch1 space
Row 2: Ch2 and turn, dc 14 st, (dc, ch1, dc) into ch1 sp, dc 14 down other side, (15 stitches each side)
Row 3: ch2, turn, dc into next 15 st, (dc, ch1, dc) into ch1 sp, dc 15 down other side (16 stitches each side)
Row 4: ch2, turn, dc into next 16 st, (dc, ch1, dc) into ch1 sp, dc 16 down other side (17 stitches each side)
Row 5: ch2, turn, dc into next 17 st, (dc, ch1, dc) into ch1 sp, dc 17 down other side (18 stitches each side)
Row 6: ch2, turn, dc into next 18 st, (dc, ch1, dc) into ch1 sp, dc 18 down other side (19 stitches each side)
Row 7: ch2, turn, dc into next 19 st, (dc, ch1, dc) into ch1 sp, dc 19 down other side (20 stitches each side)
Finish off and weave in the ends.
For extra large cups: Make two
Fit: 36D, 38C or larger
Finished cup should measure 9” – 9.5” approx.
Ch 17
Row 1: dc into 3rd st from the hook and next 13st, (2 dc, ch1, 2dc) into the last chain, dc down other side, there will be 16 st each side of the ch1 space
Row 2: ch2 and turn, dc 16 st, (dc, ch1, dc) into ch1 sp, dc 16 down other side, (17 stitches each side)
Row 3: ch2, turn, dc into next 17 st, (dc, ch1, dc) into ch1 sp, dc 17 down other side (18 stitches each side)
Row 4: ch2, turn, dc into next 18 st, (dc, ch1, dc) into ch1 sp, dc 18 down other side (19 stitches each side)
Row 5: ch2, turn, dc into next 19 st, (dc, ch1, dc) into ch1 sp, dc 19 down other side (20 stitches each side)
Row 6: ch2, turn, dc into next 20 st, (dc, ch1, dc) into ch1 sp, dc 20 down other side (21 stitches each side)
Row 7: ch2, turn, dc into next 21 st, (dc, ch1, dc)into ch1 sp, dc 21 down other side (22 stitches each side)
Repeat extra rounds if necessary to make the cup larger.
Finish off and weave in the ends.
Bodice:
The bodice is the section that goes below the bralette and has the back straps attached to it.
This can be customized to fit your body.
I have listed the various sizes and how many chains are recommended for each size. You can, however, make a chain long enough to go from one side of your rib cage to the other. For a small/medium I suggest you ch 64 plus 1. You can make it smaller or larger, but make sure it is in multiples of 8 plus 1 so the pattern works.
I have written the bodice pattern for sizes, XS, S, M, L, XL
Recommended starting chains for the above sizes:
Extra Small: Waist size 25.”
Ch48+1 (this makes a 16.5”crocheted bodice) approx.
Small: Waist size 28.”
Ch 56+1 (this makes a 18.5” crocheted bodice) approx.
Medium: Waist size 30.”
Ch 64+1 (this makes a 19.5” bodice) approx.
Large: Waist size 34.”
Ch 72+1 (this makes a 22” bodice) approx.
Extra Large: Waist 37.”
Ch 80+1 (this makes a 24.5” bodice) approx.
Instructions:
Chain the required amount from the sizing information above follow this pattern. It is the same for all sizes.
Row 1: SC into the 2nd chain from the hook. SC all the way across to the end and turn.
Row 2: Ch 3, sk1 st, DC into the next st, * ch1, sk1 st, DC into next st*, repeat from * to * across to the end.
Row 3: Ch1, 2sc into each ch1 sp across the row. (56 )
Row 4: Ch1, SC all the way across to the end and turn. (56)
Row 5: Ch 3, sk1 st, DC into the next st, * ch1, sk1 st, DC into next st*, repeat from * to * across to the end. (18 windows)
Row 6: Ch1, 2sc into each ch1 sp across the row.
Row 7: Ch1, SC all the way across to the end and turn. (56)
Row 8: Ch 3, sk1 st, DC into the next st, * ch1, sk1 st, DC into next st*, repeat from * to * across to the end.
Finish off.
For a longer bodice you can repeat rows 7 and 8.
Finish off and weave in the ends.
Joining the cups to the bodice.
Fold the bodice in half to locate the centre and mark it with a stitch marker or a piece of contrasting yarn.
Place the cups, right sides facing down over the bodice and pin in place.
Check the sides of the cups to see that they match, with even sides of the bodice at each end.
You can attach the cups by whip stitching them onto the bodice.
You can also sc them onto the bodice if you choose to.
Now you are ready to add the trim.
Rejoin yarn to the bottom corner of the bodice,
sc up the side (2sc in each dc row and 1sc in the side of each sc row)
3sc at the corner, sc to the cup,
sc into the first stitch of the cup, ch1, sk1 st, dc into next st, ch1, sk 1 st, dc into the next st, repeat from * to * up to the top of the cup, dc into top ch sp, ch 60, sc back down the chain, dc into the top of the ch sp, ch1, sk1 st, dc, continue this pattern to the centre,
Dc into the last stitch on the cup, dc into the 1st st at the base of the 2nd cup, ch1 sk1, up to the top,
Dc, ch 60, sc back down chain, dc into the same ch sp, ch1, sk1, dc, continue to the bottom of the cup, sc into the bodice, sc across to the corner, 3sc into corner, sc down to bottom corner of the bodice.
Finish off and weave in the ends.
Back straps:
Join yarn to the side of the bodice and chain 80 for a 25” tie. You can sc back down the chain if you want a thicker tie.
Do the same for the other side.
Adding The Fringe
Cut yarn for your fringe. You will need two strands for each section of fringe. If you want a heavier fringe, or a longer fringe, you can adapt the pattern to suit your style.
For the fringe to be approx 11” long, cut strands of yarn that are 23” as you will be folding them and lose some length in the knot.
Each fringe has two 23” strands of yarn, which are folded, (put the ends together and create the loop that can be threaded into the bodice and then knotted onto the garment.) This creates a four stranded fringe.
I use a crochet hook to pull the loops through and then thread the long fringe through the loop and pull tight to create the knot.
Always pull the loop through from the same direction so the knots all match.
You now have a Freya Fringe Bralette! Take some time to dance and sway.
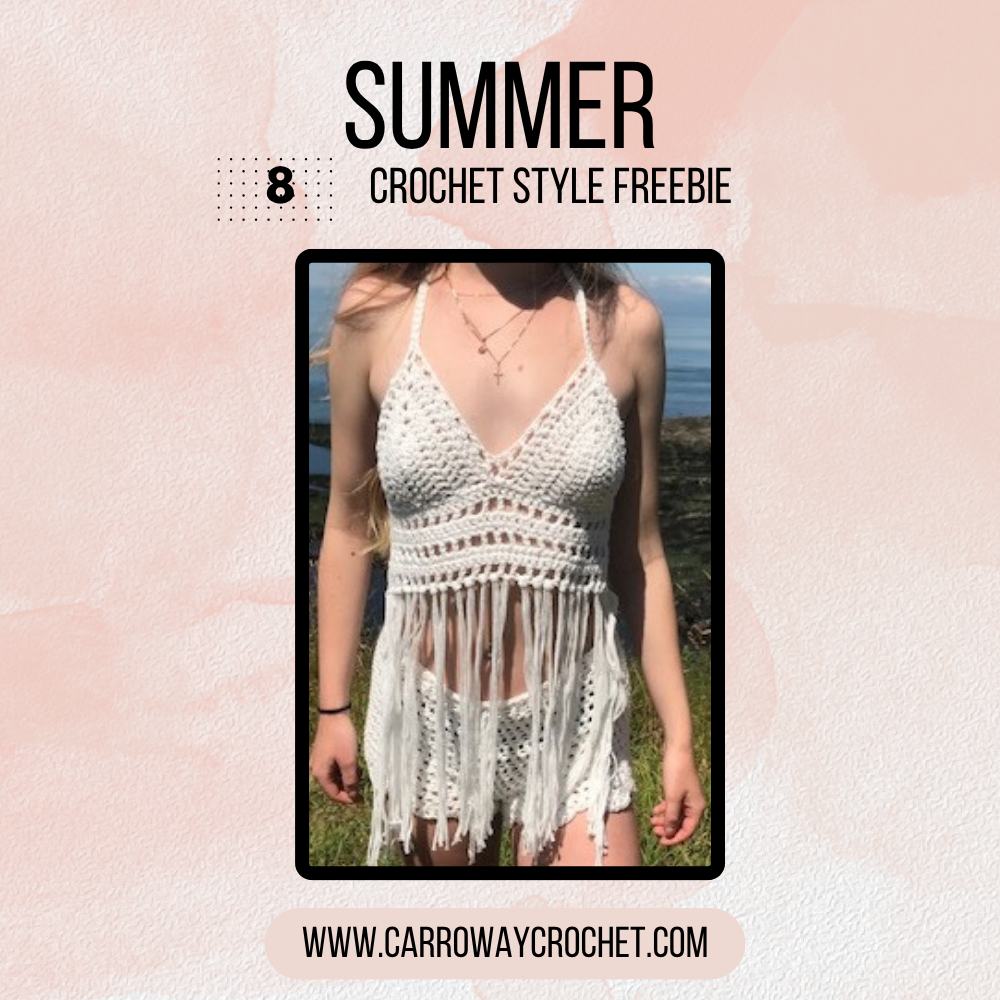
The Summer Crochet Style Freebie Event.
Join me in the Summer Crochet Style Freebie event happening in the final week of May 2026. I will be sharing 8 free crochet pattern downloads to welcome in the Summer.
Day 8 of the Summer Crochet Style Freebie Event is May 31st-June 1st 2026.
There are 2 patterns free for Day 8.
The Freya Bralette and the Shell Shorts.
I leave the pattern coupon code active for two days to allow for all the time zones.
This pattern is free for May 31st-June 1st 2026
How to get your Summer Crochet Style Freebie PDF download.
Click on the image below and it will take you to the pattern listing on Ravelry.
Next click on ‘Buy Now”
At the checkout enter the coupon code SUMMERSTYLE26
Click on the apply coupon code.
DOWNLOAD YOUR FREE PATTERN.
OTHER FREE CROCHET PATTERNS YOU MIGHT LOVE!
More Places to Find Free a Crochet Bralette Pattern:
If you love crochet, you can find over a thousand free crochet patterns including some for crop tops and bralettes over at All Free Crochet
I am honoured to have had my free crochet bralette pattern, the Earth Mother Bralette Pattern recently added to the All Free Crochet site.

It is a great resource for crochet lovers and I am proud to also have my Take Me Outside Infinity Scarf Pattern posted over on the All Free Crochet Site.

Let’s Share and Connect!
Thank you for trying my free crochet bralette pattern, I hope you enjoyed it! Please share pictures of your completed Bralettes on Instagram and Facebook. Tag them @carrowaycrochet #carrowaycrochet on Instagram.
Thank you so much for visiting me here at Carroway Crochet .
Find other patterns by Carroway Crochet in my Etsy Shop and on Ravelry.
Other places you can find me are:
Ravelry
This design, written work and images are a copyright of
©CarrowayCrochet and may not be copied or reproduced in any way.
You have permission to sell finished products made from this pattern, but please leave a link to my blog, www.carrowaycrochet.com in your product listing specifying that I am the designer of this pattern.
Please follow and like us:
One thought on “Free Crochet Bralette Pattern: The Freya Fringe Bralette”
Comments are closed.