How to Crochet a Bralette: The Feel The Love Bralette Free Pattern

Have you ever wondered How to Crochet a Bralette?
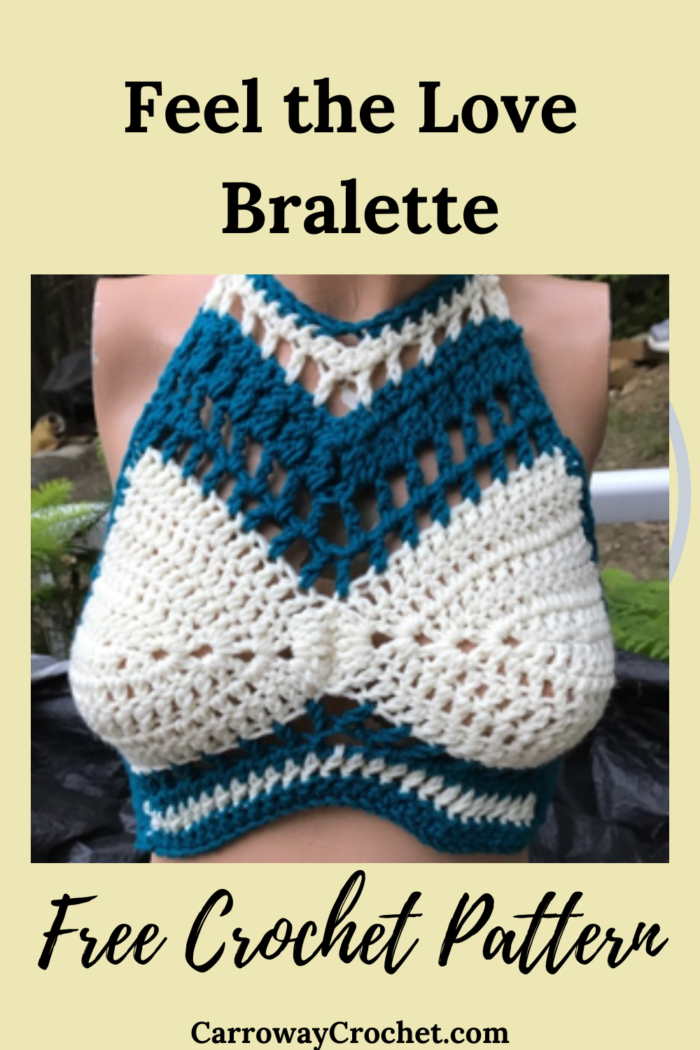
You need look no further. Here is a great tutorial on How to Crochet a Bralette. This bralette is a little different as the cups are place sideways and there are sides to it. The Feel the Love Bralette is more of a crop top than a bralette. This free bralette pattern is a great way to learn how to crochet a bralette.
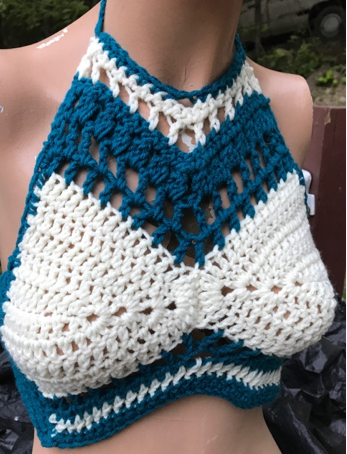
The “Feel the Love” Bralette Crop Top is perfect for those looking for something different. The tapered sides add a great style feature and the ties at the back are super simple to do. The high neck line at the front is super stylish with the crochet clusters and net like fabric.

Hi everyone. I am so excited to share this free crochet bralette pattern with you. The Feel the Love Bralette Crop Top is super cute and so much fun. It covers more of you up so I like to add Crop Top to the title.
You can find the ad free, super affordable PDF version of this pattern from my etsy shop. It is printer friendly.
Keep on reading to get to the free bralette pattern.

It can also be found on Ravelry.

**This post contains affiliate links. If you make a purchase using some of my links I may receive a small commission at no extra cost to you.**
Don’t forget to Pin this free crochet bralette pattern so you can always find it.


Description of The Feel the Love Bralette Crop Top:
Introducing this funky summer crochet pattern by Carroway Crochet. This boho inspired Feel the Love bralette crop top is perfect for warm summer days and for nights out as well. The design of this bralette gives it more of a crop top feel.
What makes this top special is the use of two contrasting colours to add interest and style to the crochet garment. It really makes is stand out having the cups one colour and the bodice made up of blocks of colour.
This bralette crop top is made with two crochet cups crocheted using double crochet stitches and then you join them in the middle. The top and bottom of the bralette crop top are worked next. The body is made with treble crochet stitches and double crochet cluster and also uses chains and skipping stitches to create a net like texture. The instructions tell you when you need to change colour.
Next you work the tapered sides of the bralette top and add the ties.
Can you Customize Your Feel the Love Bralette Crop Top?
Yes!
One of the reasons I love this crochet bralette crop top pattern is how the bodice section of this bralette is designed. You can create the perfect top to fully meet your needs. You just keep on repeating the pattern at the bottom if you want your bralette to have a longer bodice. This makes it into more of a crop top.
About the Cups on this Feel the Love Bralette Pattern.
When you are learning how to crochet a bralette, one of the first things you need to master is how to make the cups. They are each made individually. The cups on this bralette are a basic cup design. It is perfect cup for advanced beginner crocheters and I have videos on how to make bralettes that show how to make the cups.
The cups are made using the Double Crochet stitch. Some sizes require the half double crochet stitch. The cups come in sizes from Extra Small to Extra Large.
This style of bralette has the cups placed sideways, meeting in the middle.
How to Style your Crochet Bralette.
Once you have made your beautiful bralette you might be wondering how to wear it. You can wear it with your favourite denim shorts or pair it with some crochet shorts such as the Shell Shorts or the Bella B Shorts for a completely crochet wardrobe.
For a date night or just a night out you can layer your bralette with a jacket or a floaty shirt or blouse. You can even add a light weight cardigan.
Another great idea for when the weather is cooler or you don’t want to show so much skin is to wear your bralette top laced over a cami or even a cute summer shirt. Layering is a great stying option and you can experiment with what you have in your wardrobe.
You can feel so fashion forward as you wear this top. Make one for a friend or if you have an etsy shop, they are very popular there.
Looking for some other cool free crochet bralette patterns?
You might also be interested in my Earth Mother Bralette Pattern and the Ivory Lace Bralette, if you like summer crochet crop tops.
I also have some fringe style bralette patterns you might like. The Rainbow Fringe Bralette is so beautiful and the Freya Fringe Bralette is classic.
Design Inspiration for the Feel the Love Crochet Bralette Crop Top.
The inspiration for my Feel the Love Bralette pattern came from memories of my youth and all the vintage and retro fashions that are out there right now. I wanted to create a cute and trendy top that was something an adventurous beginner would be willing to have a go at and I made the pattern easy to follow.
I arrived at this design after creating the the Earth Mother Bralette. I wanted a bralette that had the tapered sides but also had the alternating colours to create a fashion statement.
Having a crochet top is such a great addition to your wardrobe as it is fashion forward and also so versatile.
I sell my bralettes at my market stall at the local Farmer’s Market on Mayne Island here in BC and people love them.
Are You A Visual Learner?
Here is a video tutorial on how to make the Earth Mother Bralette.
There are both left and right handed versions of this bralette tutorial on my YouTube Channel.
About this Free Crochet Bralette Pattern.
Bralettes are so trendy right now. I made my Feel the Love Bralette Crop Top with 100% acrylic yarn, but you can make this top with your choice of any worsted weight yarn, either acrylic or cotton, just look for the number (4) on the yarn label.
It is an advanced beginner/intermediate crochet pattern, with easy to follow instructions. It is in US terms.
This bralette style top has an elegant pattern on the bodice. You can make it as long as you like according to your style preference.
The pattern is written for Extra Small, Small, Medium, Large and Extra Large.
For those new to crochet, I have videos on my Carroway Crochet youtube Channel that will demonstrate the different stitches you will nee. I have both left and right handed versions available to help beginner crocheters.

All About the Yarn.
When you are starting to learn how to crochet a bralette, you need to have some ideas on the yarn you can use for your project.
For this pattern, one yarn I can recommend is Red Heart Super Saver yarn as it comes in so many vibrant and fun colours that are perfect for creating the colour blocks in this bralette. Red Heart Super Save yarn is so versatile and can be used in so many different types of projects. I use it for some of my Dreamer Beanies and also for my Black and White Striped Cushion pattern. It is also great for Cozies for your Tea Pots, Mason Jars or even your mugs.
For my Feel. the Love Bralette Crop Top it meets two of my top needs. It creates a great fabric for crotchet tops and it comes in all the great Red Heart colours that we all love.
Colourways:
Red Heart Super Saver yarn comes in 149 different colourways. 149!!! It comes in solid, prints and multis, flecks and heathers, and striped colours. You don’t even have to worry about matching dye lots as the colours never deviate. It is such a user friendly yarn.
Red Heart Super Save is a medium weight worsted weight yarn with a number 4 on the label.
The solid colour skeins are 7 oz (198 grams) and approximately 364 yards (333 metres). If you get the striped colours then they run smaller weighing 5 oz (14 grams) and 236 yards approx, or 215 metres
Care instructions for Red Heart Super Saver.
Another big plus for Red Heart Super Save yarn is that it is so easy to care for.You can wash and dry it in your machines. It is suggested you wash it in warm water and tumble dry. Do not bleach or iron your projects.
The Feel the Love Crop Top
Pattern by Pam Carr ©2018

Learn how to crochet a bralette with the “Feel the Love Crop Top” Pattern by Carroway Crochet.
The Feel the Love Crop Top is perfect for summer days and for magical festival experiences or a night out.
The pattern is written for Extra Small, Small, Medium, Large and Extra Large
You can make this crop top with your choice of worsted weight yarn, either acrylic or cotton, just look for the number (4) on the yarn label.
It is an advanced beginner/intermediate crochet pattern, with easy to follow instructions. It is in US terms.
Supplies you will need:
Yarn: Any worsted weight yarn (4) Red Heart Super Saver yarn is a great, affordable choice.
The Feel the Love Bralette Crop Top pictured above uses Phentex Worsted in Natural, Loops and Thread Impeccable Yarn in Teal.
Hook: Size H/8-5mm
Notions: Scissors , tapestry needle.
Gauge: 13 sc – 14 rows = 4” (10 cm)
Abbreviations (uses US conventions)
- Ch = chain
- st = stitch
- sp =space
- ch1 sp = chain one space
- sc = single crochet
- hdc = half double crochet
- dc = Double crochet
- tr =Treble crochet
- 3DC CL = 3 Double Crochet Cluster
- scdec = single crochet decrease
- sk = skip
This pattern uses US terminology. The US and UK crochet terms are different, but they use the same terms to describe different stitches. Here is a simple conversion chart for anyone in the UK.
| US
Single Crochet (sc) Double crochet (dc) Treble (tr) |
UK
Double crochet (dc) Treble (tr) Double Treble (dtr) |
Special Stitches for The Feel the Love Bralette Crop Top
3 Double Crochet Cluster:
Yo, insert hook in st, yo, pull through st, yo, pull through 2 loops on hook, (yo, insert hook in same st, yo, pull through st, yo, pull through 2 loops on hook) 2 times, yo, pull through all 4 loops on hook, ch 1.
Sizes: -Extra Small, Small, Medium, Large, Extra Large
Instructions:
Cups, make two using cream yarn.
I have included the pattern for each of the different sizes mentioned above.
Ch 2 at start of each row does not count as a stitch.
Extra Small Cup:
Fits: 32A, 34A, 32B
Finished cup should measure 5″- 5.5” approx
Ch 9
Row 1: Dc into 3rd ch from the hook and into the next 5 chain stitches, (2 dc, ch1, 2dc) into the last chain, dc down other side of the chain, (there will be 8 st each side of the ch1 space)
Row 2: Ch2 and turn, dc into next 8 st, (2dc, ch1, 2dc) into ch1 sp, dc 8 down other side, (10 stitches each side of the ch1 space)
Row 3: ch2, turn, dc into next 10 st, (2dc, ch1, 2dc) into ch1 sp, dc 10 down other side (12 stitches each side of the ch1 space)
Row 4: ch2, turn, dc into next 12 st, (2dc, ch1, 2dc) into ch1 sp, dc 12 down other side (14 stitches each side of the ch1 space)
Row 5: ch2, turn, hdc into next 14 st, ((2hdc, ch1, 2hdc) into ch1 sp, hdc 14 down other side (16 stitches each side of the ch1 space)
Fasten off and weave in the ends.
For small cup:
Fits: 36A, 34B, 36B, 32C, 34C, 32D
Finished cup should measure 6″- 6.5” approx.
Ch 11
Row 1: dc into 3rd ch from the hook and into the next 7 chain stitches, (2 dc, ch1, 2dc) into the last chain, dc 8 stitches down the other side of the chain, (there will be 10 st each side of the ch1 space)
Row 2: ch2 and turn, dc into next 10 st, (2dc, ch1, 2dc) into ch1 sp, dc 10 down other side, (12 stitches each side of the ch1 space)
Row 3: ch2, turn, dc into next 12 st, (2dc, ch1, 2dc) into ch1 sp, dc 12 down other side (14 stitches each side of the ch1 space)
Row 4: ch2, turn, dc into next 14 st, (2dc, ch1, 2dc) into ch1 sp, dc 14 down other side (16 stitches each side of the ch1 space)
Row 5: ch2, turn, dc into next 16 st, (2dc, ch1, 2dc) into ch1 sp, dc 16 down other side (18 stitches each side of the ch1 space)
Fasten off and weave in the ends.
For medium cups,
Fits: 34C, 32D, 34D, 36D, 32DD
Finished cup should measure 7″- 7 1⁄2” approx.
Ch 13
Row 1: dc into 3rd ch from the hook and next 9 chain stitches, (2 dc, ch1, 2dc) into the last chain. Then dc 10 stitches down the other side of the chain. There will be 12 st each side of the ch1 space
Row 2: ch2 and turn, dc 12 st, (2dc, ch1, 2dc) into ch1 sp, dc 12 down other side, (14 stitches each side)
Row 3: ch2, turn, dc into next 14 st, (2dc, ch1, 2dc) into ch1 sp, dc 14 down other side (16 stitches each side)
Row 4: ch2, turn, dc into next 16 st, (2dc, ch1, 2dc) into ch1 sp, dc 16 down other side (18 stitches each side)
Row 5: ch2, turn, dc into next 18 st, (2dc, ch1, 2dc) into ch1 sp, dc 18 down other side (20 stitches each side)
Row 6: ch2, turn, dc into next 20 st, (2dc, ch1, 2dc) into ch1 sp, dc 20 down other side (22 stitches each side)
Fasten off and weave in the ends.
For large cups,
Fit: 36C, 32D, 34D, 36D, 32DD, 38C
Finished cup should measure 8” – 8.5”
Ch 15
Row 1: dc into 3rd st from the hook and next 11st, (2 dc, ch1, 2dc) into the last chain, dc down other side. There will be 14 st each side of the ch1 space
Row 2: Ch2 and turn, dc 14 st, (2dc, ch1, 2dc) into ch1 sp, dc 14 down other side, (16 stitches each side)
Row 3: ch2, turn, dc into next 16 st, (2dc, ch1, 2dc) into ch1 sp, dc 16 down other side (18 stitches each side)
Row 4: ch2, turn, dc into next 18 st, (2dc, ch1, 2dc) into ch1 sp, dc 18 down other side (20 stitches each side)
Row 5: ch2, turn, dc into next 20 st, (2dc, ch1, 2dc) into ch1 sp, dc 20 down other side (22 stitches each side)
Row 6: ch2, turn, dc into next 22 st, (2dc, ch1, 2dc) into ch1 sp, dc 22 down other side (24 stitches each side)
Row 7: ch2, turn, dc into next 24 st, (2dc, ch1, 2dc) into ch1 sp, dc 24 down other side (26 stitches each side)
Fasten off and weave in the ends.
For extra large cups,
Fit: 36D, 38C or larger
Finished cup should measure 9” – 9.5” approx.
Ch 17
Row 1: dc into 3rd st from the hook and next 13st, (2 dc, ch1, 2dc) into the last chain, dc down other side, there will be 16 st each side of the ch1 space
Row 2: ch2 and turn, dc 16 st, (2dc, ch1, 2dc) into ch1 sp, dc 16 down other side, (18 stitches each side)
Row 3: ch2, turn, dc into next 18 st, (2dc, ch1, 2dc) into ch1 sp, dc 18 down other side (20 stitches each side)
Row 4: ch2, turn, dc into next 20 st, (2dc, ch1, 2dc) into ch1 sp, dc 20 down other side (22 stitches each side)
Row 5: ch2, turn, dc into next 22 st, (2dc, ch1, 2dc) into ch1 sp, dc 22 down other side (24 stitches each side)
Row 6: ch2, turn, dc into next 24 st, (2dc, ch1, 2dc) into ch1 sp, dc 24 down other side (26 stitches each side)
Row 7: ch2, turn, dc into next 26 st, (2dc, ch, 2dc)into ch1 sp, dc 26 down other side (28 stitches each side)
Repeat extra rounds if necessary to make the cup larger.
Fasten off and weave in the ends.
To join cups:
Place the cups, one on top of the other, right sides facing one another. Join yarn in the stitch before the 2dc ch1 2dc section. Ch1, sl st into next 6 stitches, across the 2dc, ch2 2dc and next dc.
After cups are joined.
Top edge of crop top.
Join teal yarn to the top side edge.
Row 1: Ch2, dc into same st, (ch1, sk1 st, dc into next st,) repeat until you are 1st away from the centre, dc, sk 1 middle st , dc into next stitch going up the other side, (ch1, sk1 st, dc into next st,) repeat between ( ) to the end , ending with 2 dc.
Row2: Ch2, dc in next st, ch1, tr into ch1sp, ch1,tr into ch1sp, continue this pattern and tr into the last ch 1 sp before the middle, skip the centre sp, tr into first space going up other side. Continue the (ch1, tr into ch1 sp) pattern back to top, 1dc in each of the last 2 st in this row.
Row 3: Ch 2, dc into sp, ch 1, 3dc cl into sp, ch1, (3dc cl into next sp, ch1) till centre, 3dc cl into sp before centre, 3dc cl into sp after centre, ch 1, 3dc cl, ch1, continue to last sp, dc into sp, dc into top of previous ch2.
Row 4: Ch 1, sc in dc, sc next ch1 sp, (sc into top of 3dc cl, sc next ch1 sp), repeat until last 3dc cl before centre, sc into this 3dc cl before the centre, sk the centre ch 1 sp, and sc into 3dc cl after the centre. Continue to sc up to top as before.
Change to cream yarn.
Row 5: Ch2, dc into next st, (ch1, sk st, dc into next st,) repeat to just before the center, dc into the sc directly above the second to last 3dc cl before center, skip over 4 stitches at the centre and dc into sc above the second 3dc cl on the other side, (ch1, sk1, dc into next st) to the end of the row.
Row 6: Ch1, (sc in sp, sc into top of dc), repeat this pattern to just before the centre point., sc into dc before the centre, sk the centre and sc into dc after the centre, and sc up the other side repeating the (sc in sp, sc into top of dc) pattern to the end of the row.
Change to teal yarn.
Row 7: Ch1, sk st, sc into next st, continue to sc but stop at the sc on top of the previous 2nd to the last dc before the centre, ch1, sk 4 st, sc in next st, sc to end, scdec at end of row.
Fasten off and weave in the ends.
Halter Straps/Ties:
You will need to make two halter-top straps/ties.
Join yarn to one top-side edge of the crop top. Chain 60 for a 20” (approx) tie. You can leave the ties thin or sc back down the chain to make a more comfortable strap.
Do the same to the other side. Fasten off and weave in ends.
Bottom edge of crop top, below the cups.
Attach teal yarn to the side edge at the bottom of the cup with the right side facing up.
Row 1: Ch2, dc into next st, (ch1, sk1 st, dc into next st,) repeat until you are 1 stitch away from the centre, sk 3 stitches, dc into next stitch going up the other side, (ch1, sk1 st, dc into next st,) repeat between ( ) to the end , ending with 2 dc in last st.
Row 2: Ch 1, sc in dc, (sc in ch1sp, sc in top of previous dc), continue to centre, stop at sc into the top of the second dc before the centre, ch1, skip a ch1 space, 2 tops of the previous dcs and a ch1 sp, then sc into the top of the next previous dc, continue up repeating the (sc in ch1sp, sc in top of previous dc) pattern. Finish with 2dc.
Change to cream yarn.
Row 3: Ch2, dc across all stitches to the end. Change to teal yarn.
Row 4: Ch1, sc across all stitches.
Row 5: Ch1, sc across all stitches.
Sides and Back Straps/Ties:
Attach teal yarn to the bottom outside edge of the side of the crop top.
Row 1: Ch 1 and sc up side of making sure to put one sc into each sc row, and two sc into each dc row along the side of the bodice and the side of the cup) counting stitches as you go so you can do the same on the other side. Stop approx. 2/3 of the way up the side of the cup.) Ch1 and turn.
Row 2: sk 1st st, sc into next st and sc down row, Ch1 and turn.
Row 3: sk 1st st , sc into next st and continue down to end
Repeat until one stitch is left creating a triangle shape.
Do not cut yarn.
Chain 60 for a 20” (approx) tie. SC back down the chain.
Fasten off.
Repeat for the other side. I started the opposite side section from 2/3 of the way up the cup and worked down to the bottom of the side section. This makes the stitches go the same way as the other side.

Finishing off the upper cup side section.
Attach teal yarn to the side at the point where the side/back tie section meets the cream upper cup and sc up to where the top edge design starts and finish with a sl st into the teal first row.
Repeat on the opposite side, attaching the teal yarn to where the top edge design meets the cream cup and sc down to where the teal side section begins and end with a sl st into the teal sc.
Weave in all the ends.
Congratulations, you now have a carefree Feel the Love Crop Top. Sending you lots of summer lovin’ vibes.
If you have any questions or need help with the patterns, please email me at carrowaycrochet@outlook.com, and Iʼll be glad to help you
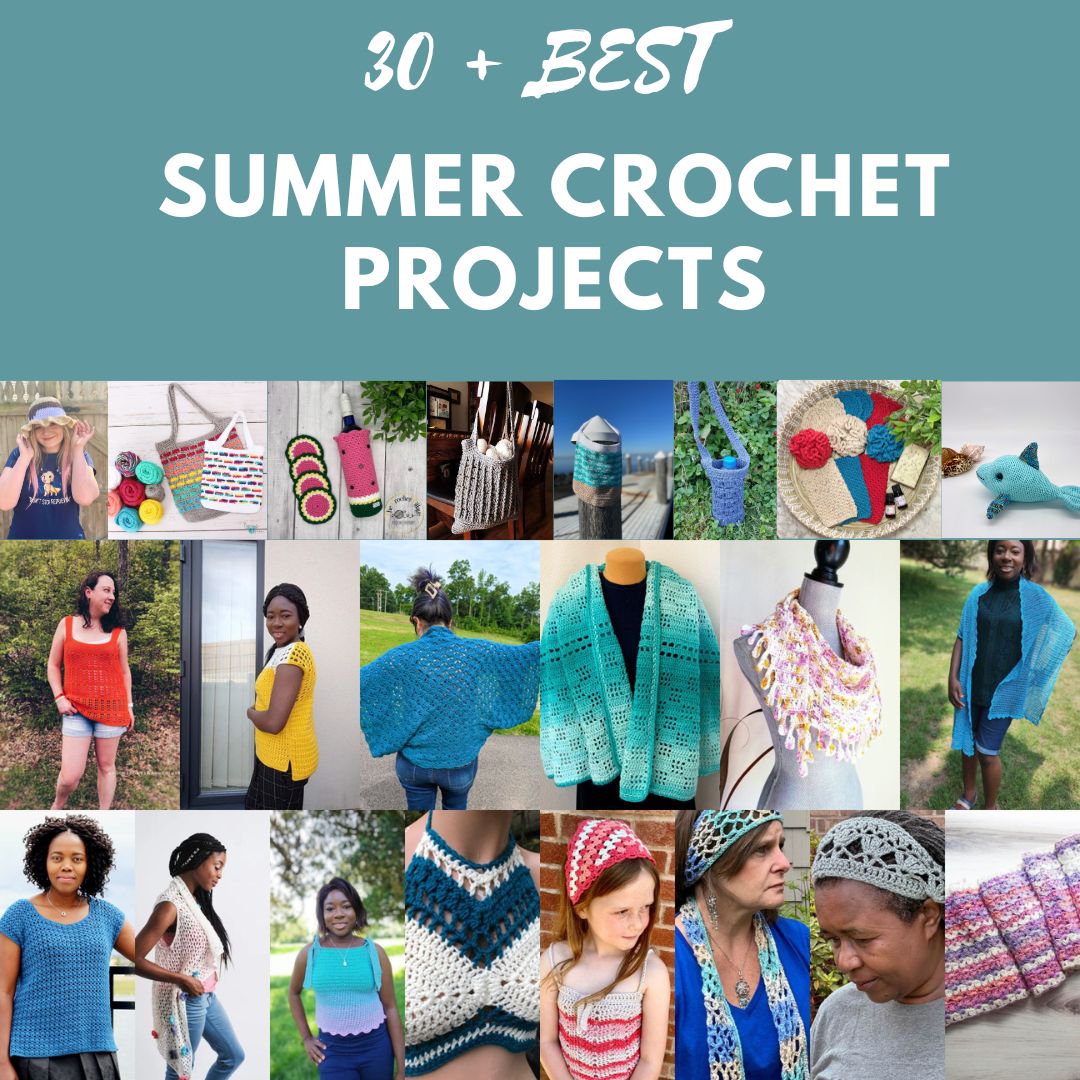
The Summer Vibes Blog Hop Event
The Feel the Love Bralette pattern is featured in the Summer Vibes Blog Hop on July 19th.
You can get the Feel the Love Bralette pattern as a free download on July 19th
To get your free pattern you will first need the coupon code
Click on the button below to find the coupon code and write it down

Click on my Feel the Love Bralette to return here and then click on the button below to go to Ravelry
Once on Ravelry please click on “buy now “ and then at the checkout enter your coupon code Click apply coupon code and download the free pattern

I hope you enjoy the pattern.
There is a pattern Bundle for all you Bundle Lovers. Only $12.99
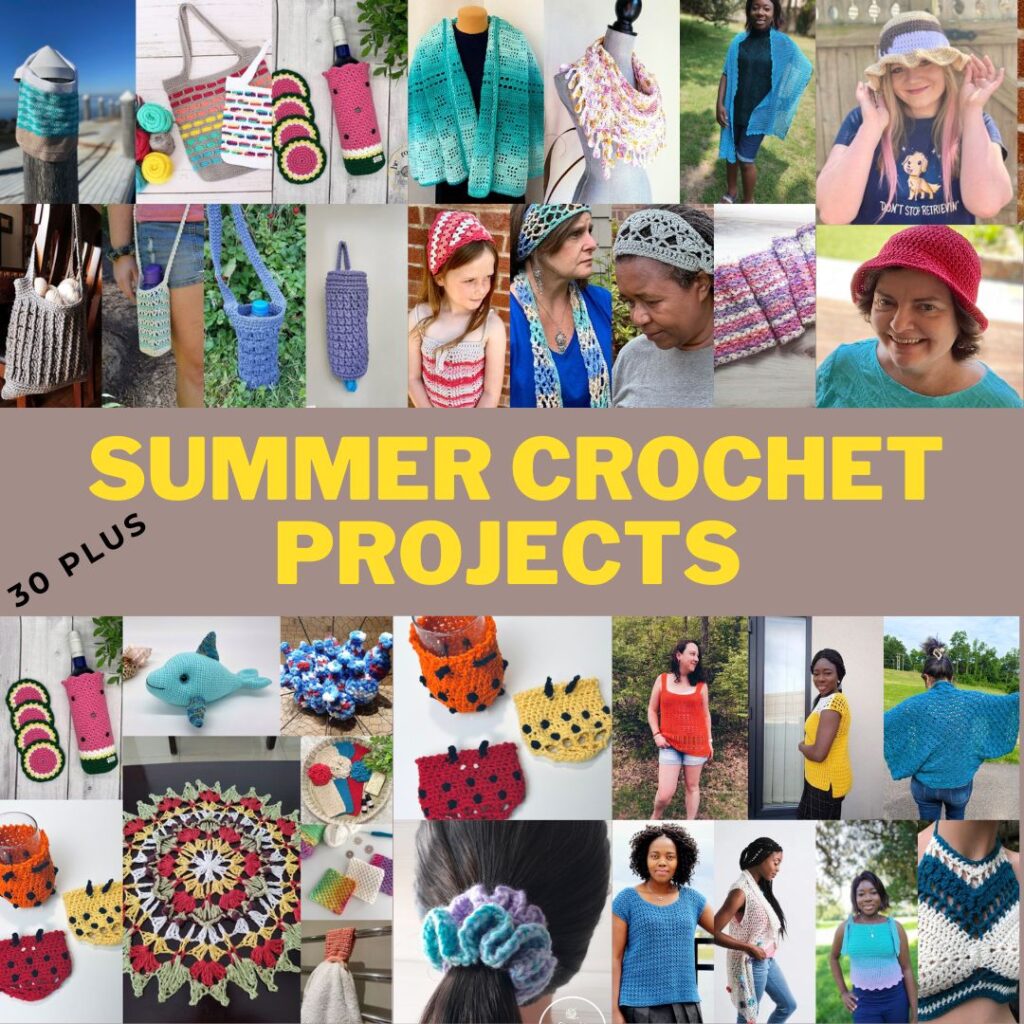
The Bundle consists of crochet projects the designer specially picked out for you.
The pattern includes
1. Crochet Garments.
2. Accessories – Scarves/shawls, Headwarmers, bags.
3. Fun bottle holders, coasters, Mandala, and many more!
The diverse range of patterns makes these perfect garments and accessories for your wardrobe. These are appropriate for this summer!!!
With these 33 crochet projects, you get each pattern at $0.39!!! That is a huge saving and an amazing deal!
Click the button and get all patterns today!

Remember to check back daily for the latest free Pattern!


OTHER FREE CROCHET PATTERNS YOU MIGHT LOVE!
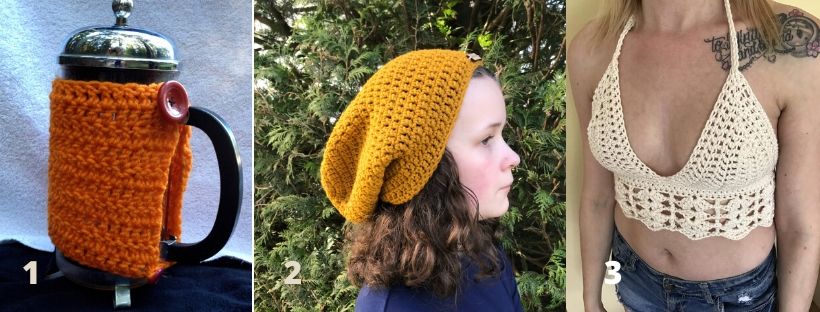
1. The French Press Cozy.
2. The Dreamer Slouchy Beanie
3. The Ivory Lace Bralette.
More Places to Find Crochet Free Patterns:
If you love crochet, you can find over a thousand free crochet patterns including some for crop tops and bralettes over at All Free Crochet
I am honoured to have my free crochet bralette pattern, the Earth Mother Bralette Pattern added to the All Free Crochet site.
 It is a great resource for crochet lovers and I am proud to also have my Take Me Outside Infinity Scarf Pattern posted over on the All Free Crochet Site.

Selling items made from my patterns?
You are more than welcome to se items made from my pattern. Please do share my link and tag and help promote it on social media. Thank you.
If you have any questions or need help with the patterns, please email me at carrowaycrochet@outlook.com, and Iʼll be glad to help you.
Thank you again for trying y pattern, I hope you enjoy it! Please share pictures of your completed Gloves on Instagram and Facebook. Tag them @carrowaycrochet #carrowaycrochet on Instagram.
Find other patterns by Carroway Crochet in my Etsy Shop and on Ravelry.