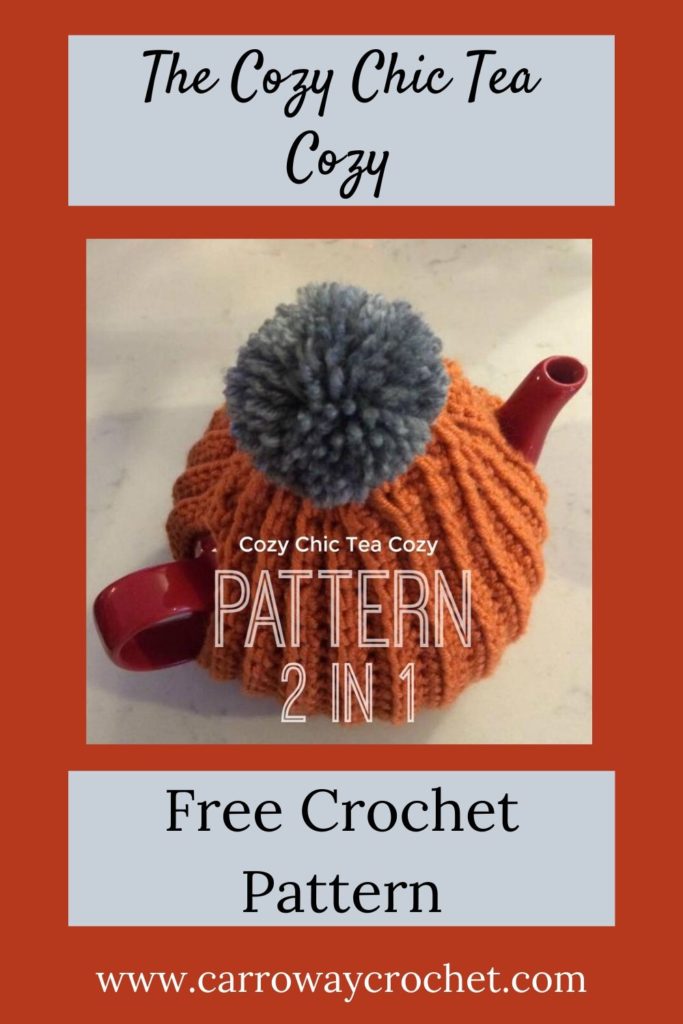
The Cozy Chic Tea Cozy: Free Crochet Pattern.

Crochet a Tea Cozy
So excited to share my free crochet pattern, “Cozy Chic Tea Cozy” with you. It is so funky with its pom pom topper. It will keep your tea piping hot during the winter weather. I hope you enjoy making it as much as I did. I made these originally for a customer who requested a special tea cozy for her mother in law. I have since made many more for my stall at the local Farmer’s Market. I thought I would make it available to fellow makers so I am offering it here on my blog as a free pattern.
If you prefer a printer friendly version you can get the pdf download from my Etsy Shop here.

You can also get the pattern in my Ravelry Shop if you are a Ravelry lover.

This post contains affiliate links that support the content on carrowaycrochet.com. All opinions are my own.
The Inspiration Behind My Cozy Chic Tea Cozy.
Growing up with English parents, tea is my go to hot beverage. Where other’s rely on coffee to get them going in the morning, I have to have a cup of tea. Making it in a mug is all well and good but it doesn’t have the mystic of brewing your tea in a warmed tea pot. I first designed this crochet tea cozy pattern as I was getting requests for them from many of my Farmer’s Market customers.
Everyone who has one a Cozy Chic Tea Cozy has loved it, so that is all I need to know. So I am very happy to be offering it here for you today. The one thing I have changed is that I added a pom pom topper instead of the traditional crochet flower topper, to make it more modern for the trend setting kitchen decor.
If you like cozies, you might also like my French Press Cozy and even my Mason Jar Cozies.

Sign up for my Newsletter
Get the latest info on free patterns and fun blog hops.
Join Me on Facebook.
Follow me on my Facebook Page for the latest video news and what I am up to.
Get the latest updates on my free patterns, latest pattern releases and share your crochet projects with our Carroway Crochet Community on Facebook. You will also get the updates on new blog hops I host or new pattern releases.
.

.
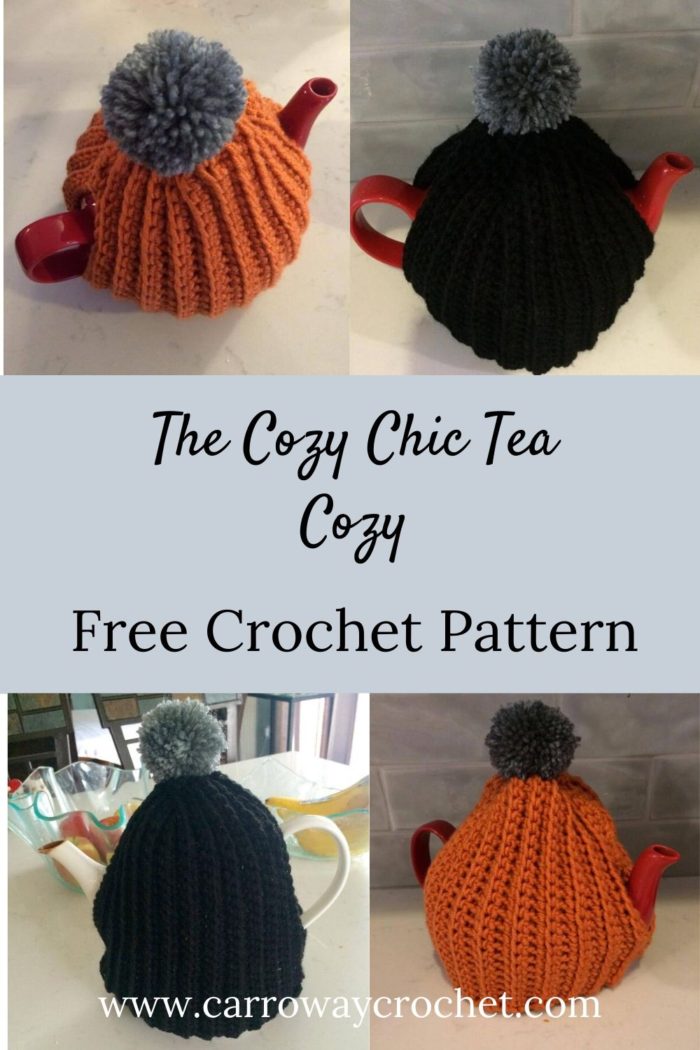
The Cozy Chic Tea Cozy Versions 1 & 2
Introducing the Cozy Chic Tea Cozy, Versions 1 and 2.
This fashion forward crocheted tea cozy is for a regular sized teapot.
Make this a part of your morning routine and start your day off with a smile.
This beautiful tea cozy will keep your fresh pot of tea nice and warm. I just love choosing and combining colours to create these gorgeous cozies.
I have included two pattern options for you. Version 1 is made with bulky yarn. Version 2 is made with worsted weight yarn.
Are You a Visual Learner
I have video tutorial on how to make my Rustic Tea Cozy over on my youtube channel.
Here is the right handed version
And here is the left handed version.
Don’t forget to pin this to your Pinterest so you don’t lose it.
This contemporary and cool design is a simple pattern for beginners.
You can make this super trendy cozy with beginner crochet stitches and the latest colours in home decor. For those new to crochet, I have videos on how to do the single crochet stitch and the back loop only single crochet stitch on my YouTube channel. They are the only stitches you need to know in order to make this Cozy Chic Tea Cozy.
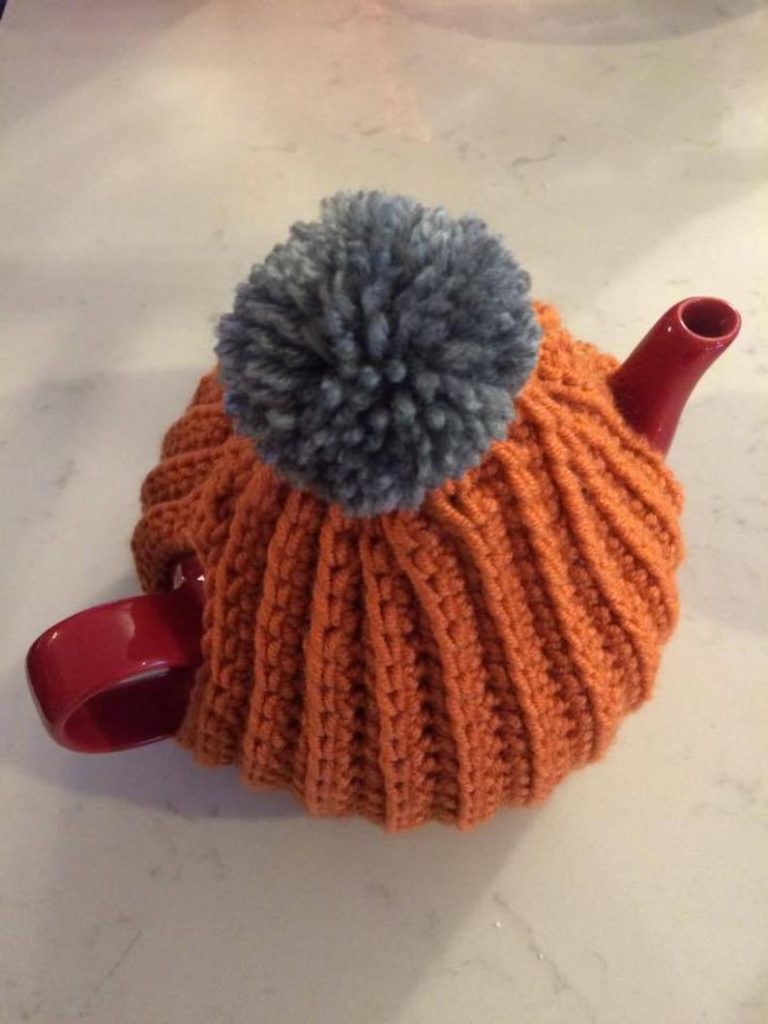
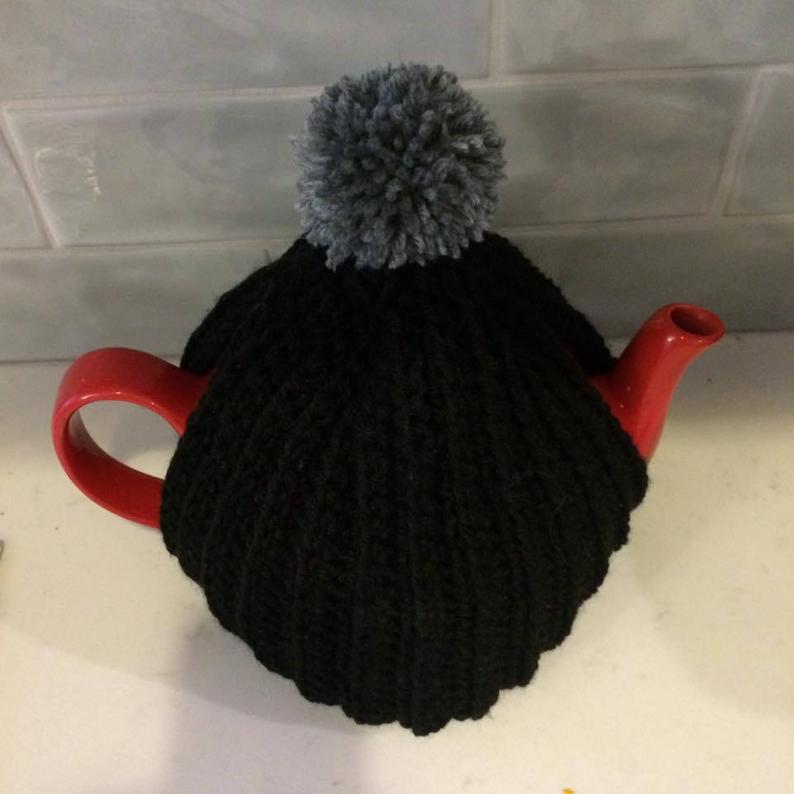
It is topped with a pom pom as seen in the pictures above.
I have a video showing you how to make a pom pom if you have never make one before. I use a pom pom maker, but you can also make them by wrapping the yarn around your hand or some cardboard if you don’t have a commercial pom pom maker.
Here is my pom pom video for you
Tea pots are not all alike and my daughter was gifted this gorgeous teapot when her sister went on holiday to England. All I did to make the cozy taller to fit this pretty teapot was cast on a few extra stitches on the foundation chain.


Which version will you choose for your cozy chic tea cozy?
Version 1: Cozy Chic Tea Cozy with Bulky Yarn
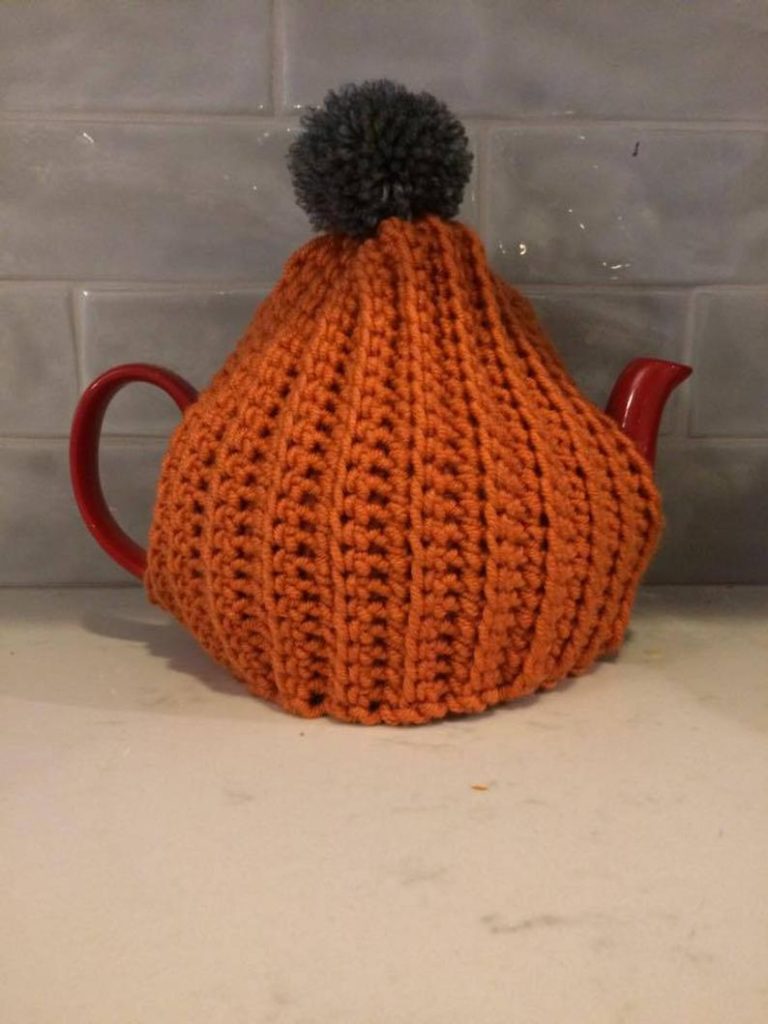
Finished Cozy Size: 18-20“/ 48-51 cm in circumference.
Supplies you will need:
Yarn: One skein of Bulky weight yarn (5)
The cozy pictured here was made using Lion Brand Lion’s Pride Woolspun, a super soft 20% wool/ 80% acrylic blend. This one is pumpkin with a grey pom pom topper.
Hook: Size US – K/10 ½ – 6.5 mm
Notions: Tapestry needle and scissors.
Gauge: 12 sc – 12 rows = 4” (10 cm)
Special Stitch for this project.
For this tea cozy you need to do the back loop only single crochet stitch.
It is the simple single crochet stitch, but it is done into the back loop of the stitch and this is what creates the rib pattern.
There is a great video showing how to do this on YouTube. I hope this helps you understand how to do it.
Abbreviations (uses US conventions)
-
Ch = chain
-
st = stitch
-
sc = Single crochet
-
blsc = back loop single crochet
-
sl st = Slip stitch
This pattern uses US terminology. The US and UK crochet terms are different, but they use the same terms to describe different stitches. Here is a simple conversion chart for anyone in the UK.
USSingle crochet (sc)Back loop single crochet (blsc) |
UKDouble crochet (dc)Back loop double crochet (bldc) |
Instructions:
Ch 1 at start of each row does not count as a stitch
This tea cozy is made in two identical sections, the front and the back.
Front.
Chain 22
Row 1: SC into 2nd stitch from hook, SC across the row (21 st)
Row 2: SC into back of loop on the first st (BLSC), BLSC into each stitch across the row (21 stitches)
Row 3-18 BLSC into the first st, BLSC across the row (21 stitches)
Tie off and leave a tail for sewing side seams.
Make another just the same for the back of the tea cozy.
Don’t forget to leave a long tail for sewing up the side seams.
Assemble the Tea Cozy.
With right sides together sew up from the bottom 2” using the whipstitch. Do this on each side. Weave in the ends.
At the top of the right hand side sew down 4”- 4 ½“ using the whipstitch and weave in the ends.
At the top of the left hand side sew down 3” approx. Weave in the ends.
With a long piece of yarn do a running stitch around the top of the tea cozy. Pull and gather tightly and knot twice to secure the yarn. Using your yarn needle run the yarn thread back and forth through the gathered top to create a tidy looking finish.
The Pom Pom
Using a pom pom maker of your choice make a three inch pom pom. You can also use the finger method for creating a pom pom. See below for directions on how to make a finger method pom pom.
Attach the pom pom to the top of your tea cozy using the two threads created by tying the pom pom.
Version 2: Cozy Chic Tea Cozy with Worsted Weight Yarn
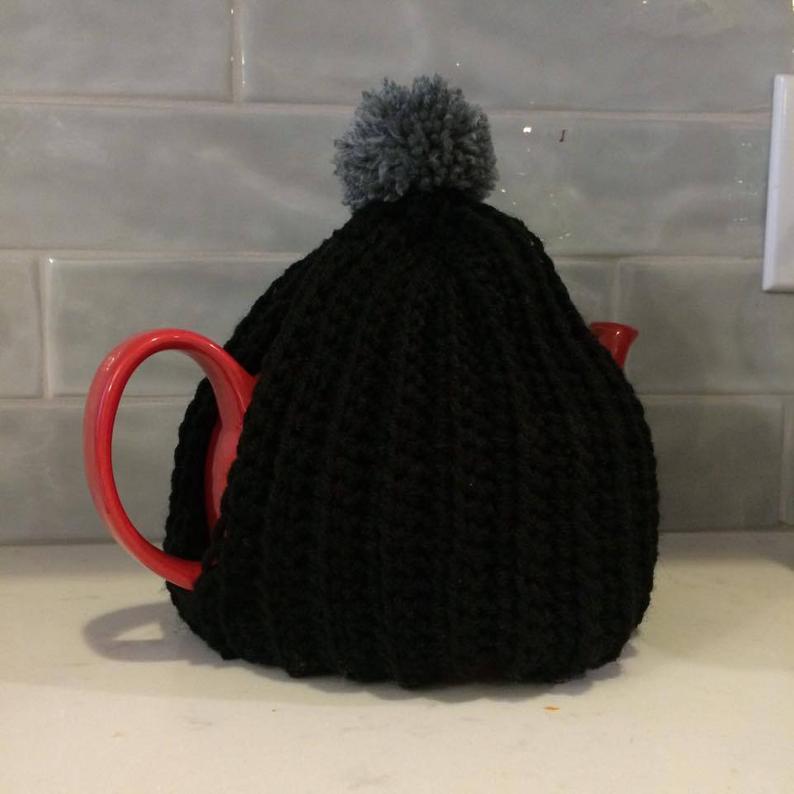
Finished Cozy Size: 18-20“/48-51 cm in circumference.
Supplies you will need:
Yarn: One skein of worsted weight yarn (4)
The cozy pictured here was made using Red Heart Super Saver, a 100% acrylic yarn. This one is black with a grey pom pom topper
Hook: Size US – H /8, 5.00 mm.
Notions: Tapestry needle and scissors.
Gauge: 15 sc – 16 rows = 4” (10 cm)
Special Stitch for this project.
For this tea cozy you need to do the back loop only single crochet stitch.
It is the simple single crochet stitch, but it is done into the back loop of the stitch and this is what creates the rib pattern.
There is a great video showing how to do this on YouTube. I hope this helps you understand how to do it.
Abbreviations (uses US conventions)
-
Ch = chain
-
st = stitch
-
sc = Single crochet
-
blsc = back loop single crochet
-
sl st = Slip stitch
This pattern uses US terminology. The US and UK crochet terms are different, but they use the same terms to describe different stitches. Here is a simple conversion chart for anyone in the UK.
USSingle crochet (sc)Back loop single crochet (blsc) |
UKDouble crochet (dc)Back loop double crochet (bldc) |

Instructions:
Ch 1 at start of each row does not count as a stitch
This tea cozy is made in two identical sections, the front and the back.
Front.
Chain 26
Row 1: SC into 2nd stitch from hook, SC across the row, ch 1 and turn (25 stitches)
Row 2: SC into back of loop on the first st (BLSC), BLSC into each stitch across the row (25 stitches)
Row 3-20 BLSC into the first st, BLSC across the row (25 stitches)
Tie off and leave a tail for sewing side seams.
Make another just the same for the back of the tea cozy.
Assemble the Tea Cozy.
With right sides together sew up from the bottom 2” (approximately, as this can vary according to the style of your teapot) using the whip stitch. Do this on each side. Weave in the ends.
At the top of the right hand side sew down 4”-4 ½“ using the whip stitch and weave in the ends.
At the top of the left hand side sew down 3” approx. Weave in the ends.
With a long piece of yarn do a running stitch around the top of the tea cozy. Pull and gather tightly and knot twice to secure the yarn. Using your yarn needle run the yarn thread back and forth through the gathered top to create a tidy looking finish.
Using a pom pom maker of your choice make a three inch pom pom. You can also use the finger method for creating a pom pom. (see below for directions.
Attach the pom pom to the top of your tea cozy using the two threads created by tying the pom pom.
How to Make a Pom Pom using the Finger Method.
Step 1
Wrap the yarn around your fingers, holding them straight. The more you do this the thicker your pom pom. Wrap the yarn loose enough that you can get it off your hand easily.
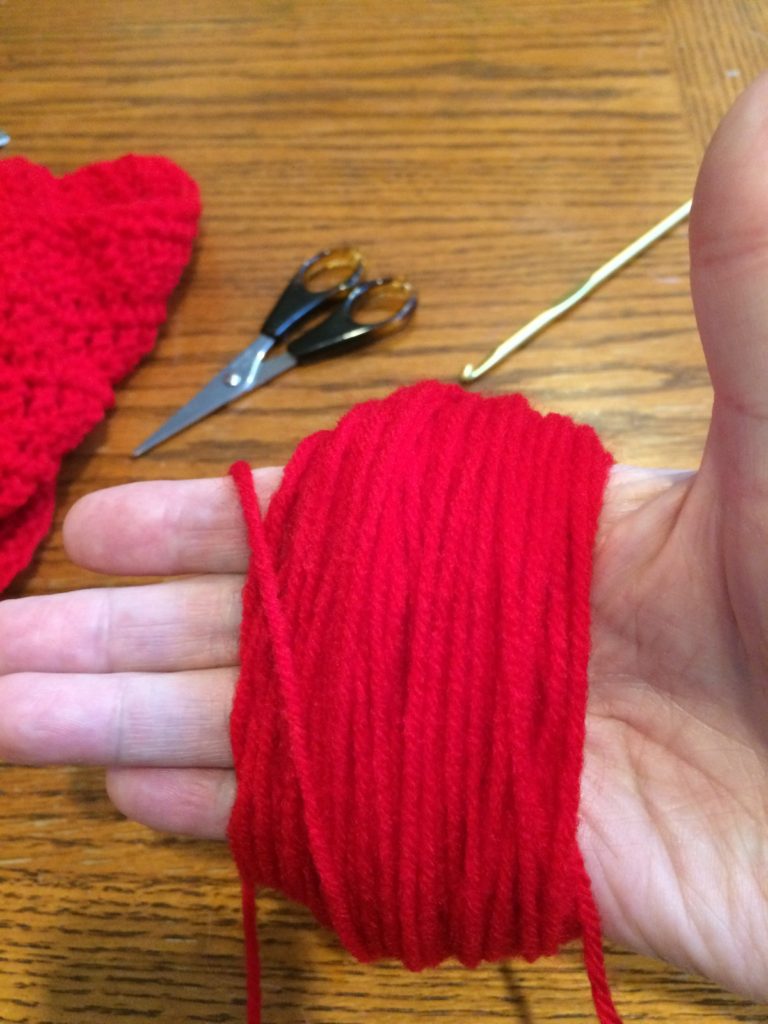
Step 2
Slip the yarn off your hand carefully and wrap a long strand of yarn around the bundle of yarn you have created. Make sure it is centred so that each side of the pom pom with be equal. Leave the long strands as you need them to secure your pom pom to your project.

Step 3:
Pull tightly and tie a tight knot in the thread wrapped around the middle of your yarn bundle. Leave the ends of the yarn long enough to hold onto as you move on to step 4. You also need the ends to attach the pom pom to your project. Now you are ready cut the yarn at the sides.

Step 4:
After you have cut the yarn at each side of the pom pom you begin trimming with sharp scissors. Hold the two ties you have left from step 2. Begin to snip around the pom pom to even it out. You will need to do this as the top and bottom of the pom pom will not be rounded due to the way the yarn was wrapped around your hand.

Step 5:
Complete trimming the pom pom to your satisfaction. Use the ties to attach it to your tea cozy.

If you have any questions or need help with the patterns, please email me at carrowaycrochet@outlook.com, and Iʼll be glad to help you.
Thank you for trying my pattern, I hope you enjoy it! Please share pictures of your completed Cozies on Instagram and Facebook. Tag them #cozychicteacozy @carrowaycrochet #carrowaycrochet on Instagram.
The Table Decor with a Story Blog Hop

The Cozy Chic Tea Cozy pattern is free on November 11th 2025 as part of the Table Decor with a Story Blog Hop.
How to Get Your Free PDF download.
Click on the image below and it will take you to the event post where you will find my coupon code for the free download.
Write down the coupon code and return here with the link in the hop post.

Next click on this button below to go to Ravelry for your free pdf download
Click on ‘buy now’ and enter your coupon code in the coupon code text box and click ‘apply coupon code’.
DOWNLOAD YOUR FREE PATTERN.

I hope you enjoy all the beautiful patterns in this crochet event.
You can return to the blog hop to see all the free patterns featured daily .

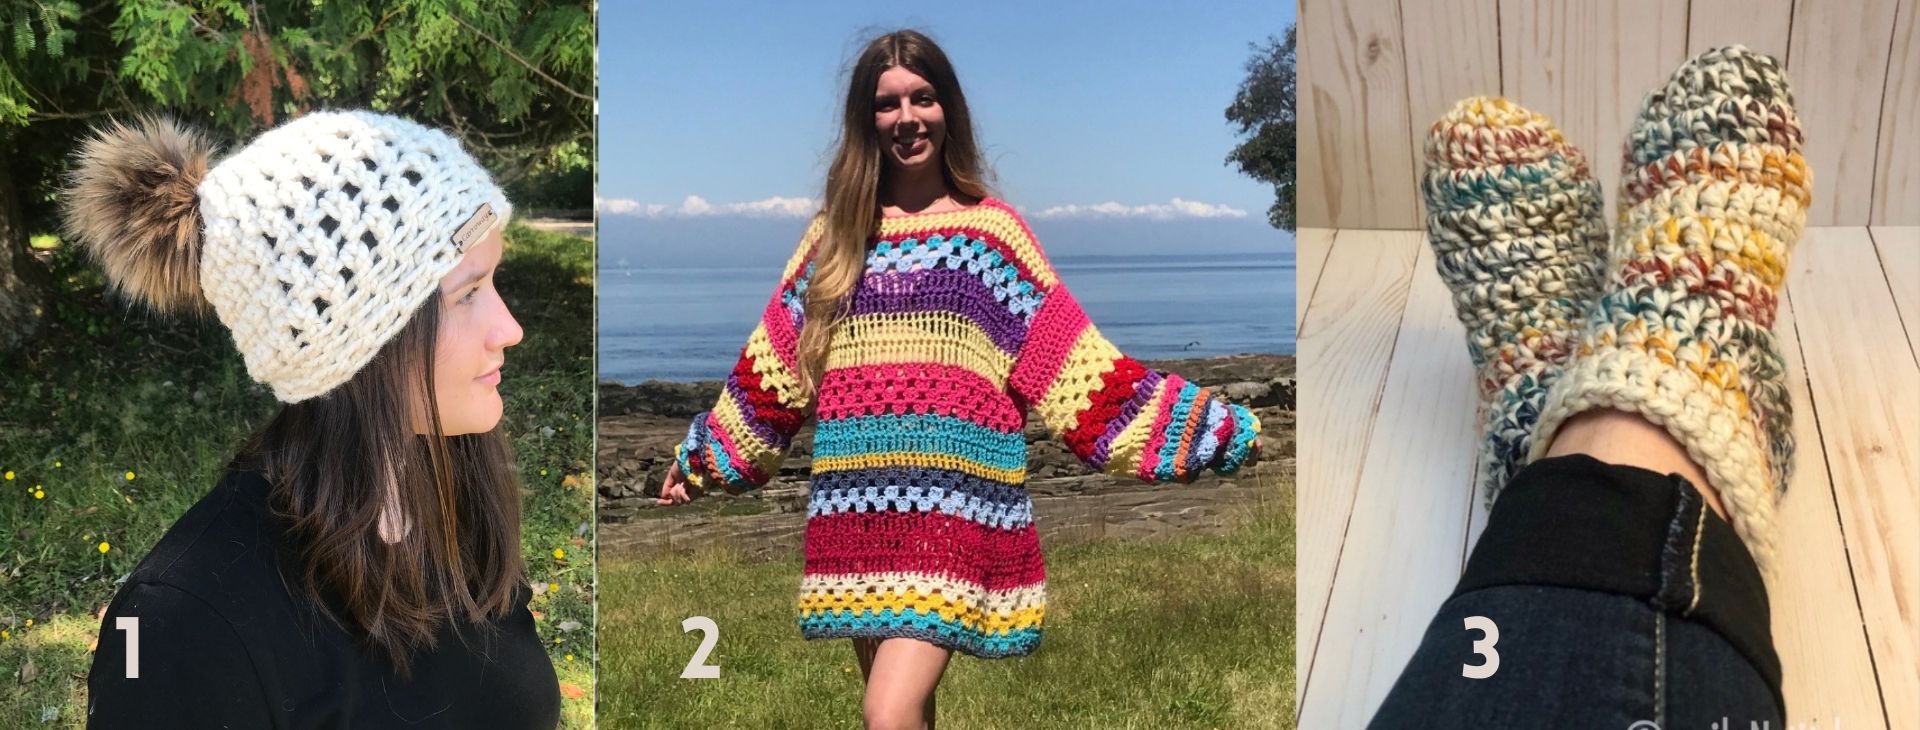
3. The Warmest Feet Ever Slipper Socks.
More Places to Find Crochet Free Patterns:
If you love crochet, you can find over a thousand free crochet patterns including some for crop tops and bralettes over at All Free Crochet
I am honoured to have my free crochet bralette pattern, the Earth Mother Bralette Pattern added to the All Free Crochet site.
 It is a great resource for crochet lovers and I am proud to also have my Take Me Outside Infinity Scarf Pattern posted over on the All Free Crochet Site.

Selling items made from my patterns?
You are more than welcome to sell items made from my pattern. Please do share my link and tag and help promote it on social media. Thank you.
If you have any questions or need help with the patterns, please email me at carrowaycrochet@outlook.com, and Iʼll be glad to help you.
Let’s Share and Connect!
Thank you so much for visiting me here at Carroway Crochet .
Find other patterns by Carroway Crochet in my Etsy Shop and on Ravelry.
Other places you can find me are:
This design, written work and images are a copyright of
©CarrowayCrochet and may not be copied or reproduced in any way.
You have permission to sell finished products made from this pattern, but please leave a link to my blog, www.carrowaycrochet.com in your product listing specifying that I am the designer of this pattern.
Thank you.