Fingerless Gloves Free Pattern

Fingerless Gloves Free Pattern for this Winter?
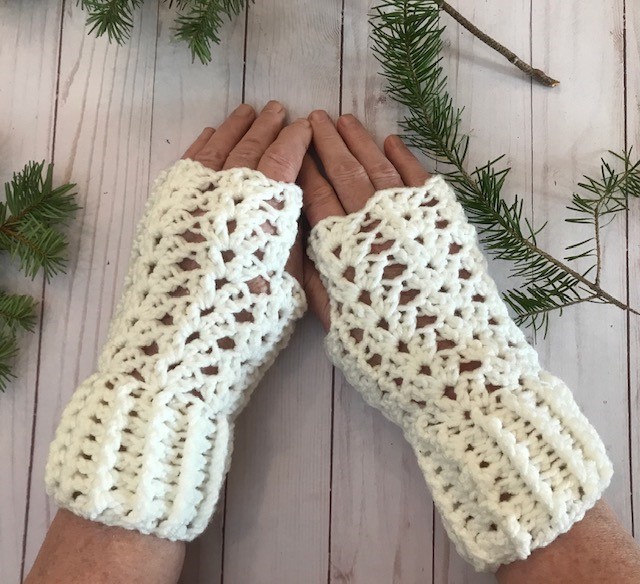
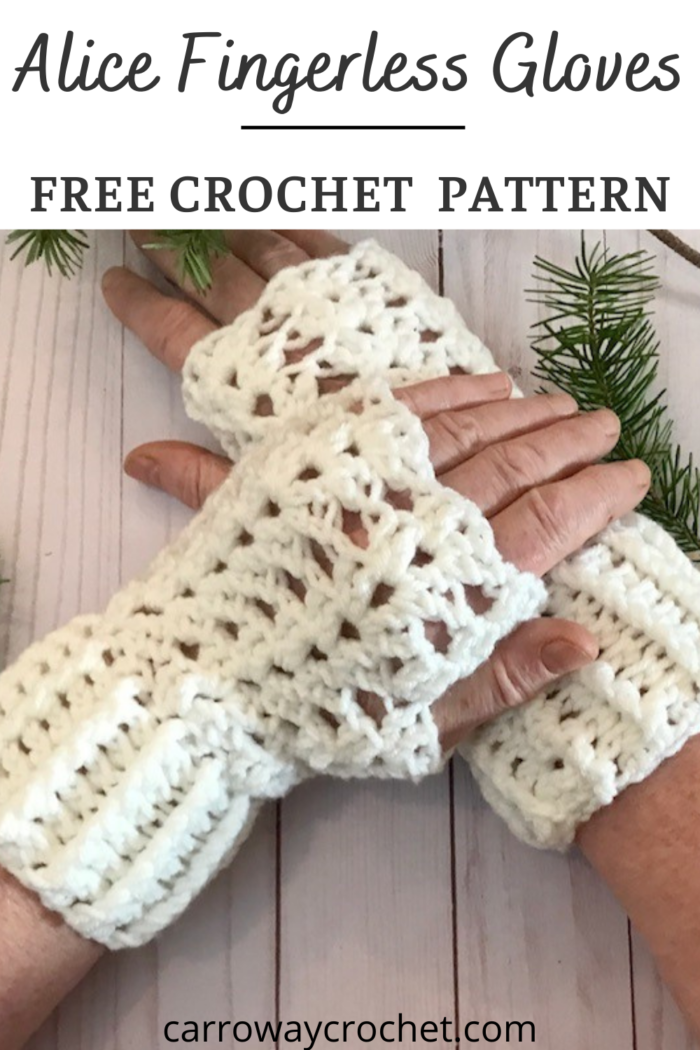
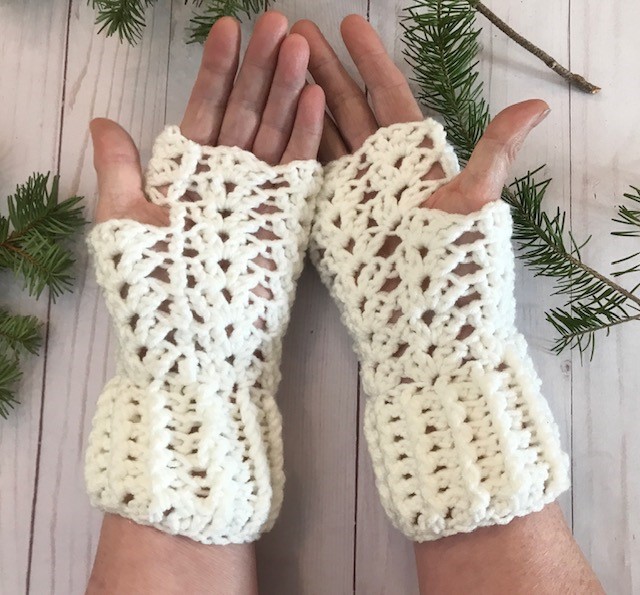
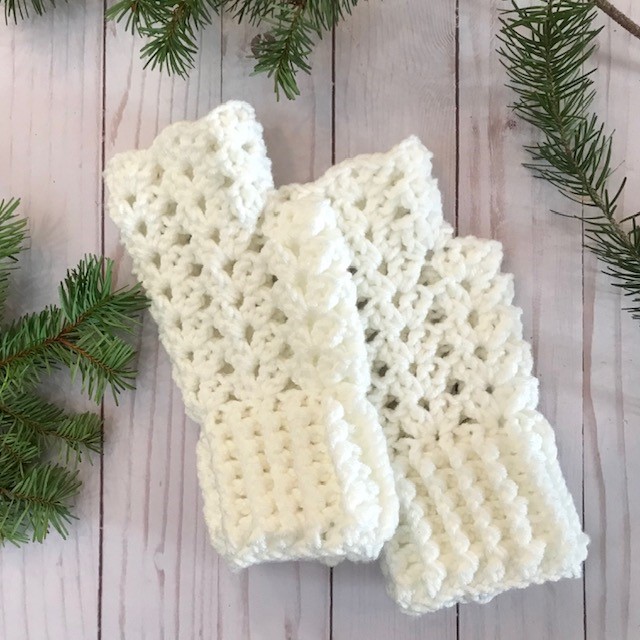
I’m so happy to introduce this Fingerless Gloves Free Pattern to you, and it is just in time for the winter holiday season. I used a worsted weight yarn for My Alice Fingerless Gloves free pattern, and you will find your finished gloves are perfect for wearing in the fall to keep your hands cozy while leaving your fingers free for texting or taking pictures on your phone.
**This post contains affiliate links. If you make a purchase using some of my links I may receive a small commission at no extra cost to you.**

The Inspiration for my Alice Fingerless Gloves Free Pattern.
The inspiration for my free Alice fingerless gloves came from wanting to add a longer cuff to a worsted weight pair of fingerless gloves.
I also wanted a textured crochet stitch that reminded me of lacy snowflakes. SO I came up with this quick and easy pattern using the Iris stitch. There is a longer more substantial cuff created by the fpdc, bpdc rib pattern. This is all explained in the pattern below.
If you love the Alice fingerless gloves crochet pattern you may also be interested in my Short and Chunky Fingerless Gloves. These were so popular with my testers as they loved how quickly they made up. Another glove pattern that makes up quickly for the Christmas Season and is especially good for gifting is my Oh So Cosy Fingerless Gloves Pattern.
There is an ad free, printer friendly PDF pattern for the Alice Fingerless Gloves available in my Ravelry shop if you would prefer a written pattern. Just click the button for the PDF pattern.

Sign up for my Newsletter!
If you want daily updates for the new FREE Patterns in this blog hop just sign up for my Newsletter.
Get the latest info on free patterns and fun blog hops.
Join Me on Facebook.
Follow me on my Facebook Page for the latest video news and what I am up to.
Get the latest updates on my free patterns, latest pattern releases and share your crochet projects with our Carroway Crochet Community on Facebook. You will also get the updates on new blog hops I host or new pattern releases.

These gloves are perfect for beginners. They are made in the round, so there are no seams to sew and they grow very quickly. You will have so much fun making these and sharing them with loved ones.
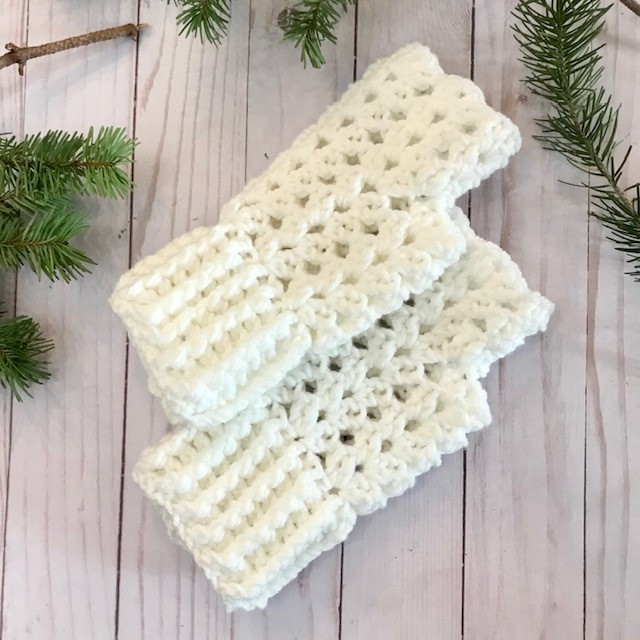
The Alice Fingerless Gloves look great in any worsted weight yarn. Look for the number (4) on the label.
There are two sizes available as well so they can fit small/medium or medium/large sized hands.
Don’t forget to pin it for later.
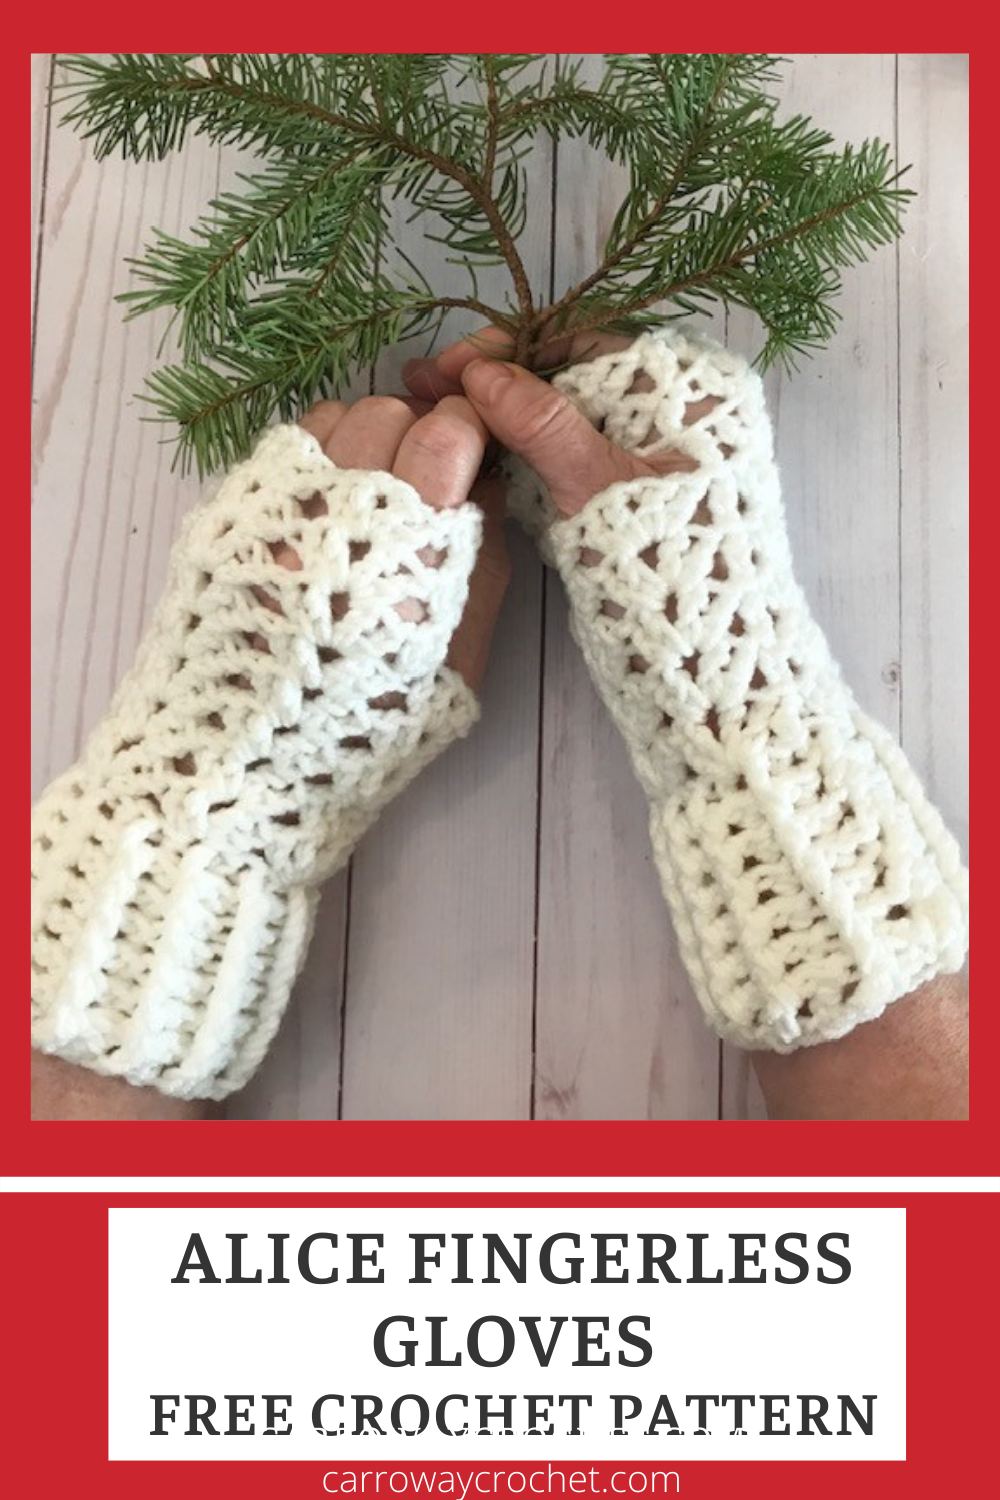
This free fingerless glove crochet pattern is perfect for beginners as well as advanced crocheters.
You can make the Alice Fingerless Gloves using iris stitch. This stitch uses double crochet stitches and a chain st to create the beautiful lacy clusters that make this such a beautiful stitch to use.
For those new to crochet, I have videos on my Carroway Crochet youtube Channel that will demonstrate the double crochet stitch. I have both left and right handed version available to help beginner crocheters.
The Alice Fingerless Gloves Free Pattern
Pattern by Pam Carr ©2022
Finished Size:
Small/Medium. Palm of hand is 8” circumference or 3.5”- 4” wide and
9” tall
Medium/Large: Palm of hand is a 9” circumference or 4.5” wide and 9” tall.
Supplies you will need for the gloves:
Yarn: One skein of worsted weight (4) yarn.
Hooks: K/10.5 – 6.50mm for the foundations ch row
J/10 -5.75mm
Notions: Scissors, tapestry needle.
Gauge: 11 dc – 7 rows = 4” (10 cm)
Abbreviations (uses US conventions)
-
Ch = chain
-
st = stitch
-
sl st=slip stitch
-
dc = double crochet
-
ch1 sp =. chain 1 space
-
fpdc = front post double crochet
-
bpdc = back post double crochet
This pattern uses US terminology. The US and UK crochet terms are different, but they use the same terms to describe different stitches. Here is a simple conversion chart for anyone in the UK.
USDouble Crochet (dc) |
UKTreble (tr) |
Special Stitch used in the Cuff of the Winter Time Fingerless Glove pattern.
For the cuff you will do Front Post Double Crochet and Back Post Double Crochet.
Here is a great video tutorial to learn this technique.
https://www.youtube.com/watch?v=5S2D25Aa5oA
FPDC or front post double crochet.
Yarn over, insert hook from the front side of the work to back and then to front again, around the post of the indicated stitch on the previous row; yarn over and pull up a loop (3 loops on hook), yarn over and draw through two loops, (2 loops on hook), yarn over and draw through two loops, (1 loop on hook).
BPDC or back post double crochet.
Yarn over, insert hook from the back side of the work to front and to back again around the post of the indicated stitch on the previous row; yarn over and pull up a loop (3 loops on hook), yarn over and draw through two loops (2 loops on hook), yarn over and draw through two loops (1 loop on hook)
A tip to remember when working this ribbed cuff.
When you work 1 front post double crochet (FP DC) around the post of the double crochet in the row below, this stitch is raised on the surface of the fabric facing you. Always make sure that the post stitches are raised to the same side in each successive row or round. Keep an eye on the ribs and remember: If the stitch you’re working is raised to the front, work a front post stitch; if the stitch is raised to the back, work a back post stitch.
Special Stitch for the Pattern:
The Iris Stitch. How to Crochet the Iris Stitch for a Flat Project
This is a lacy stitch with a great texture. Here is how to make it when working with a flat piece. For a flat piece you start with a multiple of 4.
Row 1. Ch 3, (2dc, ch1, 2dc) into the next st, *sk3 st, (2dc, ch1, 2dc) in the next st, * repeat from * to * until 2 st remain, sk a st, dc into the last st. Turn work.
Row 2: Ch 3, *(2Dc, ch1, 2dc) in next ch1 sp.*, Repeat between * and * to the end of the row, make a dc into the top of the turning ch3 from the previous row. Turn work.
Repeat Row 2
Instructions:
The instructions for both sizes are written below.
I have written two numbers to represent the number of stitches you will chain to start your project and also how many stitches you will have at the end of each row. The first number is for the small/medium, and the second number is for the medium/large size.
Eg: When you see Ch 24, (28) the 24 is for the small/medium size and the 28 is for the medium/large size.
Note: These gloves are crocheted in the round so you do not turn the work.
Note: Use the larger hook to make the foundation chain so it is easier to fit the hand into the glove.
With a K hook
Ch, 24 (28) and join with a sl st into the first chain to form a ring, being careful not to twist the chain.
Change to the J hook.
Round 1: ch 2, dc into each ch around, join to the top of the ch2 with a sl st. 24 (28)
Round 2: ch2, (fpdc into dc in row below, bpdc into next dc in row below), repeat between the brackets 9 more times, join to the top of the ch2 with a sl st. 24 (28)
Round 3: ch2 (fpdc into dc in row below, bpdc into next dc in row below), repeat between the brackets to the end of the round, join to the top of the ch2 with a sl st. 24 (28)
Round 4-7): ch2 (fpdc into dc in row below, bpdc into next dc in row below), repeat between the brackets to the end of the round, join with a sl st to the top of the ch2. 24 (28)
Round 8: Ch3, sk2, [2dc, ch1, 2dc] in next st, *sk3, [2dc, ch1, 2dc] in next st * repeat from * to * until last 2 sts, sk these 2 stitches, join with a sl st in top of 3ch. You will have made 6 (7) fan sets.
Round 9: Ch 3, *(2dc, ch1, 2dc) in next ch1 sp.* Repeat between * and * to the end of the row, join with a sl st to the top of the ch3. 6 (7) fan sets made.
Round 10: Ch 3, *(2dc, ch1, 2dc) in next ch1 sp.* Repeat between * and * to the end of the row, join with a sl st to the top of the ch3. 6 (7) fan sets made.
Round 11: Ch 3, *(2dc, ch1, 2dc) in next ch1 sp.* Repeat between * and * to the end of the row, join with a sl st to the top of the ch3. 6 (7) fan sets made.
Round 12: Ch 3, *(2dc, ch1, 2dc) in next ch1 sp.* Repeat between * and * to the end of the row, join with a sl st to the top of the ch3. 6 (7) fan sets made.
Round 13 Ch3, *[2dc, ch1, 2dc] in next ch1 sp* repeat from * to * another 3, (4) times, sk next st, [2dc, ch1, 2dc] in next st (centre of fan sets), sk 2 fan sets, join with a sl st to the top of the ch3. 5 (6) fan sets.
Round 14 – 15: Ch 3, *(2dc, ch1, 2dc) in next ch1 sp.* Repeat between * and * to the end of the row, join with a sl st to the top of the ch3. 5 (6) fan sets.
Finish off and weave in the ends.
If you have any questions or need help with the patterns, please email me at carrowaycrochet@outlook.com, and Iʼll be glad to help you.
April Fools Freebie 2026
This year is my fifth year of posting the Aprils Fool Freebie crochet event.
This year I am doing things a little bit differently. There will be some foolish fun for you.
Each pattern will be randomly shared. I will be sending out an email announcing whenever a new free pattern is being shared.
There will be no rhyme or reason as to when they will be announced, so it will be a bit of April Free Pattern Fun.
Freebie # 11 is available on April 25th and 26th
Go claim your free pdf by clicking on the pic below and enter your coupon code APRILFREEBIE26 at the check out.

If you enjoy the patterns in this event maybe you would like to share some of your finished projects or join our growing crochet community in my Facebook Group. It would be great to have you and see what you are up to.
Other Patterns You May Like.
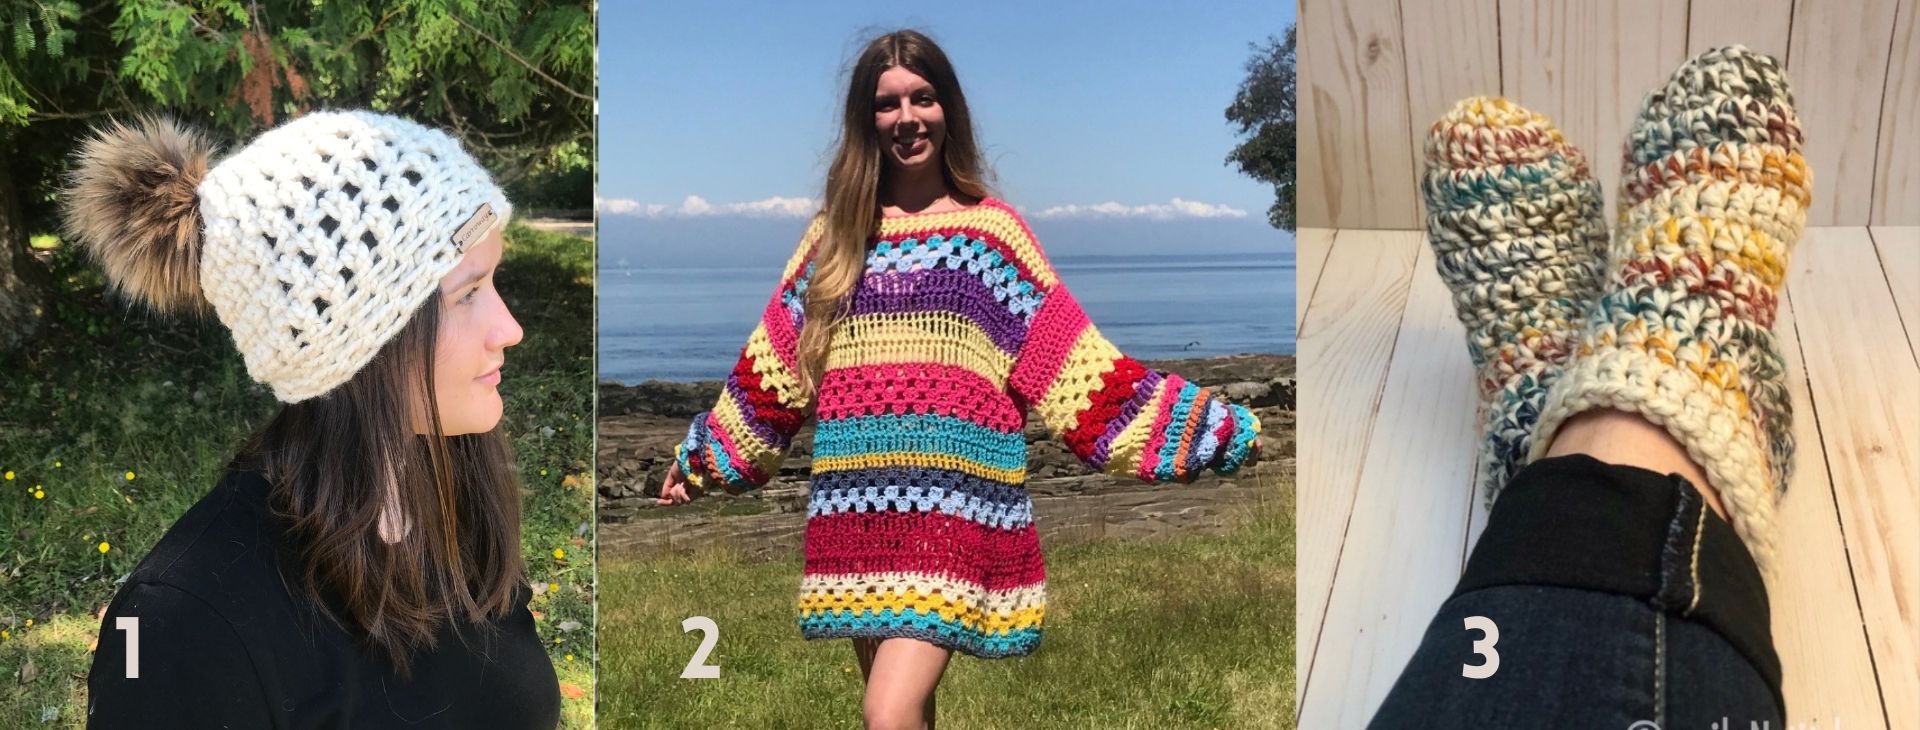
1. The Freedom Beanie.
2. The Happy Hippy Sweater
3. The Warmest Feet Ever Slipper Socks.
More Places to Find Crochet Free Patterns:
If you love crochet, you can find over a thousand free crochet patterns including some for crop tops and bralettes over at All Free Crochet
I am honoured to have my free crochet bralette pattern, the Earth Mother Bralette Pattern added to the All Free Crochet site.
It is a great resource for crochet lovers and I am proud to also have my Take Me Outside Infinity Scarf Pattern posted over on the All Free Crochet Site.
 It is a great resource for crochet lovers and I am proud to also have my
 Selling items made from my patterns?
You are more than welcome to sell items made from my pattern. Please do share my link and tag and help promote it on social media. Thank you.
If you have any questions or need help with the patterns, please email me at carrowaycrochet@outlook.com, and Iʼll be glad to help you.
Find other patterns by Carroway Crochet in my Etsy Shop and on Ravelry.
Let’s Share and Connect!
Thank you so much for visiting me here at Carroway Crochet. Your support and visits help me to grow and add more and more great content to my blog.
Other places you can find me are:
Ravelry
This design, written work and images are a copyright of
©CarrowayCrochet and may not be copied or reprodced in any way.
You have permission to sell finished products made from this pattern, but please leave a link to my blog, www.carrowaycrochet.com in your product listing specifying that I am the designer of this pattern.
Thank you and happy crocheting.