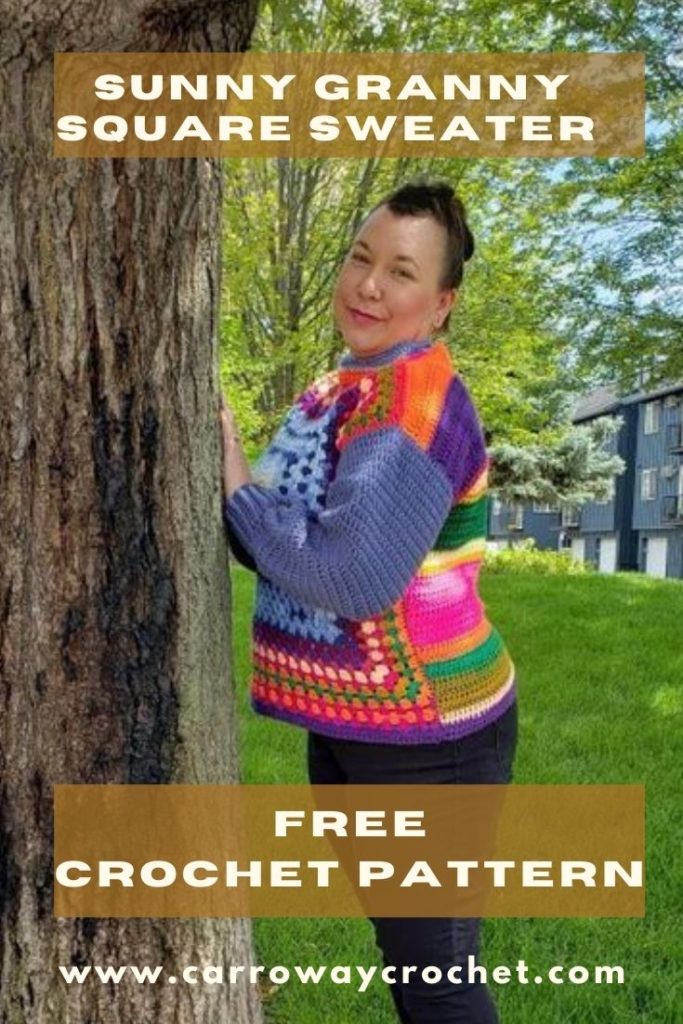
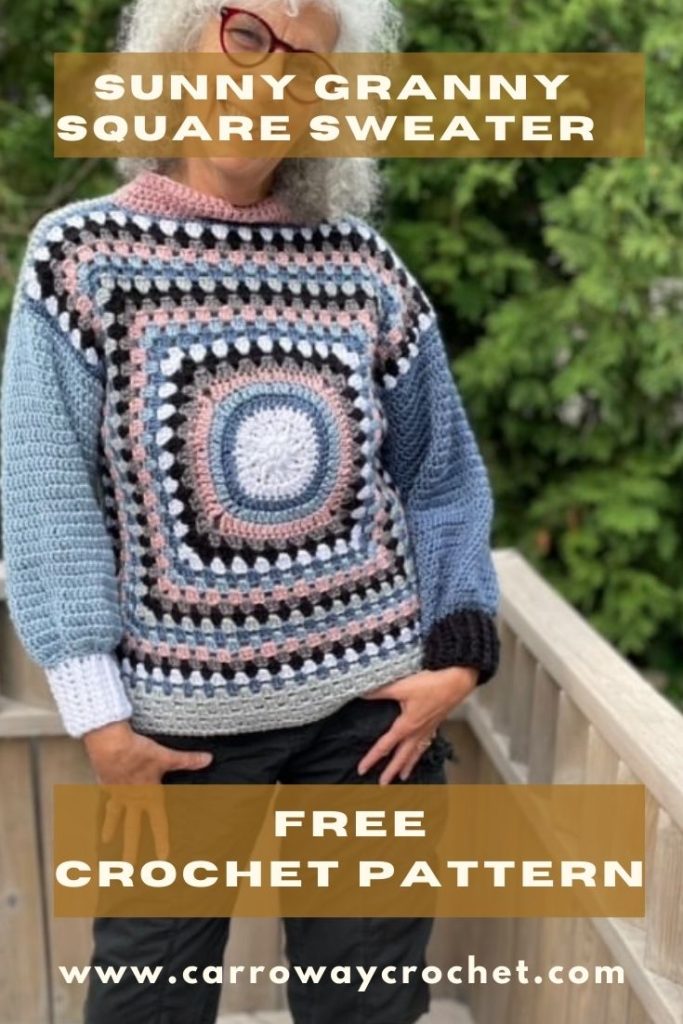
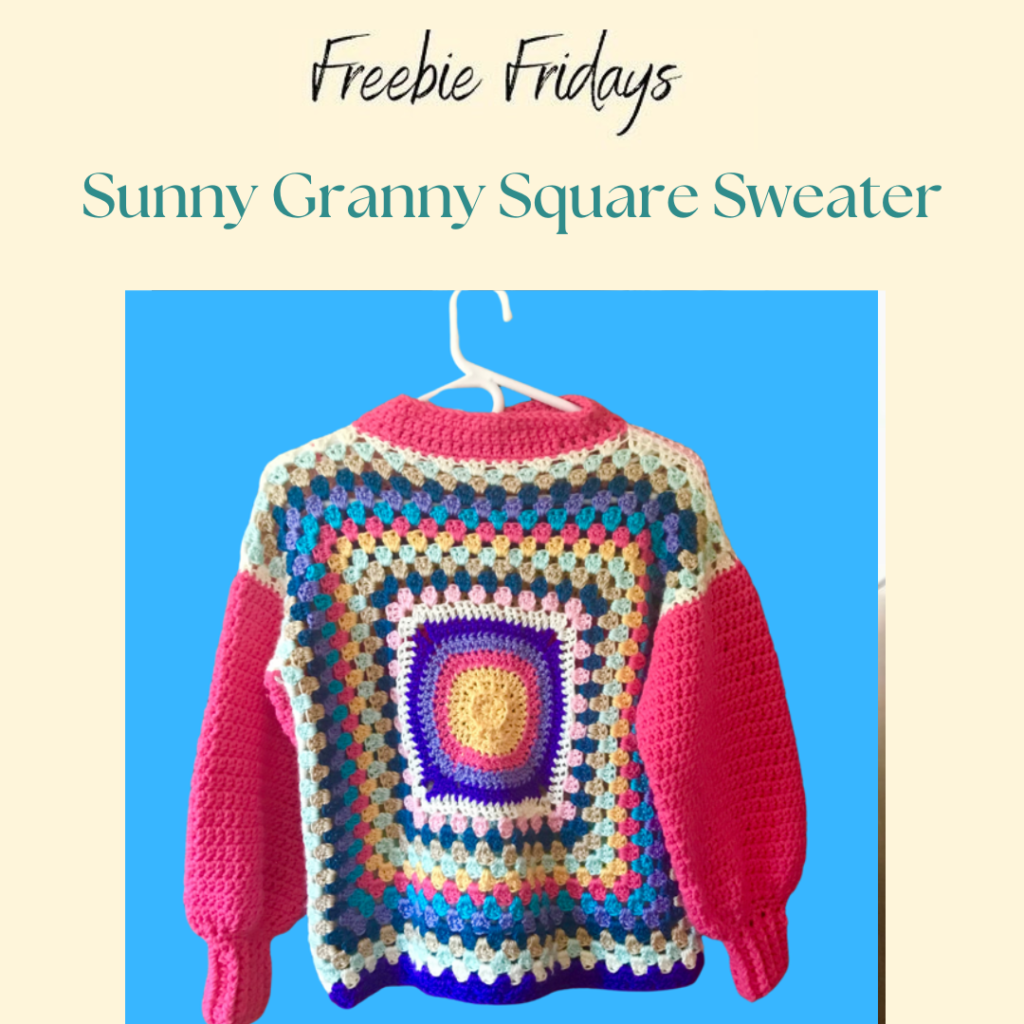
Sunny Granny Square Sweater: Free Crochet Pattern

Here is a great sweater project for using up your stash of yarn. I call it the Sunny Granny Square Sweater. I designed the Sunny Granny Square Sweater for granny square lovers and those who like a fun crochet project that is great for using up your stash, but also like modern crochet with a hippy/boho flair.
I am so excited to bring you the Sunny Granny Square Sweater Pattern.
The Sunny Granny Square Sweater Pattern is beginner friendly as it uses some of the first stitches you learn for crocheting. There is a row involving the front post double crochet but there are videos for this technique on youtube.
This is such a fun design that it lifts your mood every time you wear it. You could even go up a couple of sizes if you wanted an oversized version.
**This post contains affiliate links. If you make a purchase using some of my links I may receive a small commission at no extra cost to you.**
About the Sunny Granny Square Sweater.
I am so happy to share this fun Sunny Granny Square Sweater pattern with you as I feel it is versatile crochet sweater project. Depending on the yarn you choose, it can be a bright and funky fun top to lift your spirits when you put it on. Or you can choose more classic or neutral colours and make a sweater that is more your style and fits your comfort zone. This sweater can be the sweater of many colours or just featuring one solid colour. You decide on your yarn and get busy crocheteting and before you know it you have another beautiful handmade garment in your crochet wardrobe. Once you discover how easy it is to make this sweater you might want to make it in all the variations.

The Sunny Granny Square Sweater is made with two rectangles for the body. The sleeves are simple and the pattern instructions have clear directions on how to add the sleeves and assemble your sweater. The style of the sweater is a drop shoulder, which is a very popular style right now.
Don’t Forget to Pin This For Later.
Check out my latest Video on How to Crochet a Simple Beanie.
The Sunny Granny Square Sweater Pattern Comes in All The Sizes.
The other great thing about the Sunny Granny Square Sweater pattern is it comes in so many sizes, XS/S, M, L, XL, 2X and 3X.
There are also tips on how you can make it as long or as short as you want.

Let me tell you what I love about the Sunny Granny Square Sweater Pattern.
First, I personally love colour, as you may well know if you follow me and my design journey. I started out wanting to create a design that could use up those scraps of left over yarn. Designing a sweater featuring one big granny square has been on my ‘to do’ list for a long time.
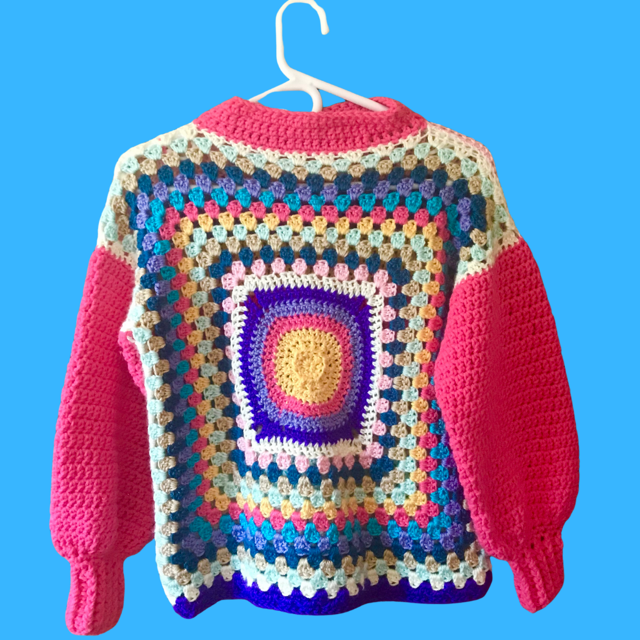
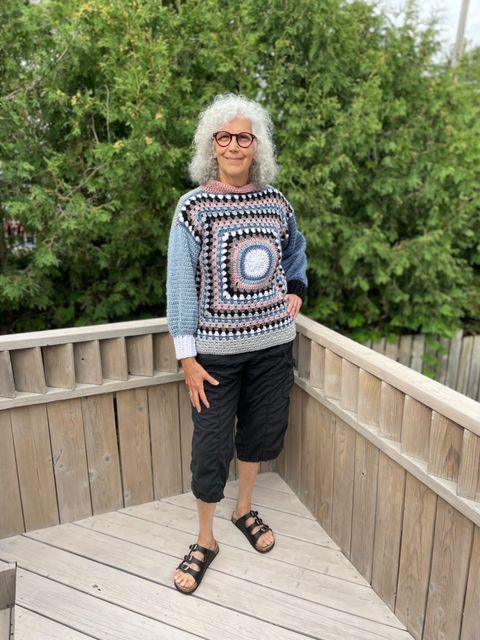
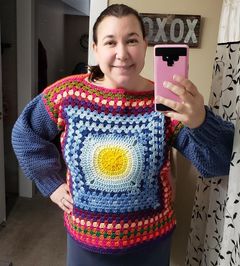
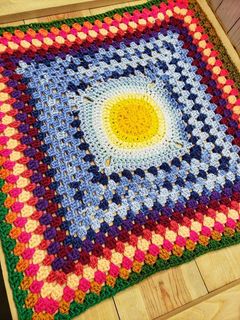
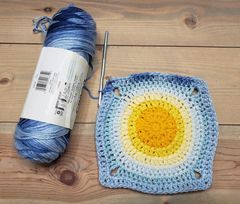
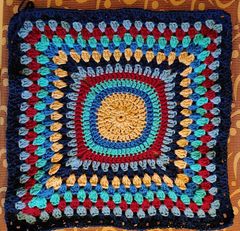
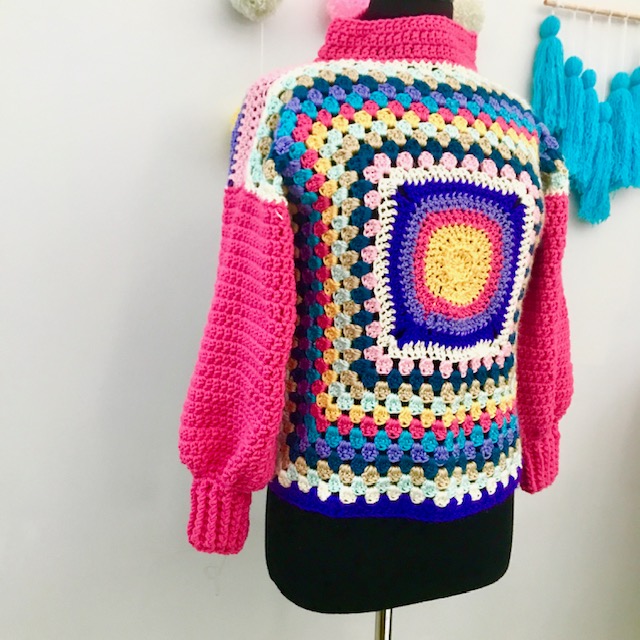
Secondly I wanted to also create a circle in the middle of the traditional granny square, so that is what I did for this sweater. Here are a few of the samples of colour palettes used by my testers.
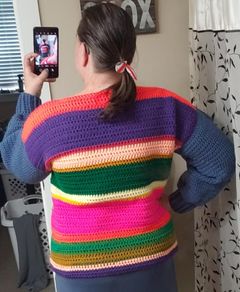
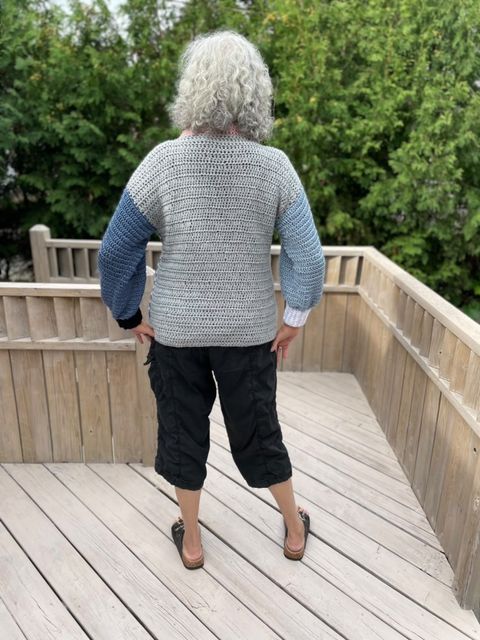
Thirdly I also switched up the ideas for the back of the sweater and this added an extra striped element to the design. You can choose to not do the striped back and just make it one solid colour. The choice is. yours.
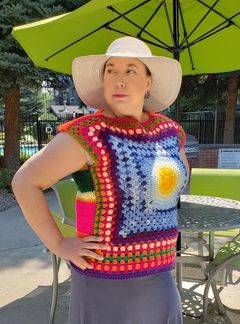
Fourthly it can double as a sleeveless summer top. This is such a great bonus with this pattern. I love the sleeveless look. 

Last of all I love how you can customize this sweater. You can make the sweater as long or as short as you like and the instructions for customizing your sweater are in the pattern.
Also you can decide how high you want the collar to be. The instructions for the neck line of the sweater are also in the pattern.


Don’t forget to pin this post for later.
If you love adding to your crochet wardrobe you might like my Super Simple Sweater pattern and my Happy Hippy Sweater as well.

If you prefer to have the pattern in front of you instead of on the screen you can get the ad free pdf .
Get the Pattern on Etsy.

The Sunny Granny Square Sweater Pattern
Pattern by Pam Carr ©2021
Introducing the Sunny Granny Square Sweater. I love the fun of Granny Squares and creating a sweater pattern incorporating a granny square has been on my crochet bucket list for a while.
This is a bit different as the granny square starts out with a circle that is then worked into a square. I just love how the yellow centre reminds me of the sun,
Once you complete the circular section you begin working the traditional granny square and just keep working outwards from there to complete the front of the sweater. The back and sleeves are made using the double crochet stitch.
I used a hot pink for my sleeves, and added stripes for the back. It is a truly joyful sweater and I am in love with it.
Supplies you will need:
Yarn: worsted weight yarn (4) I used yarns from my stash. The amounts shown below are generous approximations for how much yarn in total you will need for each size.
Extra Small/Small 1025 yards. Medium 1200 yards, Large 1300 yards, 1X 1400 yards, 2X 1500 yards, 3X 1600 yards.
Hook: Size H/8 – 5 mm
Notions: Scissors , tapestry needle.
Gauge: 12 dc –7 dc rows = 4”x 4″ (10 cm) with an H 5mmhook
Abbreviations (uses US conventions)
- Ch = chain
- st = stitch
- sc = single crochet
- dc = double crochet
- sl st = slip stitch
- fpdc = front post double crochet
- bpdc = back post double crochet
Special stitch for this pattern.
For the sleeve cuffs you will do Front Post Double Crochet and Back Post Double Crochet.
Here is a great video tutorial to learn this technique.
https://www.youtube.com/watch?v=5S2D25Aa5oA
FPDC or front post double crochet.
Yarn over, insert hook from the front side of the work to back and then to front again, around the post of the indicated stitch on the previous row; yarn over and pull up a loop (3 loops on hook), yarn over and draw through two loops, (2 loops on hook), yarn over and draw through two loops, (1 loop on hook).
BPDC or back post double crochet.
Yarn over, insert hook from the back side of the work to front and to back again around the post of the indicated stitch on the previous row; yarn over and pull up a loop (3 loops on hook), yarn over and draw through two loops (2 loops on hook), yarn over and draw through two loops (1 loop on hook)
A tip to remember when working this ribbed brim.
When you work 1 front post double crochet (FP DC) around the post of the double crochet in the row below, this stitch is raised on the surface of the fabric facing you. Always make sure that the post stitches are raised to the same side in each successive row or round. Keep an eye on the ribs and remember: If the stitch you’re working is raised to the front, work a front post stitch; if the stitch is raised to the back, work a back post stitch.
This pattern uses US terminology. The US and UK crochet terms are different, but they use the same terms to describe different stitches. Here is a simple conversion chart for anyone in the UK.
| US
Double Crochet (dc) Single Crochet (sc)
|
UK
Treble crochet (tr) Double Crochet (dc)
|
To fit bust measurement
XS/Small: 28”-34” [71-86.5 cm]
Medium: 36-38″ [91.5-96.5 cm]
Large: 40-42″ [101.5-106.5 cm]
XL: 44-46″ [112-117 cm]
2X : 46-48″ [122-137 cm]
3X: 48”-52” [137-142 cm]
The actual size of your panels should be approximately
| Width | Length | |
| Extra Small/Small | 19 | 21” |
| Medium | 20” | 22” |
| Large | 21” | 23” |
| X Large | 22” | 24” |
| 2 X | 24” | 25” |
| 3X | 27” | 27” |
Instructions:
The Front and Back:
This top is made with two rectangular pieces which form the back and front of the garment.
Front:
Note: This is made from the centre out, like a granny square.
The ch2 starting ch does not count as a stitch.
Start with yellow yarn
Make a magic circle or ch4 and join with a sl st to the first ch to make a circle, do not twist the chain.
Round 1: ch1, make 8 sc into the loop, sl st into 1st stitch to join, (8 sts)
Round 2: ch2, 2dc into the first st and into every stitch around. Sl st into 1st st to join, (total 16 sts)
Round 3: ch2, * 2dc into the first st, fpdc into the next st, * repeat between * and * 8 times, sl st into 1st stitch to join, ( 24 sts )
Round 4: Ch2, *2dc into the 1st st, 1dc into the next st,* repeat between * and * to the end, join with a sl st to the top of the ch2) (36)
Change colour.
Round 5: Ch2, *2dc into the 1st st, make 1 dc int each of the next 2 st,* repeat between * and * to the end, join with a sl st to the top of the ch2). (48)
Change colour.
Round 6: Ch2, *2dc into the 1st st, make 1 dc into each of the next 3 st,* repeat between * and * to the end, join with a sl st to the top of the ch2. (60)
We are now going to transition from the circle into the square section. This is done by creating four corners. In Round 7 each corner is made up of a dc, tc, ch3, tr, dc cluster. We start with only half the cluster and it will be completed at the end of the round.
Change colour:
Round 7: Ch4 (this acts as the first triple crochet), dc into the same st, 13dc around to where the next corner will be, dc, tc into the next st, ch 3, * tc, dc into the next st, 13 dc around, dc and tr into the next st, ch3*, repeat between * and * 2 more times, sl st into the top of the third st of the ch to join.
Change colour. Join yarn to one of the ch 3 corner spaces from the precious round.
Round 8: Ch3 ( this acts as the first dc) , make 1dc into the same corner sp, make 16 dc across to the next corner, 2dc into the ch3 sp, ch2, *2dc into the same corner sp, 16dc across to the next corner, 2dc into the ch3 sp, ch2, *. Repeat between * and * 2 more times, sl st to join.
Note:
Now you work as a regular granny square.
Turn work so the raised circle of the third row is facing up.
Corners will be made up of 3dc, ch2, dc all worked into the same ch2 space from the corner of the previous round.
When you make 3 double crochet into the same st or space it is called a cluster.
Join new colour to a ch3 corner space.
Round 9: Ch3 which acts as first dc, (2 dc, ch2, 3dc, into the same ch3 sp), {*skip 2 st, , 3dc in sp between stitches, * repeat from * to * to the next corner, sk 2, [3dc, ch2 3dc] into the ch3 sp.} Repeat between { and } around to the first corner and sl st to the top of the ch 3 to join. Change colour. There are 9 dc clusters between each corner of 3dc, ch2 3dc.
Join a new colour to a ch2 corner space.
Round 10: ch3 which acts as first dc, (2 dc, ch2, 3dc, into the same ch2 sp),* make a 3dc into the space between the clusters in the round below. Continue working a cluster into each sp until the next corner. (3 dc, ch2, 3dc)* Repeat between the * and * until you are back at the first corner, sl to top of the ch3 to join.
Change colour.
Repeat Round 10 changing colours every round. Each round will get bigger.
Work until the panel is 19” (20”, 21”, 22”, 24”, 27”) across.
Bottom Trim:
Row 1: Attach new colour to the bottom corner. Ch2, dc into the same st, 3dc into the next sp, 3dc into each space across, 2dc into the final corner sp.
Note: See the how to customize your sweater instructions below if you want to make your sweater longer.
Row 2: Ch2, dc into the first st and every st across.
How to Customize your Sweater:
If you want a longer sweater you can add extra rows of granny stripe stitch and customize it to your desired length.
Row 2: Chain 2, then work 3dc stitches (a shell) into the first sp between the 2dcs at the end of the previous row and the next 3 dc shell. Work a 3 dc shell into each space across. At the end of the row, work 1 dc into the top of the ch2 made at start of previous row. Turn work.
Row 3: Ch 2, 1 dc in same space as the ch 2, work a 3 dc shell into each space to the end of the row, work 2 dc into the top of the turning chain from the previous row. Turn.
Repeat Rows 2 and 3 until it is your desired length.
Finish off with Row 2 from the Trim instructions above.
Fasten off and weave in the ends.

Back:
Note: I worked the back in stripes, changing colours after every four rows. You may choose to make yours a solid colour
Chain 58, (61, 64 , 68, 72, 76)
Ch 2 at start of each row does not count as a stitch
Row 1: Dc into second chain from the hook, dc across. Ch2 and turn. 57, (60, 63 , 67, 71, 75)
Row 2: ch2, DC in each st across, ch 2 and turn, 57, (60, 63 , 67, 71, 75)
Repeat row 2 until your back measures 21” (22”, 23” 24”, 25”, 27”) long or is the same length as your front panel..
Fasten off and weave in the ends
Construction.
Lay one piece down (the back) with the right side up. Make sure your bottom edge is at the bottom.
Lay the front piece down on top of it with the right side facing down. Once again check to make sure your bottom row is at the bottom.
Match up the sides and whip stitch them together from the bottom making sure the rows line up. Leave 8” ( 9”, 9”, 10”, 11”, 11”) open from the top for the arm holes.
Sewing up the Shoulders.
Leave the top with right sides facing each other for this stage of construction.
Lay the top down on a flat surface.
Count 18, (19, 20, 21, 22, 23) stitches in from each side, and mark with a stitch marker or pins. These will be the shoulders of your top. Whip stitch the shoulders together. Fasten off and weave in the ends.
This is what it looks like when you have sewn the back and front together.My testers thought it could be worn as a sleeveless top, and I agree. Hereis a pic of how it looks before adding sleeves. Good for summer time.
Sleeves:
Turn the top so the right sides are facing out.
The sleeves will be worked around the edge of each arm opening in the round.
Attach yarn to the underarm where the side seams are.
Round 1: ch 1. Single crochet around the opening picking up 46, (52, 52, 58, 64, 64) st.
When picking up the stitches make 2 sc into each row of dc on the back, and a sc into each st of the granny square row on the front.. You may need to add or subtract a few stitches as you do this as the rows in the measurement for the arm hole can vary on each sweater. When you are back at the side seam under the arm sl st to the top of the first ch1.
Round 2: ch 2, dc into each stitch around, join with a sl st to the top of the ch2.
Repeat Round 2 until your sleeve measures 12” (13”, 14” 15”, 16”, 17”)
Decrease for cuff.
Round 1: ch1, sc 2 tog, repeat sc 2 tog around to the end. Join to top of ch1 with a sl st. 23, (26, 26, 29, 32, 32) st.
Round 2: ch1, make 1sc into each of the next 4 stitches, sc2tog * sc into each of the next 4st, sc2tog ,* repeat from * to * around to the end, join to the top of the ch1 with a sl st. 20 (22, 22, 25, 27, 27)
The Cuff.
For sizes XS/S, Medium and Large
Round 1: ch2, dc into the first st and into each st. around. (20 (22, 22) st
For sizes XL, 2XL and 3XL.
Round 1: ch2, 2dc into the first st and then make one dc into each st. around. 26 (28,28)
Note: Instructions for doing the cuff using the alternating FPDC and BPDC are above, along with a link to a video tutorial.
Round 2: Ch 2, *FPDC into DC in row below, BPDC into next DC in row below* repeat around, join with a sl st to top of Ch2.
Round 3: Ch 2, *FPDC into DC in row below, BPDC into next DC in row below* repeat around, join with a sl st to top of Ch2.
Round 4- 9: Ch 2, *FPDC into DC in row below, BPDC into next DC in row below* repeat around, join with a sl st to top of Ch2.
Fasten off and weave in the ends.
Repeat this for the other sleeve. You can customize your sleeves by making them different colours, or like one of my testers did, just swtich up the colours on the cuffs.
Neck Trim or Collar:
Attach the yarn to the neck opening on one side.
Round 1: Ch1 and single crochet around the neck opening making one sc into each st around. Join with a sl st to the ch1.
You can choose to fasten off here and weave in the ends if you would just like a trim row for your neck opening.
Continue if you would like a collar.
Round 2-4: ch2, dc into the first st and into every st around. Join to the top of the ch2 with a sl st.
Fasten off and weave in the ends.
You are now the proud owner of a Sunny Granny Square Sweater.
If you have any questions or need help with the patterns, please email me at carrowaycrochet@outlook.com, and Iʼll be glad to help you.
The Friday’s Freebie Pattern.
Welcome to the Friday’s Freebie
Get this weeks Friday’s Freebie pattern.
Here is what you need to do:
Use the coupon code FREEBIE to get your free pattern.
All you need to do is go to Ravelry and click on ‘Buy Now’ and that takes you to the check out. Click on ‘Coupon Code’ and enter FREEBIE and click apply coupon code.
Now you can download your free pattern pdf. Thank you for joining us here and I hope you enjoy this free pattern pdf.

OTHER FREE CROCHET PATTERNS YOU MIGHT LOVE!
More Places to Find Crochet Free Patterns:
If you love crochet, you can find over a thousand free crochet patterns including some for crop tops and bralettes over at All Free Crochet
I am honoured to have my free crochet bralette pattern, the Earth Mother Bralette Pattern added to the All Free Crochet site.
 It is a great resource for crochet lovers and I am proud to also have my Take Me Outside Infinity Scarf Pattern posted over on the All Free Crochet Site.
Selling items made from my patterns?
You are more than welcome to sell items made from my pattern. Please do share my link and tag and help promote it on social media. Thank you.
If you have any questions or need help with the patterns, please email me at carrowaycrochet@outlook.com, and Iʼll be glad to help you.
Thank you again for trying my pattern, I hope you enjoy it! Please share pictures of your completed items on Instagram and Facebook. Tag them @carrowaycrochet #carrowaycrochet on Instagram.
Find other patterns by Carroway Crochet in my Etsy Shop and on Ravelry.
Let’s Share and Connect!
Thank you for trying my free crochet sweater pattern, I hope you enjoyed it! Please share pictures of your completed Happy Scrappy Sweater on Instagram and Facebook. Tag them @carrowaycrochet #carrowaycrochet and #happyscrappysweater on Instagram.
Thank you so much for visiting me here at Carroway Crochet .
Find other patterns by Carroway Crochet in my Etsy Shop and on Ravelry.
Other places you can find me are:
This design, written work and images are a copyright of
©CarrowayCrochet and may not be copied or reproduced in any way.
You have permission to sell finished products made from this pattern, but please leave a link to my blog, www.carrowaycrochet.com in your product listing specifying that I am the designer of this pattern.
Thank you.
Love it. On my list for Holiday crafting. Thanks for posting.