
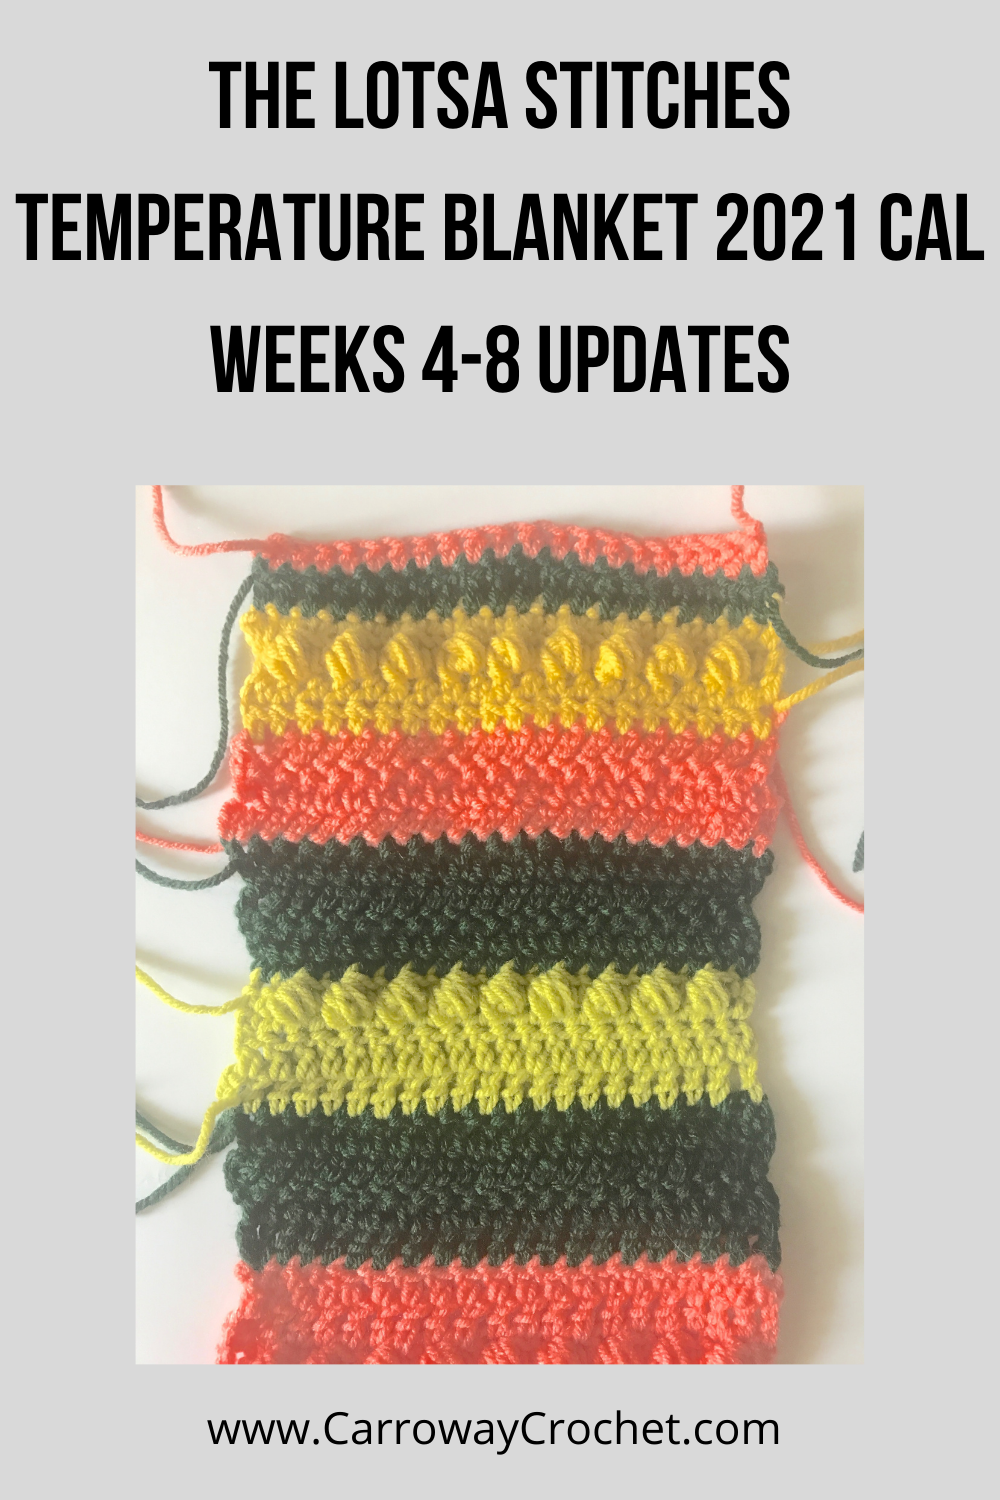
The Lotsa Stitches Temperature Blanket: Weeks 5-8 Pattern Updates

Weeks 5-8 Pattern Updates for the The Lotsa Stitches Temperature Blanket 2021 CAL.
For the Introduction to the The Lotsa Stitches Temperature Blanket and how to get started visit this post.
This blog post will have weeks 5-8 added each Friday. I work on temperature projections for my area so I an set you up for each week.
Recap on the Basic Information for you.
The Lotsa Stitches Temperature Blanket is made with worsted weight yarn, (4) and I use a mix of yarns I have on hand. Some Loops and Threads Impeccable, some Caron Simply Soft, Red Heart Super Saver and Bernat Premium. I chose to use acrylic but once again, the choice is yours as to what yarn you pick for your blanket.
The finished blanket will be approximately 52″ by 60″
It will be made in strips. There are 8 strips that will measure 6.5″ wide and 60″ long.
These will be sewn or crocheted together at the end to make the finished blanket.
Each week I will add the pattern for the 7 daily sections to be worked and introduce the feature stitch of the week.
There will be individual stitch tutorials posted.
If you have any questions about this project please do comment below and I will get back to you as soon as I can.
The Lotsa Stitches Temperature Blanket Pattern will be released Week by Week.
We will be starting Strip 1 first.
Each week will have 7 days represented using some of these stitches, the single crochet, half double crochet and double crochet stitches. I am calling these the basic stitches that will be used throughout the blanket.
Each week there will also be the weekly feature stitch in each section. Sometimes the feature stitch may reappear in future sections, but that is a surprise.
Here is how week 1 looks with the basic stitches and the feature stitch. I added a couple of hdc rows more than you see here in order for it to be be 10 long. As each week goes by it gets more and more beautiful.
Lots of Video Support For the Lotsa Stitches Temperature Blanket.
If you are new to crochet there are video tutorials for the basic stitches, (the single crochet, half double crochet and double crochet stitch) on my You Tube Channel. I have them in both left and right handed versions. Here is a sample.
And here is the left handed version.
Don’t forget to pin this post so you can find it later.
Size:
Finished size for the Lotsa Stitches Temperature Blanket is 52” by 60” approximately.
Supplies you will need:
Yarn: worsted weight yarn in the colours you selected for your colour chart. I used ten. (4) The blanket is made using a variety of worsted weight yarns. You will need 200 grams of each colour to start with and add more as required. Due to the colours being used according to the temperature chart it is impossible to predict how much you will need of each colour.
Hook:
Size H/8 – 5.00mm hook
Notions: Scissors, tapestry needle, measuring tape.
Gauge: 13 dc – 5 dc rows (approx.) = 4” (10 cm) with a H hook
Feel free to go up or down a hook size to get the correct gauge.
Abbreviations (uses US conventions)
- Ch = chain
- st = stitch
- sc = single crochet
- dc = double crochet
- hdc = half double crochet
- blo = back loop only
- sl st = slip stitch
- Sp = space
This pattern uses US terminology.
The US and UK crochet terms are different, but they use the same terms to describe different stitches. Here is a simple conversion chart for anyone in the UK.
|
US Double Crochet (dc) Single Crochet (sc) Half Double Crochet (hdc)
|
UK
Treble crochet (trc) Double Crochet (dc) Half treble crochet (htr) |
Special Stitches for this Pattern.
Each week the Lotsa Stitches Temperature Blanket will have a feature stitch with a video tutorial for the stitch in left and right handed versions.

I am adding the updates for weeks 5
Instructions:
This blanket consists of 8 long strips or panels that will be worked individually. Each strip will be 6.5” wide and 60” long. When they are all completed they will be joined together to create the completed blanket.
I will be releasing each section of the pattern weekly throughout this CAL. I am using the projected forecast dates for my blanket so I can be ahead of you.
Note: The turning chain does not count as a stitch.
Week 5: The Lotsa Stitches Temperature Blanket
Note: Please keep checking your strip to make sure it is approx. 6.5” wide. Go up or down a hook size if it is too small or big until you get it to be close to 6.5” as this will impact the final size of your blanket.
If you are ok with it being slightly bigger or smaller than the 52” by 60” size then that is ok and you can proceed with your blanket.

Week 5: The Lotsa Stitches Temperature Blanket
My projected temperatures for this week are 6, 7, 3 , 4, 4, 6, 3
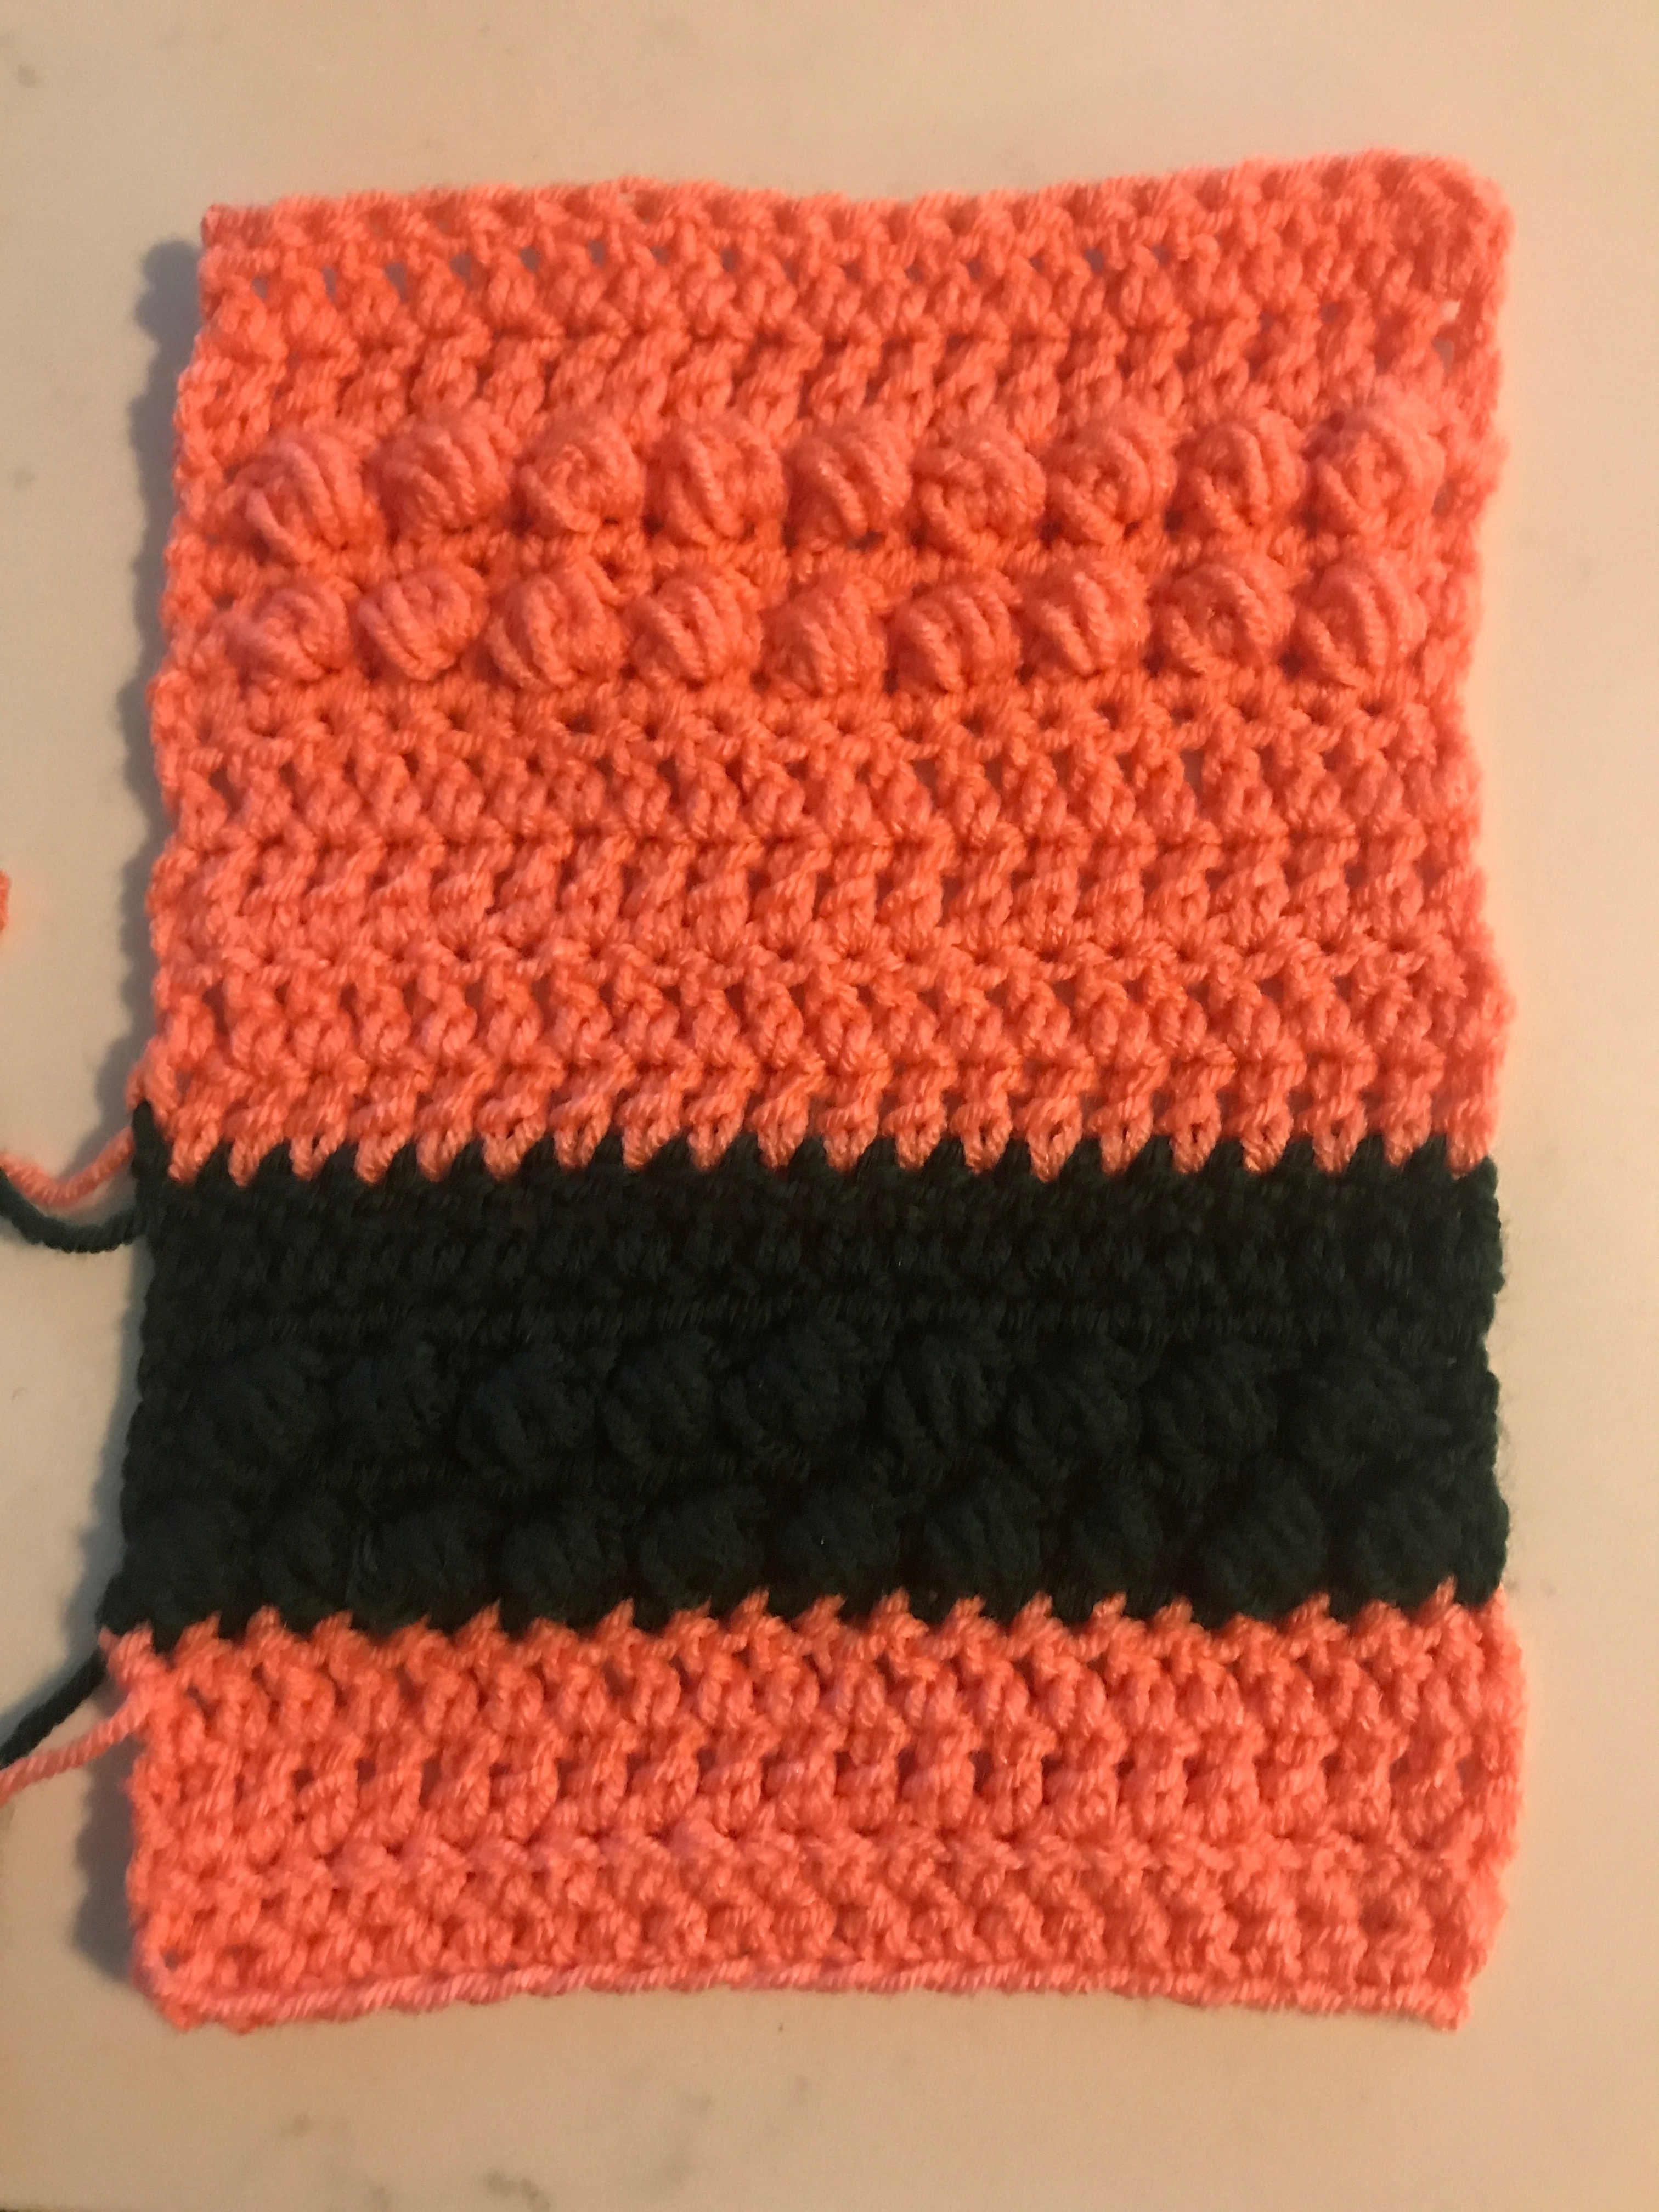
The Feature Stitch this week is the Easy Shell Stitch.
Written Instructions.
These instructions are for starting the easy shell stitch from scratch.
To apply it to the temperature blanket I include instructions below.
Ch multiples of 6 plus 1.
Row 1: Skip the first three chains and make 3 dc stitches into the 4th chain from the hook.
Skip 2 ch and make 1 sc into the next stitch,
*Skip 2 ch and make 5dc into the next stitch,
Skip 2 ch and make 1 sc into the next stitch,*
Repeat between *and* until the end of the row.
Row 2: ch 3 and turn, make 3dc into the first sc, *make a sc into the top of the previous shell, (the third dc of the shell), make 5 dc into the next sc, * repeat between * and * till you reach the 3dc from the previous row and sc into the top of the 3rd sc.
Repeat Row 2
Video Tutorial for the Easy Shell Stitch.
Here is the left handed version for you lefties out there.

Week 5 Instructions:
Match the colour of yarn you use for each day to your temperature colour chart. Each day is represented by several rows, not just one.
Day 29 colour.
Row 79: Ch2, DC into the first st and into every stitch across. Turn Work. (20 stitches)
Row 80: Ch2, DC into the first st and into every stitch across. Turn work. (20st)
Day 30 Colour
Row 81: Adapted Easy Shell Stitch: I will call this row 1 of the adapted easy shell st. Ch3, make 3 dc into the first st, sk3 st, make sc into the next st,*Skip 2 and make 5dc into the next stitch, Skip 2 ch and make 1 sc into the next stitch,* Repeat between *and* until the end of the row where you do 3 dc into the last st. Turn work. (20st)
Row 82: This is Row 2 of the Adapted Easy Shell Stitch. Ch1, sc into the top of the last dc in the row below, make 5 dc into the next sc, *make a sc into the top of the previous shell, (the third dc of the shell), make 5 dc into the next sc, * repeat between * and * till you reach the end. sc into the last st. Turn work. (20st)
Day 31 Colour.
Row 83: Adapted Easy Shell Stitch as in row 2 in Day 30. Turn work. (20 st)
Row 84: Adapted Easy Shell Stitch as in row 2 in Day 30. Turn work. (20 st)
Row 85: Adapted Easy Shell Stitch.as in row 2 in Day 30. Turn work. (20 st)
Row 86: Adapted Easy Shell Stitch.as in row 2 in Day 30. Turn work. (20 st)
We are now moving into February. Woo Hoo. I am putting the dates beside the day for simplicity in keeping track where. you are.
Day 32 Colour: February 1st.
Row 87: Ch 2, DC into the first st and into every stitch across. Turn work. (20 st)
Row 88: Ch 2, DC into the first st and into every stitch across. Turn work. (20 st)
Day 33 Colour: February 2nd.
We are going to revisit the Bean Stitch. Here is a reminder for you.
Insert your hook, YO, draw up a loop. YO, insert your hook in the same st , YO and draw up a loop. YO, insert hook into the same space, YO, draw up a loop. YO, draw through all 6 loops on your hook. Ch1 to finish off. Skip a stitch and repeat the bean stitch as above.
Row 89: ch1, sc in first st, Bean stitch in next st, *skip a st, make a bean st in the next st* Repeat between * and * to the end. Turn work (20 st)
Row 90: ch1, Bean stitch across, sc in last st. Turn work. (20st)
Row 91: ch1, sc in first st, Bean stitch across. Turn work. (20st)
Row 92: ch1, Bean stitch across, sc in last st. Turn work. (20st)
Day 34 Colour: February 3rd.
Row 93: ch1, sc into the first st, Bean stitch across. Turn work. (20st)
Row 94: ch1, Bean stitch across, sc in last st Turn work. (20st)
Row 95: Ch 2, DC into the first st and into every stitch across. Turn work. (20 st)
Row 96: Ch 2, DC into the first st and into every stitch across. Turn work. (20 st)
Day 35 colour: February 4th.
Row 97: Ch1, sc into the first st and into every stitch across. Turn work. (20st)
Row 98: Ch1, hdc into the first st, hdc into every stitch across. Turn work (20 st)
That is it for week 5.
See you next week.
Week 6:
My projected temperatures this week 6, 7, 6, 3, 1, 0, -3
Feature Stitch is the Sedge Stitch.
How to make the sedge stitch.
Abbreviations:
ch – chain
hdc – half double crochet
dc – double crochet
sc – single crochet
sk – skip
st(s) – stitch(es)
* – indicates instructions to be repeated
Chain a multiple of 3 stitches.
- Into the 2nd chain from the hook make a hdc and a dc, (both into the same chain), sk 2 ch and in the next chain work a sc, hdc, dc, (all into the same chain st), * sk 2 ch, then make a sc, hdc, dc into the next st, * repeat between the * and * to the end of the row. There will be one chain left. Work a sc into the last ch and turn.
- Ch1, (this counts as the 1st sc), Then make a hdc and a dc into the top of the sc that you made at the end of the row below. Skip over the the DC, hdc and make a sc, hdc,,dc into the top of the sc in the row below. You will always be working into the top of the sc in the previous row, this is where you will work the sc, hdc, dc cluster.
Repeat Row 2 for the rest of the pattern.
Here is a link to the video tutorial for the sedge stitch.
Right Handed
Left Handed
Week 6 Instructions:
Match the colour of yarn you use for each day to your temperature colour chart. Each day is represented by several rows, not just one.
Day 36 colour. February 5th
Row 99: Ch2, DC into the first st and into every stitch across. Turn Work. (20 stitches)
Row 100: Ch2, DC into the first st and into every stitch across. Turn work. (20st)
Day 37 Colour, February 6th
Row 101: Sedge Stitch: I will call this row 1 of the adapted sedge stitch as we are doing 2 sc at the beginning of the odd rows because we have an even number of stitches. Ch1, make 1 sc into the first st, 1sc into the next st, sk2 st, make sc, hdc, dc into the next st,* Skip 2 and make make sc, hdc, dc into the next st,* Repeat between *and* until the end of the row where you do a sc into the last st. Turn work. (20st)
Row 102: This is Row 2 of the Adapted Sedge Stitch. Ch1, (this counts as the 1st sc), Then make a hdc and a dc into the top of the sc that you made at the end of the row below. Skip over the DC, hdc and make a sc, hdc, dc into the top of the sc in the row below. You will always be working into the top of the sc in the previous row, this is where you will work the sc, hdc, dc cluster. At the end of the row make 1sc into each of the last two stitches
Day 38 Colour. February 7th
Row 103: Repeat row 1 of the Adapted Sedge St Turn work. (20 st)
Row 104: Repeat row 2 of the Adapted Sedge St Turn work. (20 st)
Row 105: Repeat row 1 of the Adapted Sedge St Turn work. (20 st)
Row 106: Repeat row 2 of the Adapted Sedge St Turn work. (20 st)
Day 39 Colour: February 8th.
Row 107: Ch 2, DC into the first st and into every stitch across. Turn work. (20 st)
Row 108: Ch 2, DC into the first st and into every stitch across. Turn work. (20 st)
Day 40 Colour: February 9th.
Row 109: ch1, sc in first st, sc into each st across. Turn work (20 st)
Row 110: Ch1, SC into the first st. make a puff stitch in the next stitch and into each stitch across until the last st, sc into the last st. Turn work (20 st)
Row 111: Ch1, sc into the first st and into every stitch across. Turn work. (20st)
Row 112: Ch1, SC into the first st. make a puff stitch in the next stitch and into each stitch across until the last st, sc into the last st. Turn work (20 st)
Day 41 Colour: February 10th.
Row 113: Ch1, sc into the first st and into every stitch across. Turn work. (20st)
Row 114: Ch1, SC into the first st. make a puff stitch in the next stitch and into each stitch across until the last st, sc into the last st. Turn work (20 st)
Row 115: Ch 2, DC into the first st and into every stitch across. Turn work. (20 st)
Row 116: Ch 2, DC into the first st and into every stitch across. Turn work. (20 st)
Day 42 colour: February 11th.
Row 117: Ch 2, DC into the first st and into every stitch across. Turn work. (20 st)
Row 118: Ch 2, DC into the first st and into every stitch across. Turn work. (20 st)
That is it for week 6.
See you next week.
Week 7:
My projected temperatures this week -5, -3, 2, 3, 6, 5, 5
Feature Stitch is the Bobble Stitch.
How to make the Bobble Stitch.
- Yarn over, insert hook into stitch and pull up a loop. Yarn over, pull through two loops
- Repeat number one in the same stitch/space until you have a total of 6 loops on your hook.
- Yarn over, pull through all 6 loops at once.
- Single crochet in next stitch.
Here is a link to the video tutorial for the Bobble Stitch.
Right Handed
Week 7 Instructions:
This week we will be finishing off Strip 1. There will be three days reflected on the end of this strip, February 12, 13 and 14. Make sure when we have finished the instructions for February 14th that you measure your strip and that it is 60 ” long. This is important so that when we join all the strips to make the blanket that they are all the same length.
If your strip is not 60″ long then add a few sc or hdc rows with the February 14th colour until it is 60″.
If your strip is more than 60″ long then pull back a few of the February 14th rows. I have made plenty of rows for this day in order to fix any issues over length. We all crochet differently so it is not expected that we all arrive at 60″ at the same time. Please contact me if you have any concerns at this point.
Let’s get started.
Match the colour of yarn you use for each day to your temperature colour chart. Each day is represented by several rows, not just one.
Day 43 colour. February 12th
Row 119: Ch1, HDC into the first st and into every stitch across. Turn Work. (20 stitches)
Row 120: Ch1, HDC into the first st and into every stitch across. Turn work. (20st)
Day 44 Colour, February 13th
Row 121: Ch1, sc into the first st and into every stitch across. Turn work. (20st)
Row 122: Ch1, SC into the first st. make a bobble stitch in the next stitch and i across until the last st, sc into the last st. Turn work (20 st)
Row 123: Ch1, sc into the first st and into every stitch across. Turn work. (20st)
Day 45 Colour. February 14th.
This is the final stretch of the first strip.
Row 124: Ch 2, DC into the first st and into every stitch across. Turn work. (20 st)
Row 125: Ch 2, DC into the first st and into every stitch across. Turn work. (20 st)
Row 126: Ch 2, DC into the first st and into every stitch across. Turn work. (20 st)
Row 127: Ch1, hdc into the first st and into every stitch across.
Fasten off and weave in the ends.
When you have completed the rows for February 14th, measure your strip. If it is 60″ you are ready to start your new strip.
If it is too short make some extra single crochet or half double crochet rows until your strip measures 60″.
If it is too long, pull back some of the rows until it is 60″.
Now we are ready to start our new strip. This is exciting. So February 15, 16, 17 and 18 will be on the new strip.
Day 46 Colour: February 15th.
Row 1: Ch 2, DC into the first st and into every stitch across. Turn work. (20 st)
Row 2: Ch 2, DC into the first st and into every stitch across. Turn work. (20 st)
Day 47 Colour: February 16th.
Row 3: ch1, sc in first st, sc into each st across. Turn work (20 st)
Row 4: Ch1, SC into the first st. make a bobble stitch in the next stitch and across until the last st, sc into the last st. Turn work (20 st)
Row 5: Ch1, sc into the first st and into every stitch across. Turn work. (20st)
Row 6: Ch1, SC into the first st. make a bobble stitch in the next stitch and across until the last st, sc into the last st. Turn work (20 st)
Row 7: Ch1, sc into the first st and into every stitch across. Turn work. (20st)
Day 48 Colour: February 17th.
Row 8: Ch1, SC into the first st. make a bobble stitch in the next stitch and across until the last st, sc into the last st. Turn work (20 st)
Row 9: Ch1, sc into the first st and into every stitch across. Turn work. (20st)
Row 10: Ch1, SC into the first st. make a bobble stitch in the next stitch and across until the last st, sc into the last st. Turn work (20 st)
Day 49 Colour: February 18th.
Row 11: Ch 2, DC into the first st and into every stitch across. Turn work. (20 st)
Row 12: Ch 2, DC into the first st and into every stitch across. Turn work. (20 st)
That is it for week 7
See you next week.
Week 8:
My projected temperatures this week 7, 4, 6, 10, 6, 4, 7
Feature Stitch is the Moss Stitch.
How to make the Moss Stitch.
Note: the chain 2 at the beginning of each row count as one moss stitch (sc and ch1).
Chain an even number of chain stitches.
Row 1: sc in 4th ch from hook, [ch1, skip 1ch, sc in next ch] – repeat between […] to end. The last stitch should be a sc. Turn.
Row 2: ch2, sc in 1st ch-1 space, [ch1, skip 1 stitch, sc in next ch-1 space] – repeat between […] to end . The last stitch should be a sc in the ch-3 sp at the start of Row 1. Turn.
Row 3: ch2, sc in 1st ch-1 space, [ch1, skip 1 stitch, sc in next ch-1 space] – repeat between […] to end . The last stitch should be a sc in the ch-2 sp at the start of Row 2. Turn.
Repeat Row 3 to continue the moss stitch.
Here is a link to the video tutorial for the Moss Stitch.
Right Handed
And here it is for the lefties out there.
Week 8 Instructions:
Let’s get started.
Match the colour of yarn you use for each day to your temperature colour chart. Each day is represented by several rows, not just one.
Day 50 colour. February 19th
Row 13: Ch2, DC into the first st and into every stitch across. Turn Work. (20 stitches)
Row 14: Ch2, DC into the first st and into every stitch across. Turn work. (20st)
Day 51 Colour, February 20th
Row 15: Ch1, sc into the first st and into every stitch across. Turn work. (20st)
Row 16: Ch1, SC into the first st. make a puff stitch in the next stitch and across until the last st, sc into the last st. Turn work (20 st)
Row 17: Ch1, HDC into the first st and into every stitch across. Turn work. (20st)
Day 52 Colour. February 21st.
Row 18: Ch 3, sc in 4th ch from hook, [ch1, skip 1 stitch, sc in next stitch] – repeat between […] to end. The last stitch should be a sc. Turn work. (20 st)
Row 19: Ch 2, moss stitch across as in instructions above. Turn work. (20 st)
Row 20: Ch 2, moss stitch across. Turn work. (20 st)
Row 21: Ch2, moss stitch across. Turn work. (20 st)
Day 53 Colour: February 22nd.
Row 22: Ch 2, moss stitch across. Turn work. (20 st)
Row 23: Ch 2, moss stitch across. Turn work. (20 st)
Day 54 Colour: February 23rd.
Row 24: ch1, sc in first st, sc into each st across. Turn work (20 st)
Row 25: Ch2, HBDC into the first st and into every stitch across. Turn work. (20st)
Row 26: Ch2, HBDC into the first st and into every stitch across. Turn work. (20st)
Row 27: Ch2, HBDC into the first st and into every stitch across. Turn work. (20st)
Row 28: Ch2, HBDC into the first st and into every stitch across. Turn work. (20st)
Day 55 Colour: February 24th.
Row 29: Ch 2, dc into the first st, 3dc cluster into the next st, *sk 1, 3dc cluster into the next st* repeat between * and * to the end. Turn work (20 st)
Row 30: Ch2, DC into the first st and into every stitch across. Turn work. (20st)
Row 31: Ch2, DC into the first st and into every stitch across. Turn work. (20st)
Row 32: Ch2, DC into the first st and into every stitch across. Turn work. (20st)
Day 56 Colour: February 25th.
Row 33: Ch2, DC into the first st and into every stitch across. Turn work. (20st)
Row 34: Ch2, DC into the first st and into every stitch across. Turn work. (20st)
That is it for week 8.
See you next week.
Do you like Crochet Video Tutorials.
If you really enjoy following along with videos when you crochet, I have the Simple Scarf available on my youtube channel. There are lots of other great videos you might enjoy while you are there so check out my stitch tutorials and how to make videos.
Here is the right handed tutorial for making the Simple Scarf.
And here is the left handed version for all you lefties out there. I am one lol.

Other Patterns You May Like.
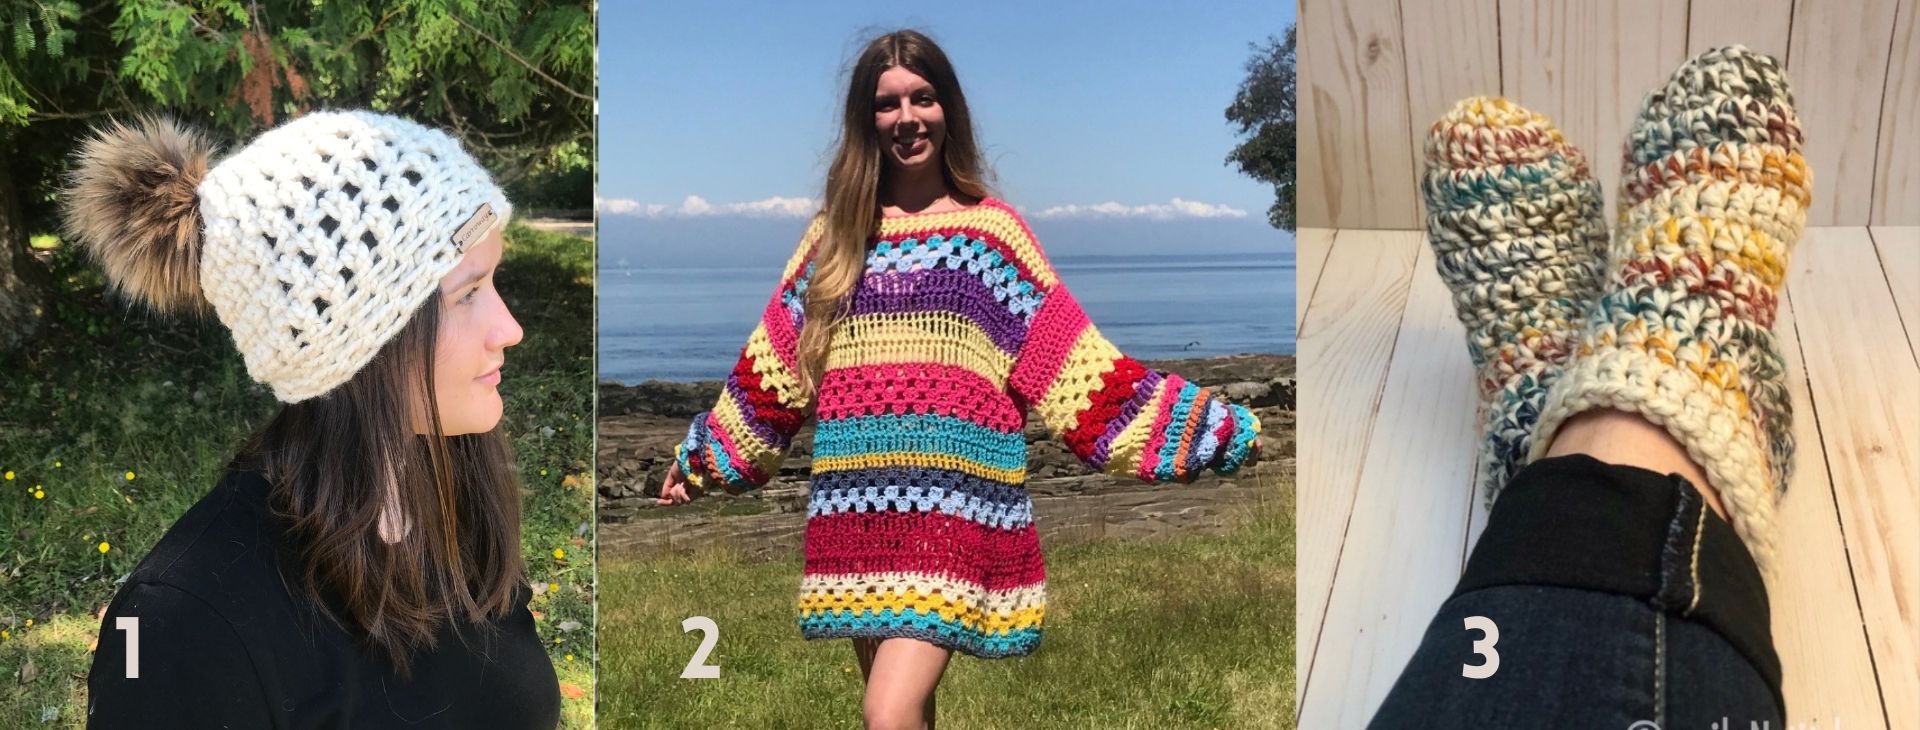
3. The Warmest Feet Ever Slipper Socks.
More Places to Find Crochet Free Patterns:
If you love crochet, you can find over a thousand free crochet patterns including some for crop tops and bralettes over at All Free Crochet
I am honoured to have my free crochet bralette pattern, the Earth Mother Bralette Pattern added to the All Free Crochet site.
 It is a great resource for crochet lovers and I am proud to also have my Take Me Outside Infinity Scarf Pattern posted over on the All Free Crochet Site.
Selling items made from my patterns?
You are more than welcome to sell items made from my pattern. Please do share my link and tag and help promote it on social media. Thank you.
If you have any questions or need help with the patterns, please email me at carrowaycrochet@outlook.com, and Iʼll be glad to help you.
Let’s Share and Connect!
Thank you for trying my free crochet pattern, I hope you enjoyed it! Please share pictures of your completed projects on Instagram and Facebook. Tag them @carrowaycrochet #carrowaycrochet and #simplescarf on Instagram.
Thank you so much for visiting me here at Carroway Crochet .
Find other patterns by Carroway Crochet in my Etsy Shop and on Ravelry.
Other places you can find me are:
This design, written work and images are a copyright of
©CarrowayCrochet and may not be copied or reproduced in any way.
You have permission to sell finished products made from this pattern, but please leave a link to my blog, www.carrowaycrochet.com in your product listing specifying that I am the designer of this pattern.
Thank you.