The Lotsa Stitches Temperature Blanket 2021 CAL

The Temperature Blanket 2021 CAL has a unique twist. It is the Lotsa Stitches Temperature Blanket 2021 CAL
Please come and join me in this crochet adventure that is the Temperature Blanket 2021 CAL..
I am hosting my first ever CAL.
I am making my first ever Temperature Blanket.
I am making my first ever Stitch Sampler Blanket.
First of all I will answer some questions that probably pop into your head as you read this.

What is a CAL
A CAL is a Crochet Along.
A crochet along is when we all work on a project together at the same time. It’s a great way to have fun with fellow crocheters all over the world! It sounds like a great idea to me.
I have never done one and I thought this project would be perfect for my first CAL.
Starting in week one of January I will be posting regular weekly pattern updates for the Lotsa Stitches Temperature Blanket 2021 CAL here and on my youtube channel.
So each week you will get a section of the pattern, and we’ll crochet along together towards a finished blanket. I love this idea, it is great way to spend time right now? I hope you will join me.
There are so many ways we can track one another and our progress. I will also be sharing the pattern links and videos on my Carroway Crochet Group over on facebook, so if you would like to join us there we can chat and share ideas and concerns as well as pictures of our progress. This will be a great way for our community to share our love of crochet. And of course there is Instagram, where we can share our progress pics.
**This post contains affiliate links. If you make a purchase using some of my links I may receive a small commission at no extra cost to you.**
My Inspiration for this Temperature Blanket 2021 CAL project.
1. The Temperature Blanket.
Every year I hear about Temperature Blankets. I was confused as to what they were when I first heard about them. I was intrigued to learn they were a crocheted record of the weather over a given time period in a given area. By using the temperatures of your area and the colour that goes with than temperature you can create your own temperature blanket. The great thing about this project is that you can pick any colours, yarn, stitch pattern, or place in the world to use while creating your blanket. And some people decide not to make a blanket, but use this concept to create a scarf, or anything your heart desires.
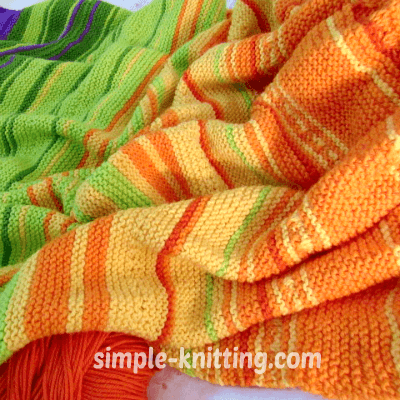
Temperature Blankets can be simple like this beautiful knit one from Simple Knittting.
They also come in many configurations and the sky is the limit as far as what type of Temperature Blanket you choose to make.
Just check out some of the examples of Temperature Blankets on The Pattern Centre website. 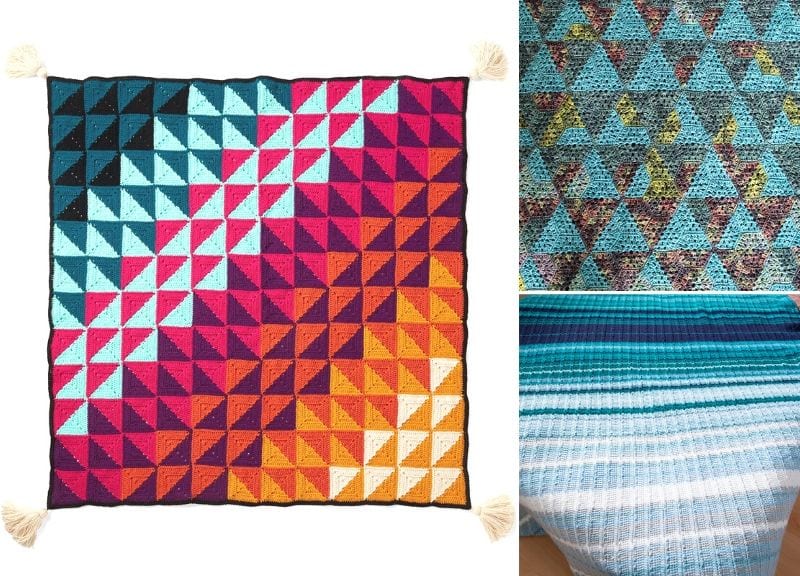
SO I wanted to make a Temperature Blanket, but I was torn, as I also love Stitch Sampler Blankets.
The Stitch Sampler Blanket.
I have just loved the stitch sampler style of blanket that I have seen around the internet and on Pinterest.
Just look at this beauty from haakmaarraak.

Learning new stitches is a passion of mine so I thought why not add a twist to my Temperature Blanket 2021 CAL and introduce a new feature stitch into the blanket each week of the year.
What a great way to learn 52 NEW stitches.
Pin this for Later
![]()
THE BIG IDEA.
The BIG idea was to roll all these three elements into one wonderful project to make 2021 be a stand out year in at least one way. I have called it The Lotsa Stitches Temperature Blanket 2021 CAL.
We will all have a colourful record of our year in a temperature blanket that also has incorporated 52 new crochet stitches that we have learnt together. The idea of the Crochet Along is what really lights my fire on this. I can’t wait to see what we all come up with.
Watch this video to see how the blanket will come together and how to plan your colours and temperature gauge.
Preparation for the Lotsa Stitches Temperature Blanket 2021 CAL.
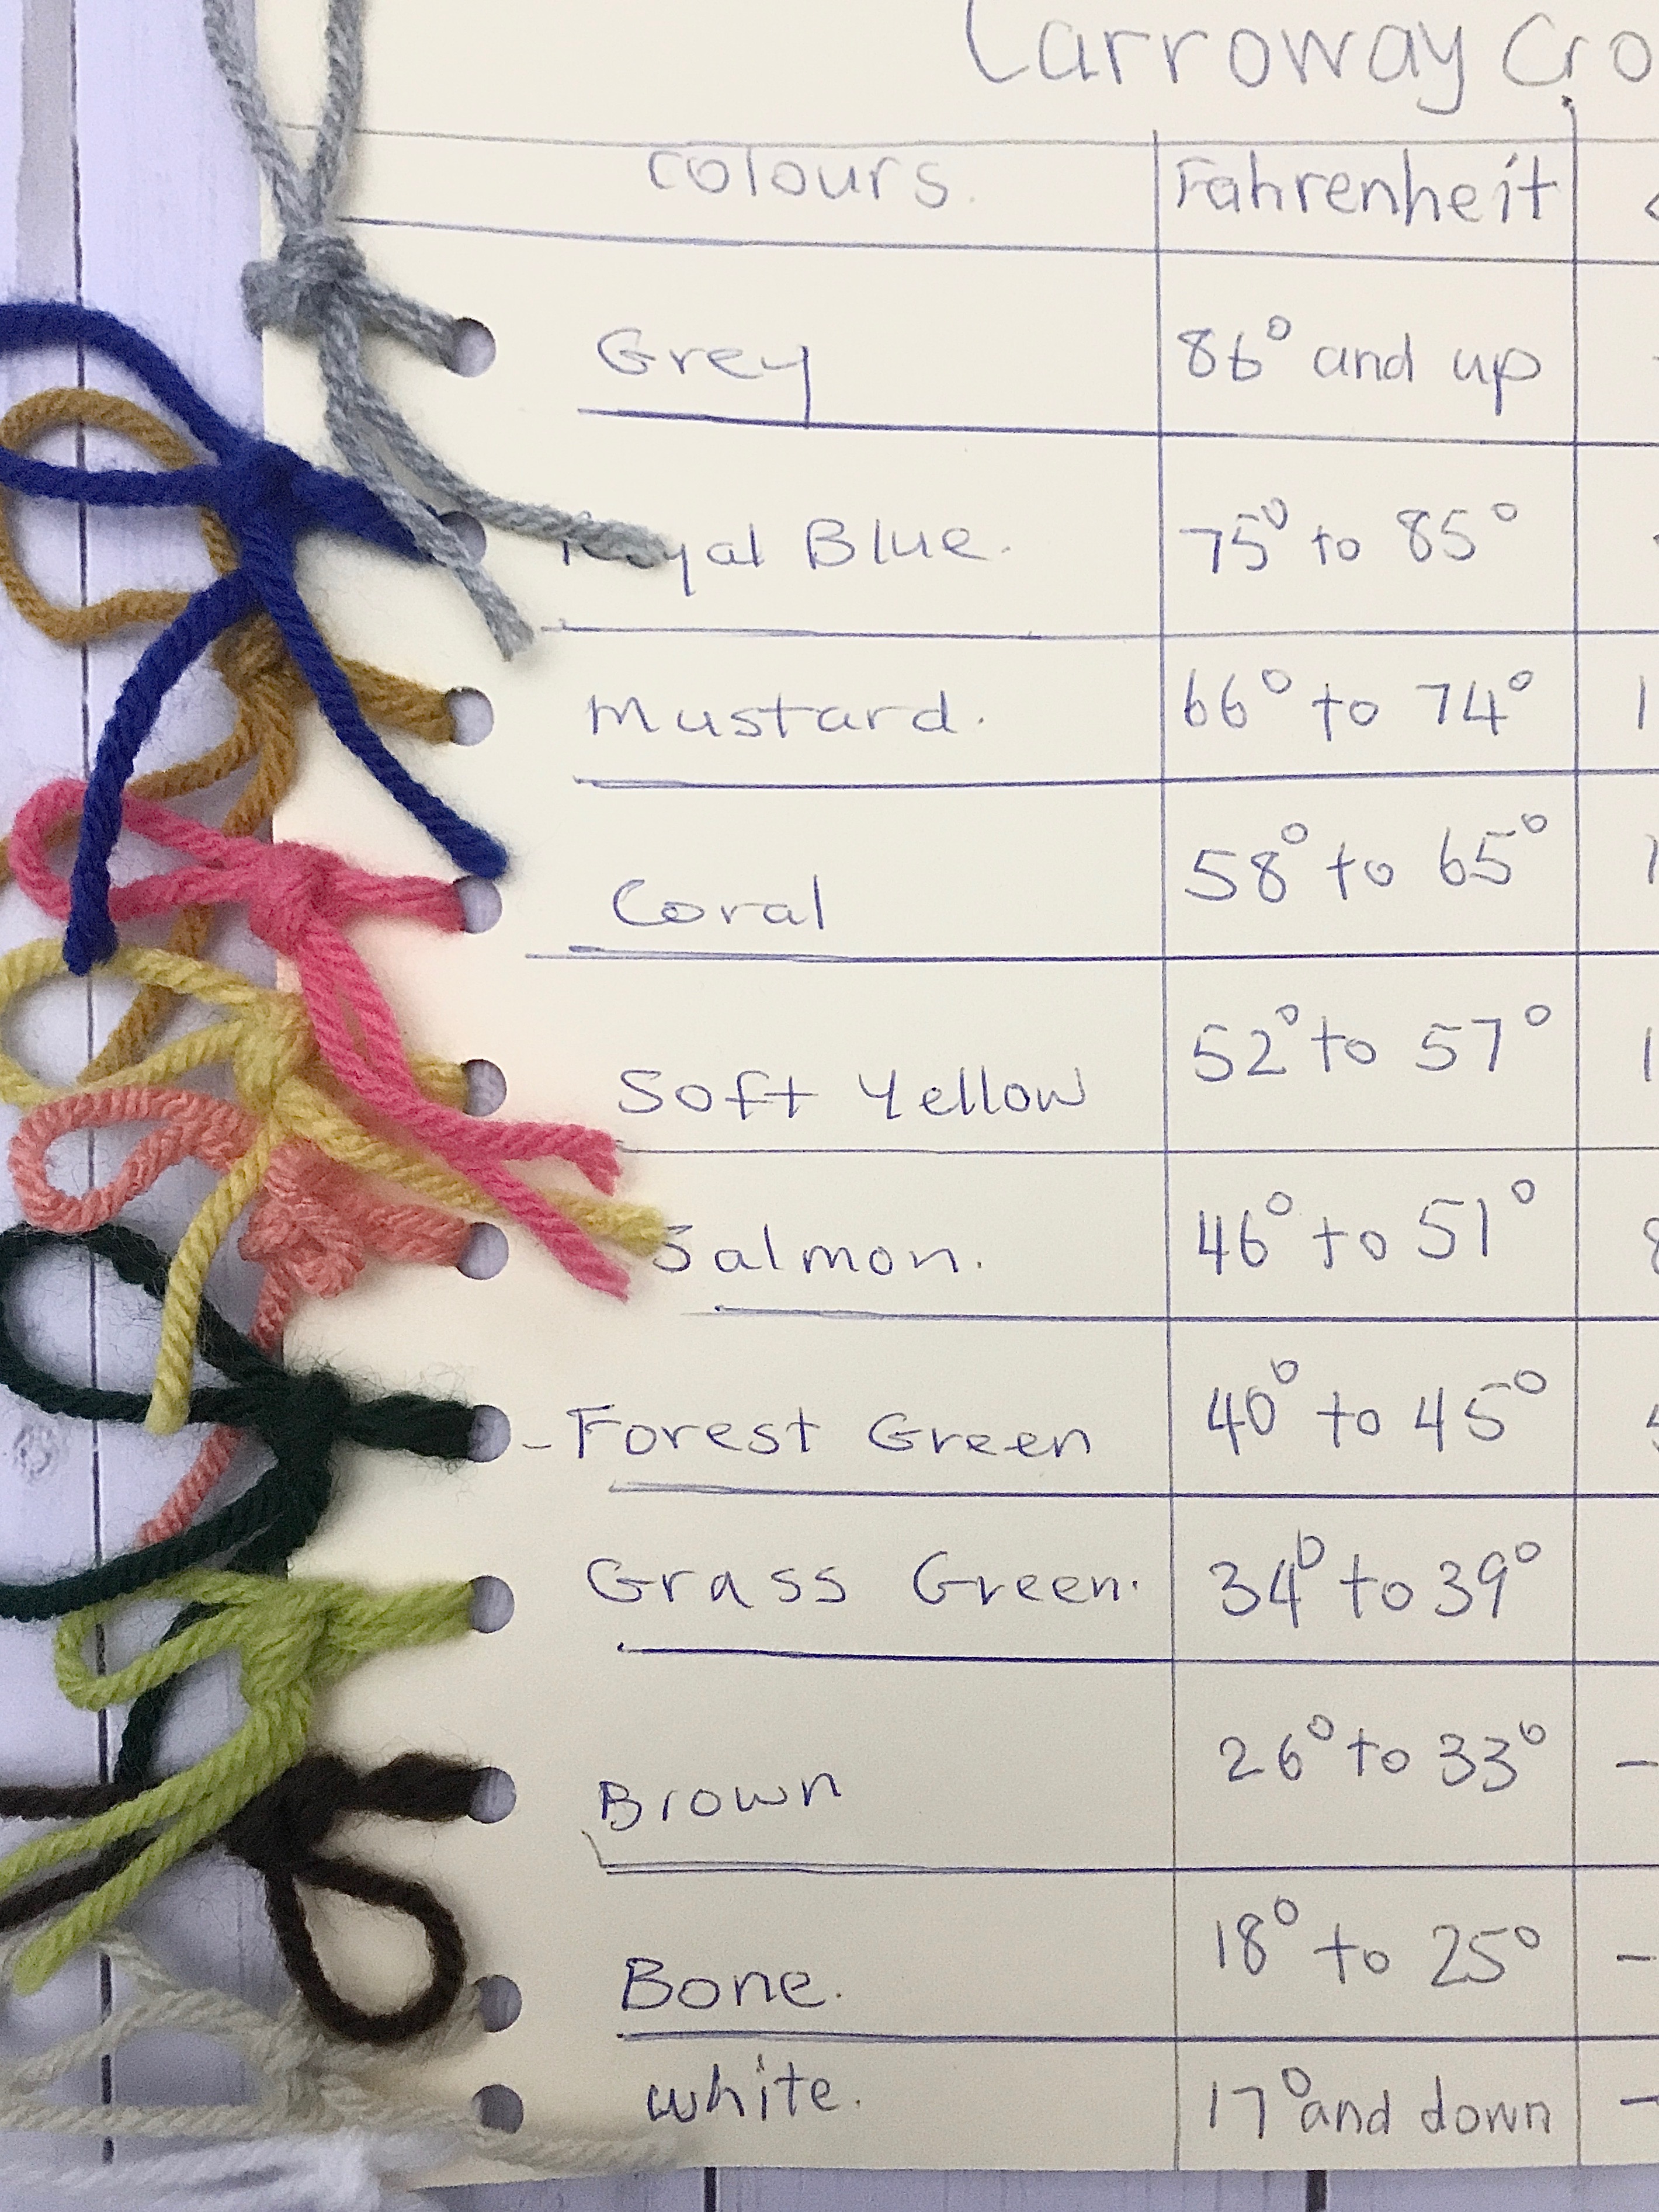
Temperature Blanket Colour Chart
You will need to create your own colour chart and gather your yarn for the project.
I suggest you get 200 grams of each colour to start and get more as you progress with your blanket. I went with ten colours and my temperature gauge is in Celsius.
You will need an H crochet hook, 5.00 mm.
You will also need to create your personal colour gauge. Each person has to decide what temperatures to assign to what colour as each location has its own weather patterns. A good starting point is to have around around 6 degrees fahrenheit in each colour group, but as I say it is an arbitrary thing that each crocheter must decide. Also there are the options to go with the high daily temperature, or the low, or the daily average. Once again there are no rules and it is up to you.
My chart is old school.
Description of The Lotsa Stitches Temperature Blanket 2021 CAL.
The Lotsa Stitches Temperature Blanket is made with worsted weight yarn, (4) and I use a mix of yarns I have on hand. Some Loops and Threads Impeccable, some Caron Simply Soft, Red Heart Super Saver and Bernat Premium. I chose to use acrylic but once again, the choice is yours as to what yarn you pick for your blanket.
The finished blanket will be approximately 52″ by 60″
It will be made in strips. There are 8 strips that will measure 6.5″ wide and 60″ long.
These will be sewn or crocheted together at the end to make the finished blanket.
Each week I will add the pattern for the daily rows to be worked and introduce the feature stitch of the week.
There will be individual stitch tutorials posted.
If you have any questions about this project please do comment below and I will get back to you as soon as I can.
The Pattern will be released Week by Week.
We will be starting Strip 1 first.
I have planned the design so that each strip is worked in 10″ sections.
Each section will have 7 or 8 days represented using single crochet, half double crochet and double crochet stitches. I am calling these the basic stitches that will be used throughout the blanket.
Each week there will also be the weekly feature stitch in each section. Sometimes the feature stitch may reappear in future sections, but that is a surprise.
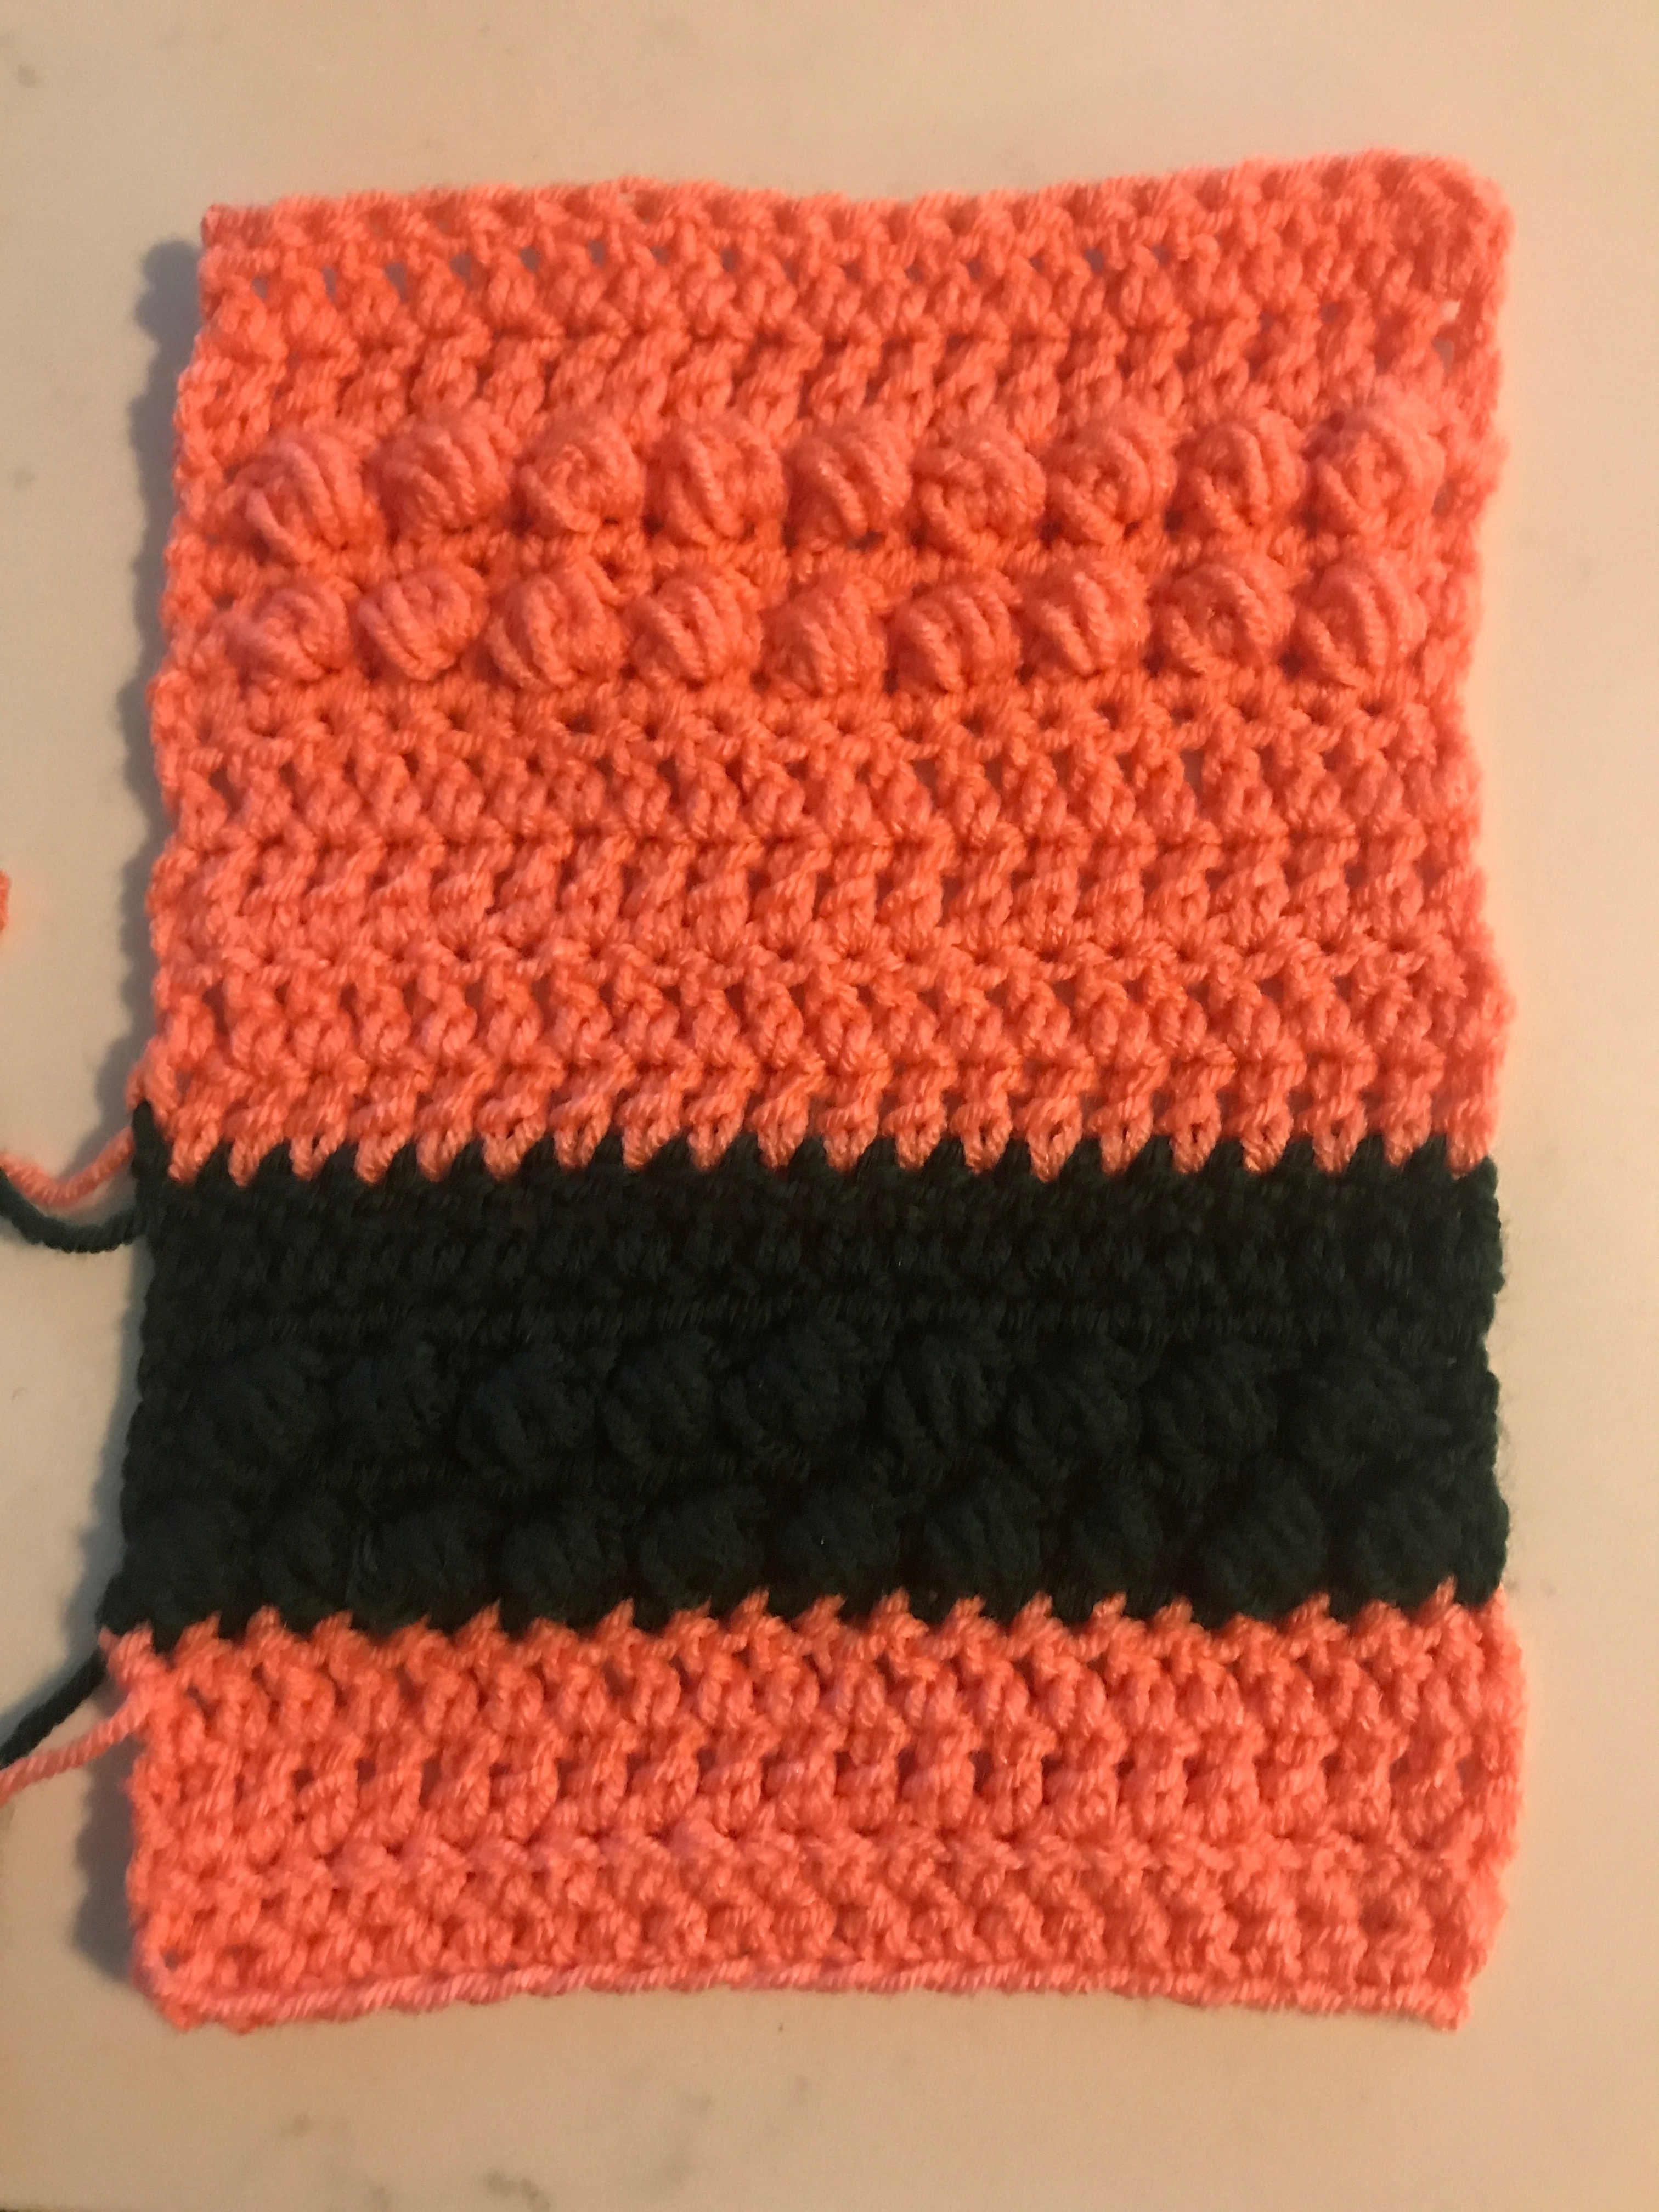
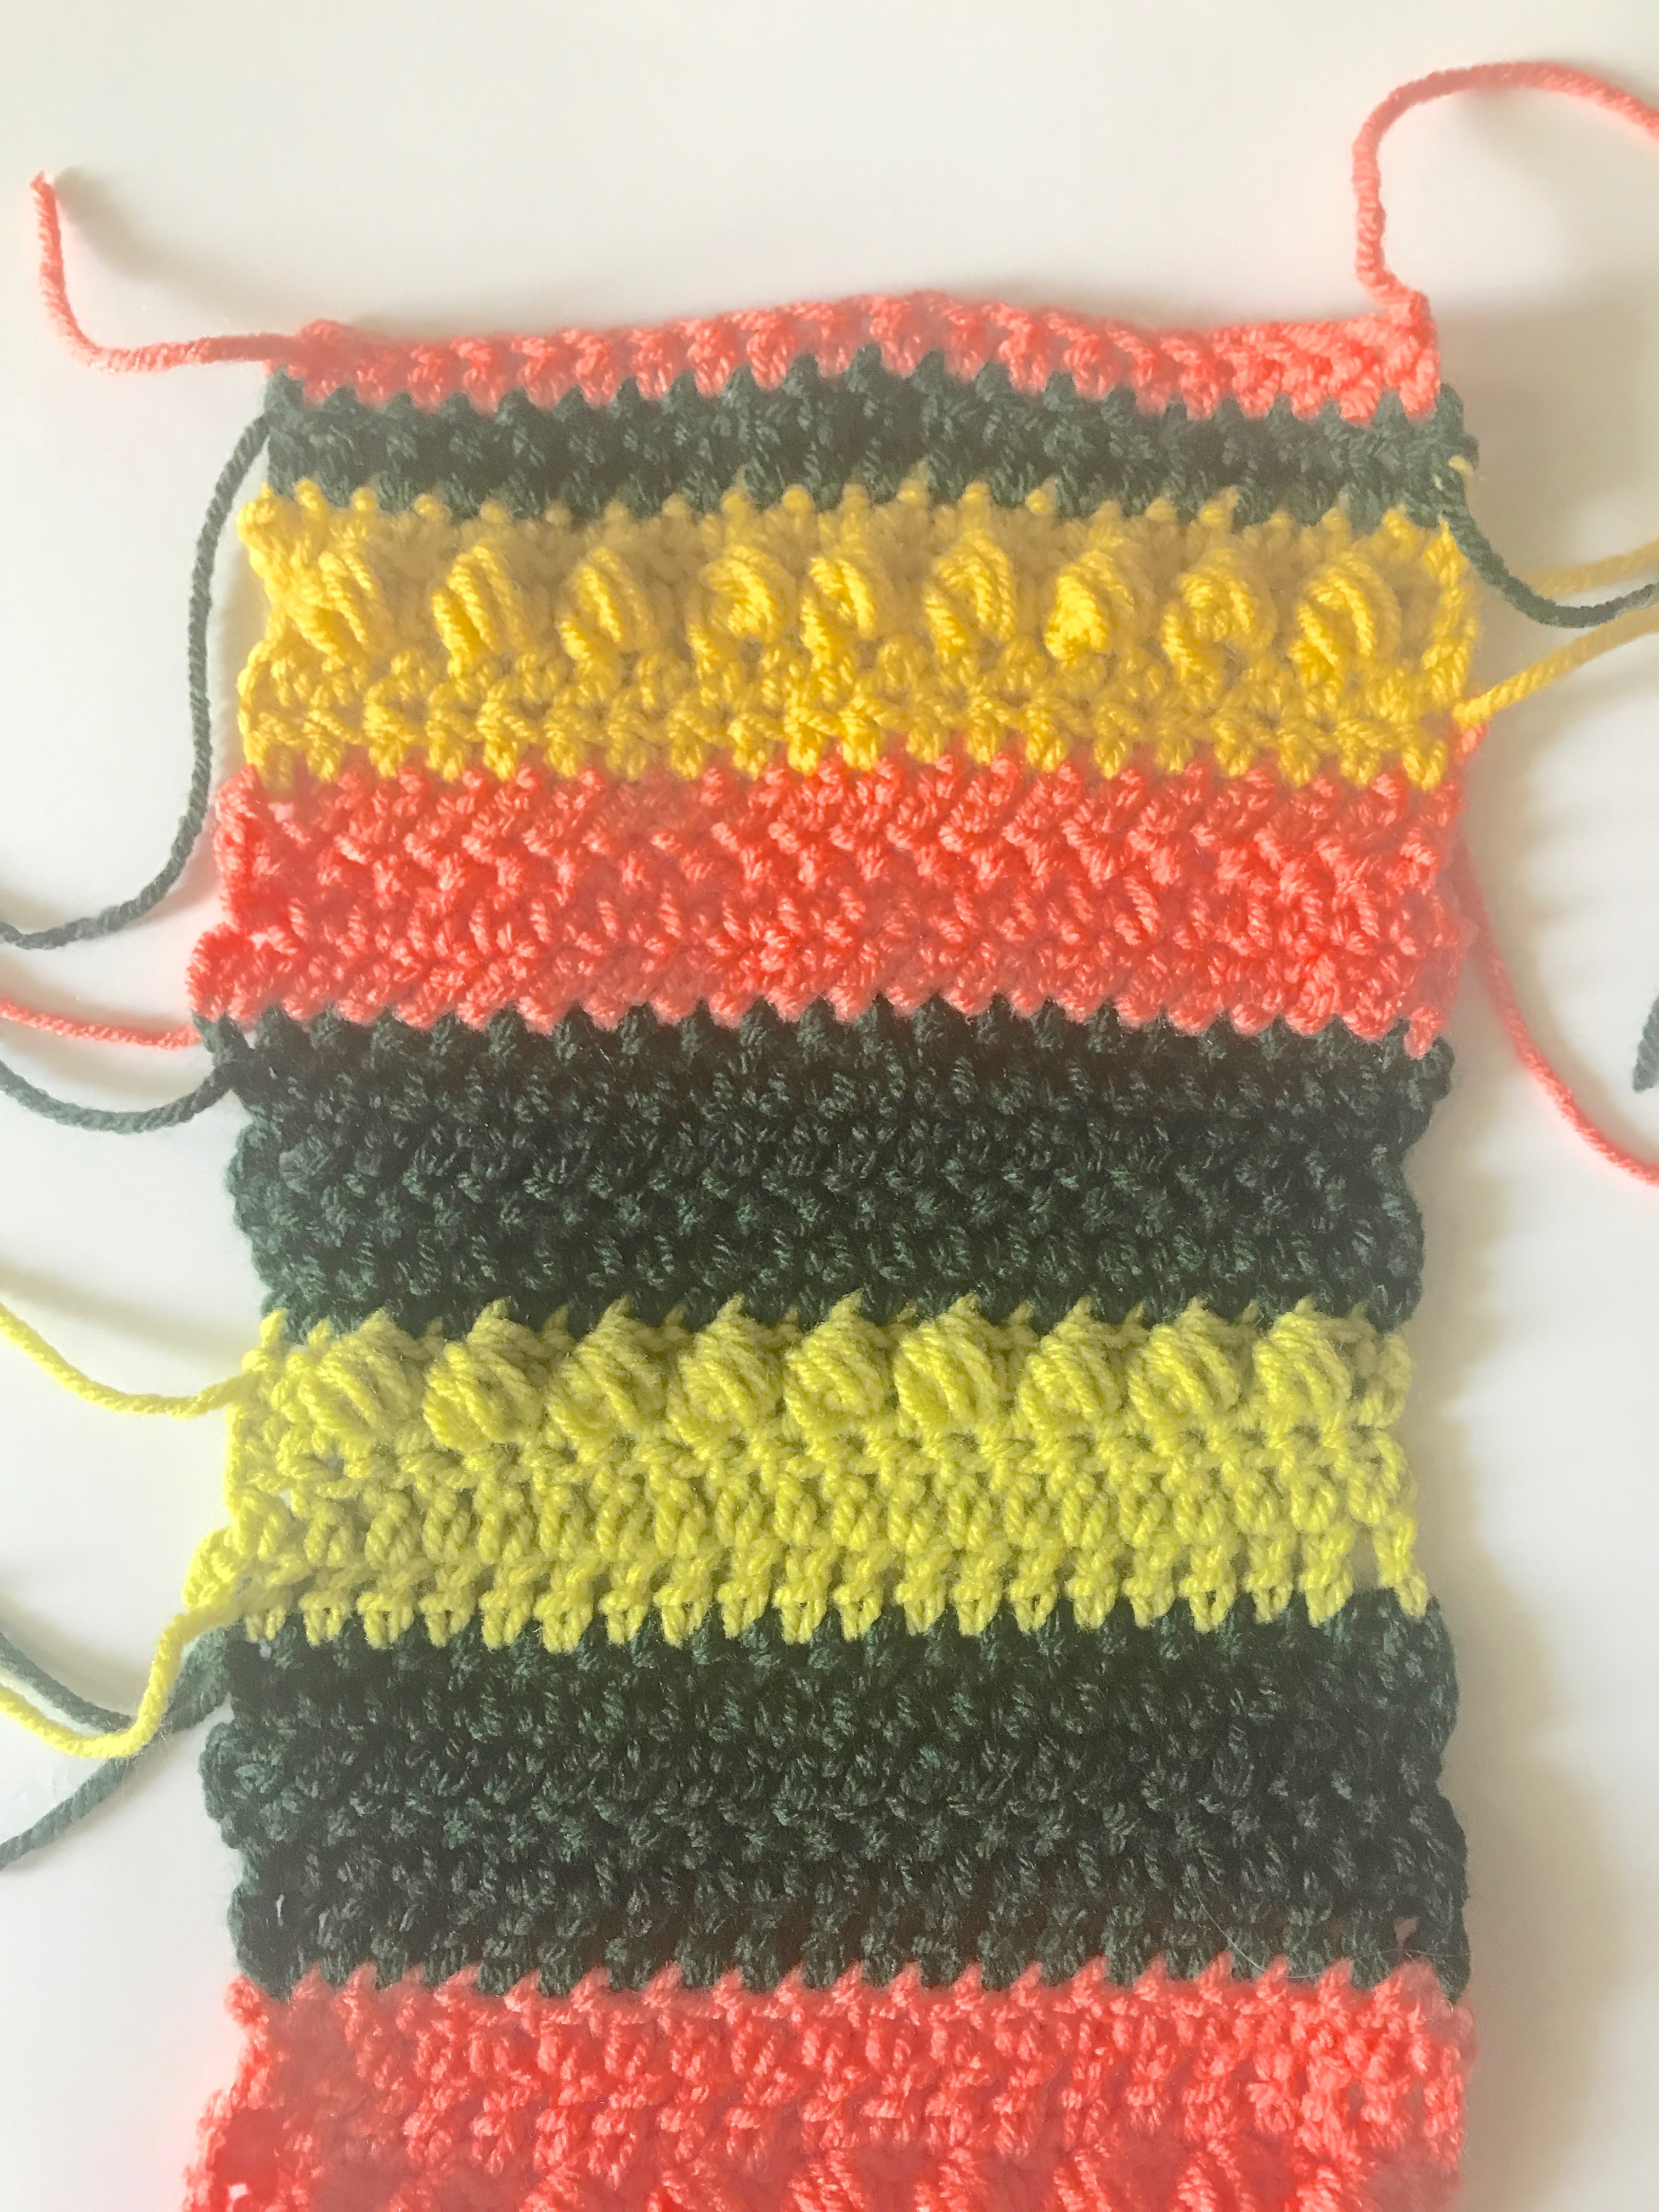
This is week 1 with the basic stitches and the feature stitch. I added a couple of hdc rows more than you see here in order for it to be be 10 long.
Lots of Video Support.
If you are new to crochet there are video tutorials for the basic stitches, (the single crochet, half double crochet and double crochet stitch) on my You Tube Channel. I have them in both left and right handed versions. Here is a sample.
And here is the left handed version.

Size:
Finished size for the Lotsa Stitches Temperature Blanket is 52” by 60” approximately.
Supplies you will need:
Yarn: worsted weight yarn in the colours you selected for your colour chart. I used ten. (4) The blanket is made using a variety of worsted weight yarns. You will need 200 grams of each colour to start with and add more as required. Due to the colours being used according to the temperature chart it is impossible to predict how much you will need of each colour.
Hook:
Size H/8 – 5.00mm hook
Notions: Scissors, tapestry needle, measuring tape.
Gauge: 13 dc – 5 dc rows (approx.) = 4” (10 cm) with a H hook
Feel free to go up or down a hook size to get the correct gauge.
Abbreviations (uses US conventions)
- Ch = chain
- st = stitch
- sc = single crochet
- dc = double crochet
- hdc = half double crochet
- blo = back loop only
- sl st = slip stitch
- Sp = space
This pattern uses US terminology.
The US and UK crochet terms are different, but they use the same terms to describe different stitches. Here is a simple conversion chart for anyone in the UK.
|
US Double Crochet (dc) Single Crochet (sc) Half Double Crochet (hdc)
|
UK
Treble crochet (trc) Double Crochet (dc) Half treble crochet (htr) |
Special Stitches for this Pattern.
Each week there will be a feature stitch with a video tutorial for the stitch in left and right handed versions.
Instructions:
This blanket consists of 8 long strips or panels that will be worked individually. Each strip will be 6.5” wide and 60” long. When they are all completed they will be joined together to create the completed blanket.
I will be releasing each section of the pattern weekly throughout this CAL. I am using the projected forecast dates for my blanket so I can be ahead of you.
Note: The turning chain does not count as a stitch.
Week 1:
Note: Please check your strip once you have got a few rows done to make sure it is approx.. 6.5” wide. Go up or down a hook size if it is too small or big until you get it to be close to 6.5” as this will impact the final size of your blanket.
If you are ok with it being slightly bigger or smaller than the 52” by 60” size then that is ok and you can proceed with your blanket.

Week 1: The Feature Stitch this week is the Puff Stitch.
Written Instructions.
Yarn over and insert your hook into the specified stitch/space. Yarn over again and pull up a loop. (Yarn over and insert your hook into the same stitch/space. Yarn over again and pull up a long loop) three more times. Yarn over and pull through all 9 loops on your hook. sc into the next stitch.
Video Tutorial
Here is the left handed version for you lefties out there.
Match the colour of yarn you use for each day to your temperature colour chart. Each day is represented by several rows, not just one.
Day 1 colour.
Chain 21
Row 1: HDC into the second ch from the hook and HDC into each chain across. Turn Work. (20 stitches)
Row 2: Ch1, HDC into the first st and into every stitch across. Turn work. (20st)
Row 3: Ch1, HDC into the first st and into every stitch across. Turn work. (20st)
Row 4: Ch1, HDC into the first st and into every stitch across. Turn work. (20st)
Day 2 Colour
Row 5: Ch 2, DC into the first st and into every stitch across. Turn work. (20 st)
Row 6: Ch 2, DC into the first st and into every stitch across. Turn work. (20 st)
Day 3 Colour.
Row 7: Ch1, sc into the first st and into every stitch across. Turn work. (20st)
Row 8: SC into the first st, work the puff stitch as described above across until the last st, sc into the last st. Turn work (20 st)
Day 4 Colour
Row 9: Ch1, sc into the first st and into every stitch across. Turn work. (20st)
Row 10: SC into the first st, work the puff stitch as described above across until the last st, sc into the last st. Turn work (20 st)
Day 5 Colour
Row 11: Ch1, sc into the first st and into every stitch across. Turn work. (20st)
Row 12: Ch 2, DC into the first st and into every stitch across. Turn work. (20 st)
Day 6 Colour
Row 13-16: Ch 2, DC into the first st and into every stitch across. Turn work. (20 st)
Day 7 colour
Row 17: Ch1, sc into the first st and into every stitch across. Turn work. (20st)
Row 18: SC into the first st, work the puff stitch as described above across until the last st, sc into the last st. Turn work (20 st)
Row 19: Ch1, sc into the first st and into every stitch across. Turn work. (20st)
Row 20: SC into the first st, work the puff stitch as described above across until the last st, sc into the last st. Turn work (20 st)
Row 21: : Ch 2, DC into the first st and into every stitch across. Turn work. (20 st)
Row 22: : Ch 2, DC into the first st and into every stitch across. Turn work. (20 st)
That is it for week 1.

Week 2:
Welcome back for week 2 of our Lotsa Stitches Temperature Blanket 2021 CAL. I am so happy our numbers are growing. Please do say hi if you have jumped on board and are joining in with this crochetalong.
I changed my temperature graduations on my chart so I can have more variety in colour changes in my rows. Some colours I took down to 1 degree only.
My weekly temperatures are projected at 7,6,7,8,9,8,8. This would have meant predominantly salmon with a little forest green. I added the extra degrees into the top end of the spectrum where we hardly ever go.
This blanket it for you. You are the BOSS.
I just want to say how each maker must make the blanket work for themselves. Feel free to make any adaptations you want so it is pleasing to you. Just make sure the panels are consistent if you vary from my instructions.
Week 2: The Feature Stitch is the Herringbone Double Crochet Stitch.
Written Instructions:
The Herringbone Double Crochet (HBDC) creates a fun textured pattern. The tilt of this stitch creates the distinctive Herringbone arrow-shape on the surface of the fabric.
Herringbone Double Crochet (hbdc): Yarn over, insert your hook into the next stitch, yarn over and pull up the loop through the stitch (there will be 3 loops on your hook) then pull the first loop on your hook through the second loop on your hook, 2 loops left on your hook, yarn over and pull through the first loop on your hook, yarn over and pull through last two loops on your hook.
Video Tutorial of the Herringbone Double Crochet Stitch
Here is the left handed version.
Don’t forget to match the colour of yarn you use for each day to your temperature colour chart. Each day is represented by several rows, not just one.
We are carrying on from Row 22 of last week to add to the 6.5” wide panel that will eventually measure 60” long.
Day 8 colour.
Row 23: ch2, DC into the second ch from the hook and DC into each chain across. Turn Work. (20 stitches)
Row 24: Ch2, HBDC into the first st and into every stitch across. Turn work. (20st)
Row 25: Ch2, HBDC into the first st and into every stitch across. Turn work. (20st)
Row 26: Ch2, HBDC into the first st and into every stitch across. Turn work. (20st)
Day 9 Colour
Row 27: Ch 2, DC into the first st and into every stitch across. Turn work. (20 st)
Row 28: Ch 2, DC into the first st and into every stitch across. Turn work. (20 st)
Row 29: Ch1, sc into the first st and into every stitch across. Turn work. (20st)
Row 30 : Ch1, SC into the first st. make a puff stitch in the next stitch and into each stitch across until the last st, sc into the last st. Turn work (20 st)
Day 10 Colour.
Row 31: Ch1, sc into the first st and into every stitch across. Turn work. (20st)
Row 32: Ch2, HBDC into the first st and into every stitch across. Turn work. (20st)
Row 33: Ch1, HBDC into the first st and into every stitch across. Turn work. (20st)
Row 34: Ch1, HBDC into the first st and into every stitch across. Turn work. (20st)
Day 11 Colour
Row 35: Ch2, HBDC into the first st and into every stitch across. Turn work. (20st)
Row 36: Ch2, HBDC into the first st and into every stitch across. Turn work. (20st)
Row 37: Ch2, HBDC into the first st and into every stitch across. Turn work. (20st)
Day 12 Colour
Row 38: Ch1, hdc into the first st and into every stitch across. Turn work. (20st)
Row 39: Ch1, hdc into the first st and into every stitch across. Turn work. (20st)
Row 40: Ch1, SC into the first st. make a puff stitch in the next stitch and into each stitch across until the last st, sc into the last st. Turn work (20 st)
Row 41: Ch1, sc into the first st and into every stitch across. Turn work. (20st)
Day 13 Colour
Row 42: Ch 2, DC into the first st and into every stitch across. Turn work. (20 st)
Day 14 colour
Row 43: Ch1, hdc into the first st and into every stitch across. Turn work. (20st)
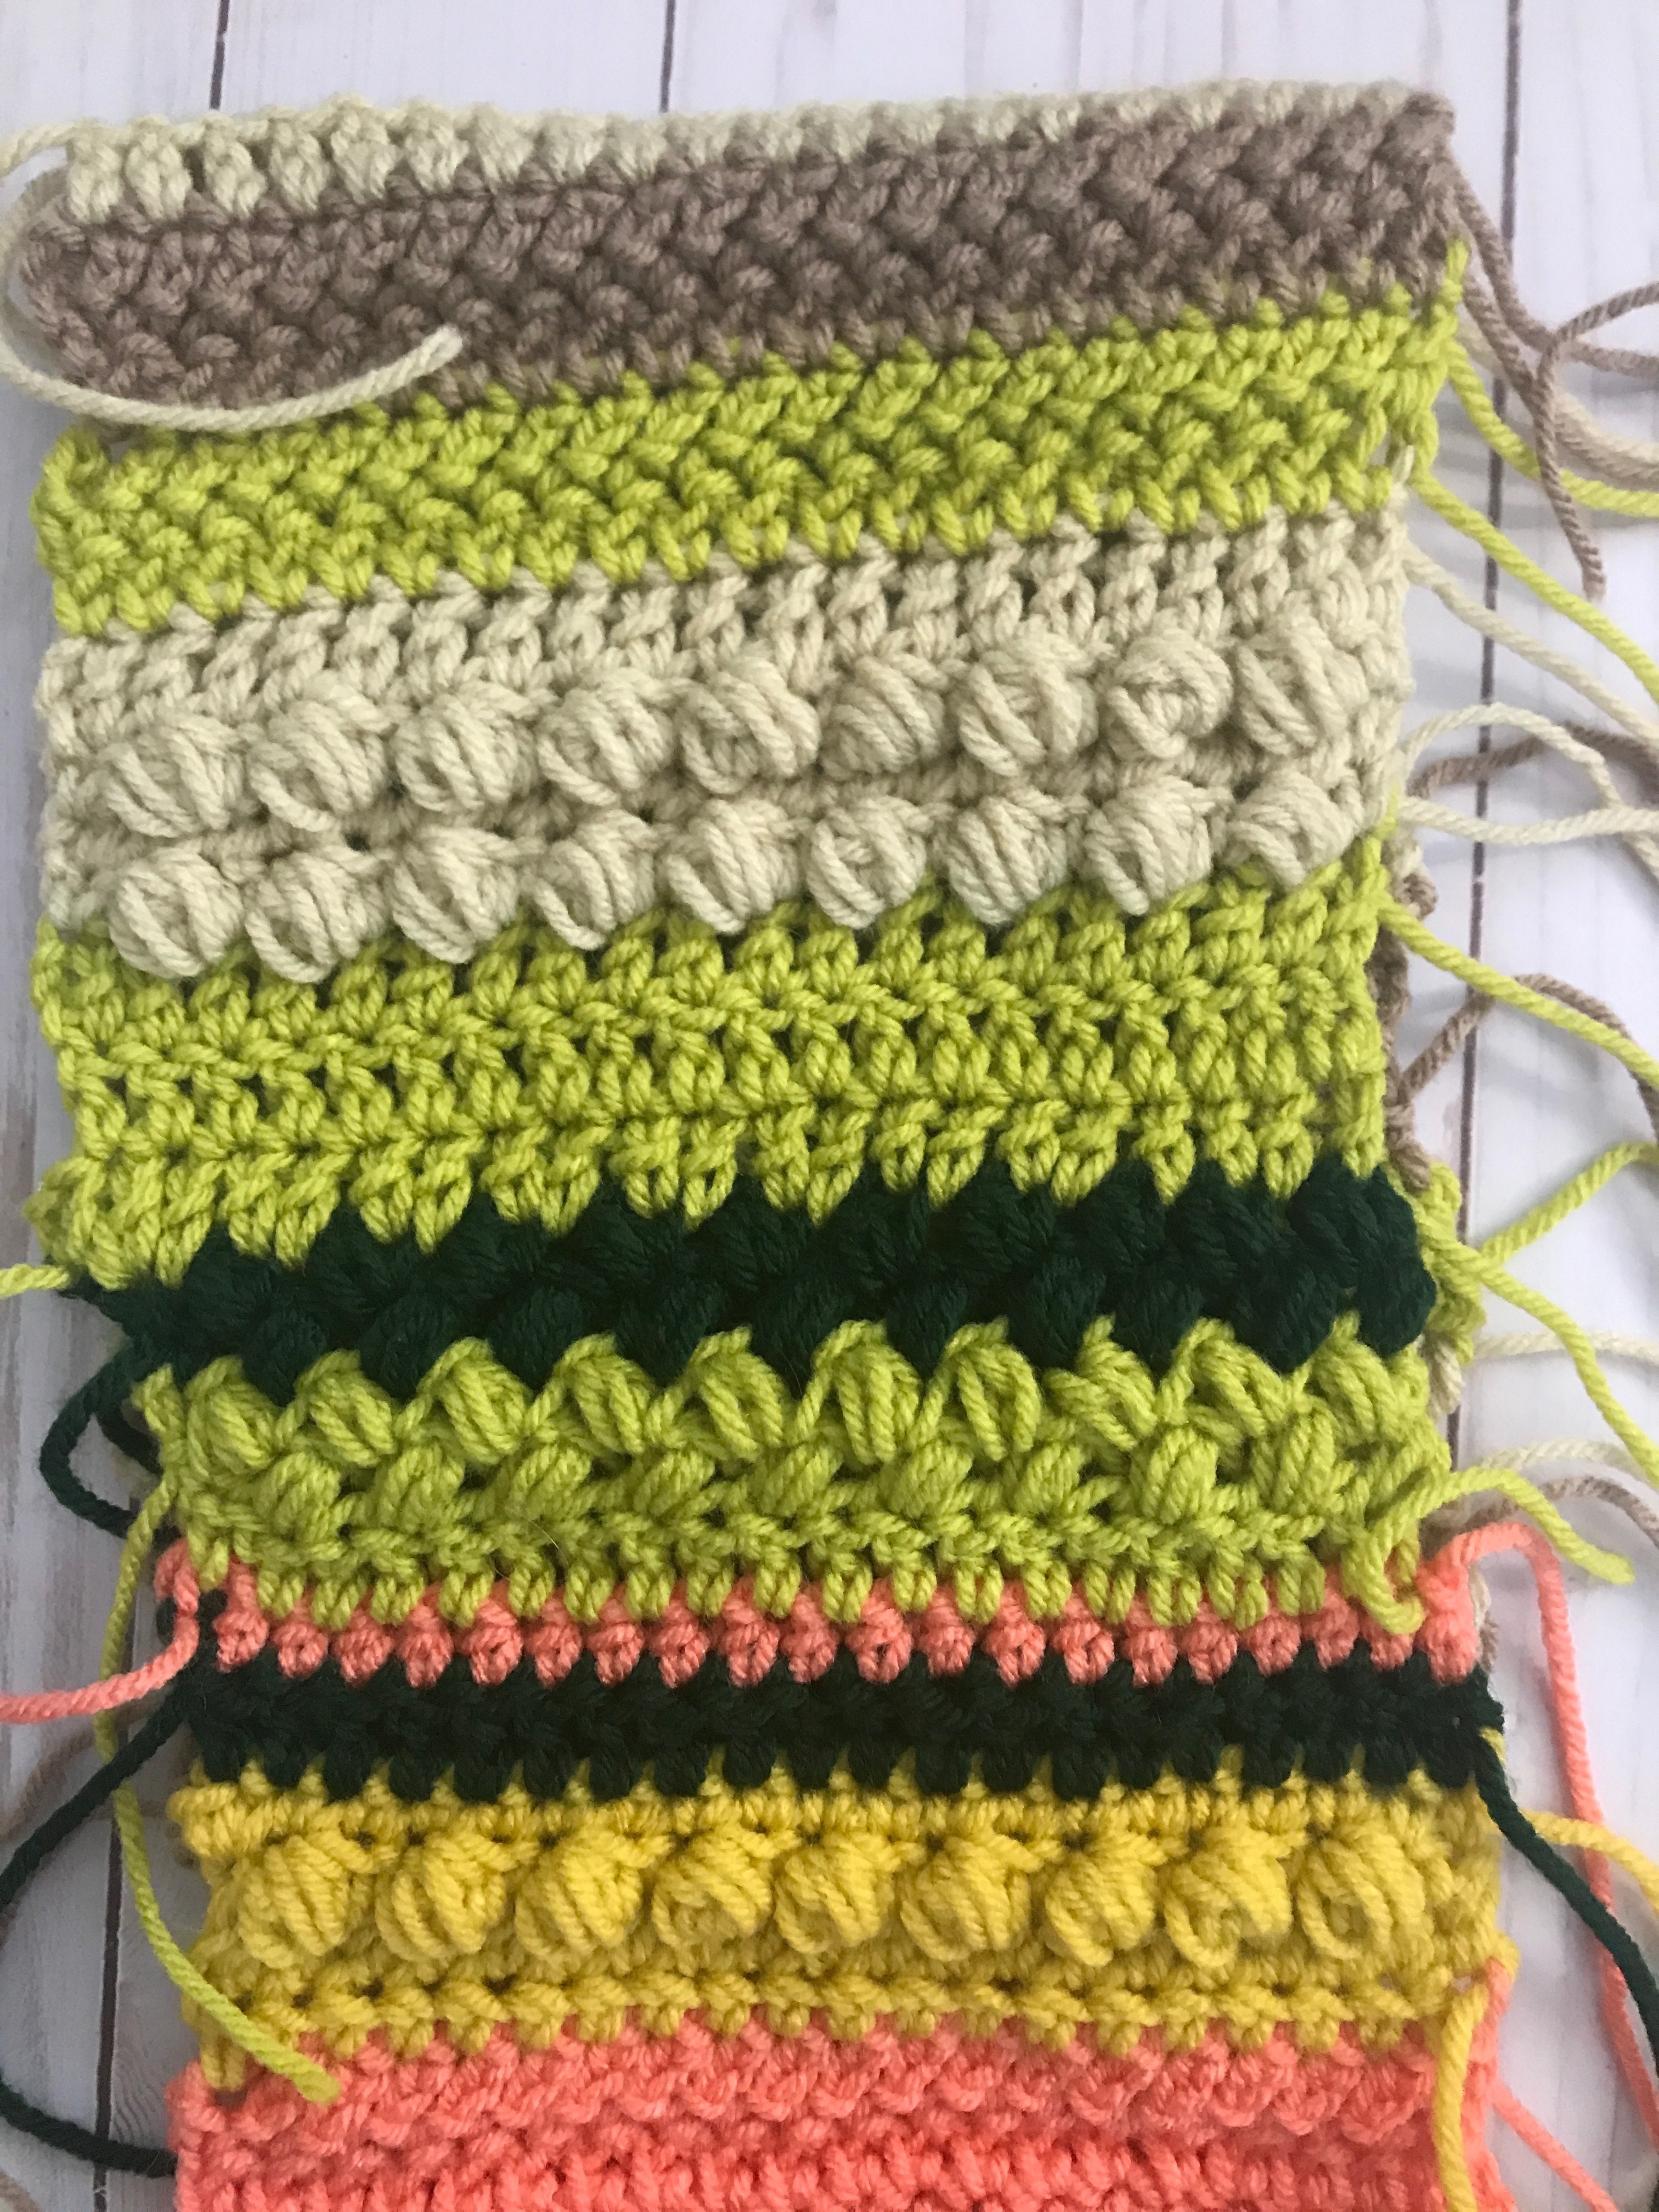
Things are starting look so textured and fun. I hope you enjoyed week 2 and I look forward to next week.
Here is what my Week 2 looks like.
And this is my week 1 and 2 panel.

Don’t forget that the entire pattern tutorial for week 2 is up on my youtube channel, so you can watch along as I do each day.
Week 3:
My projected temperatures this week 6, 7, 6, 4, 6, 5, 4
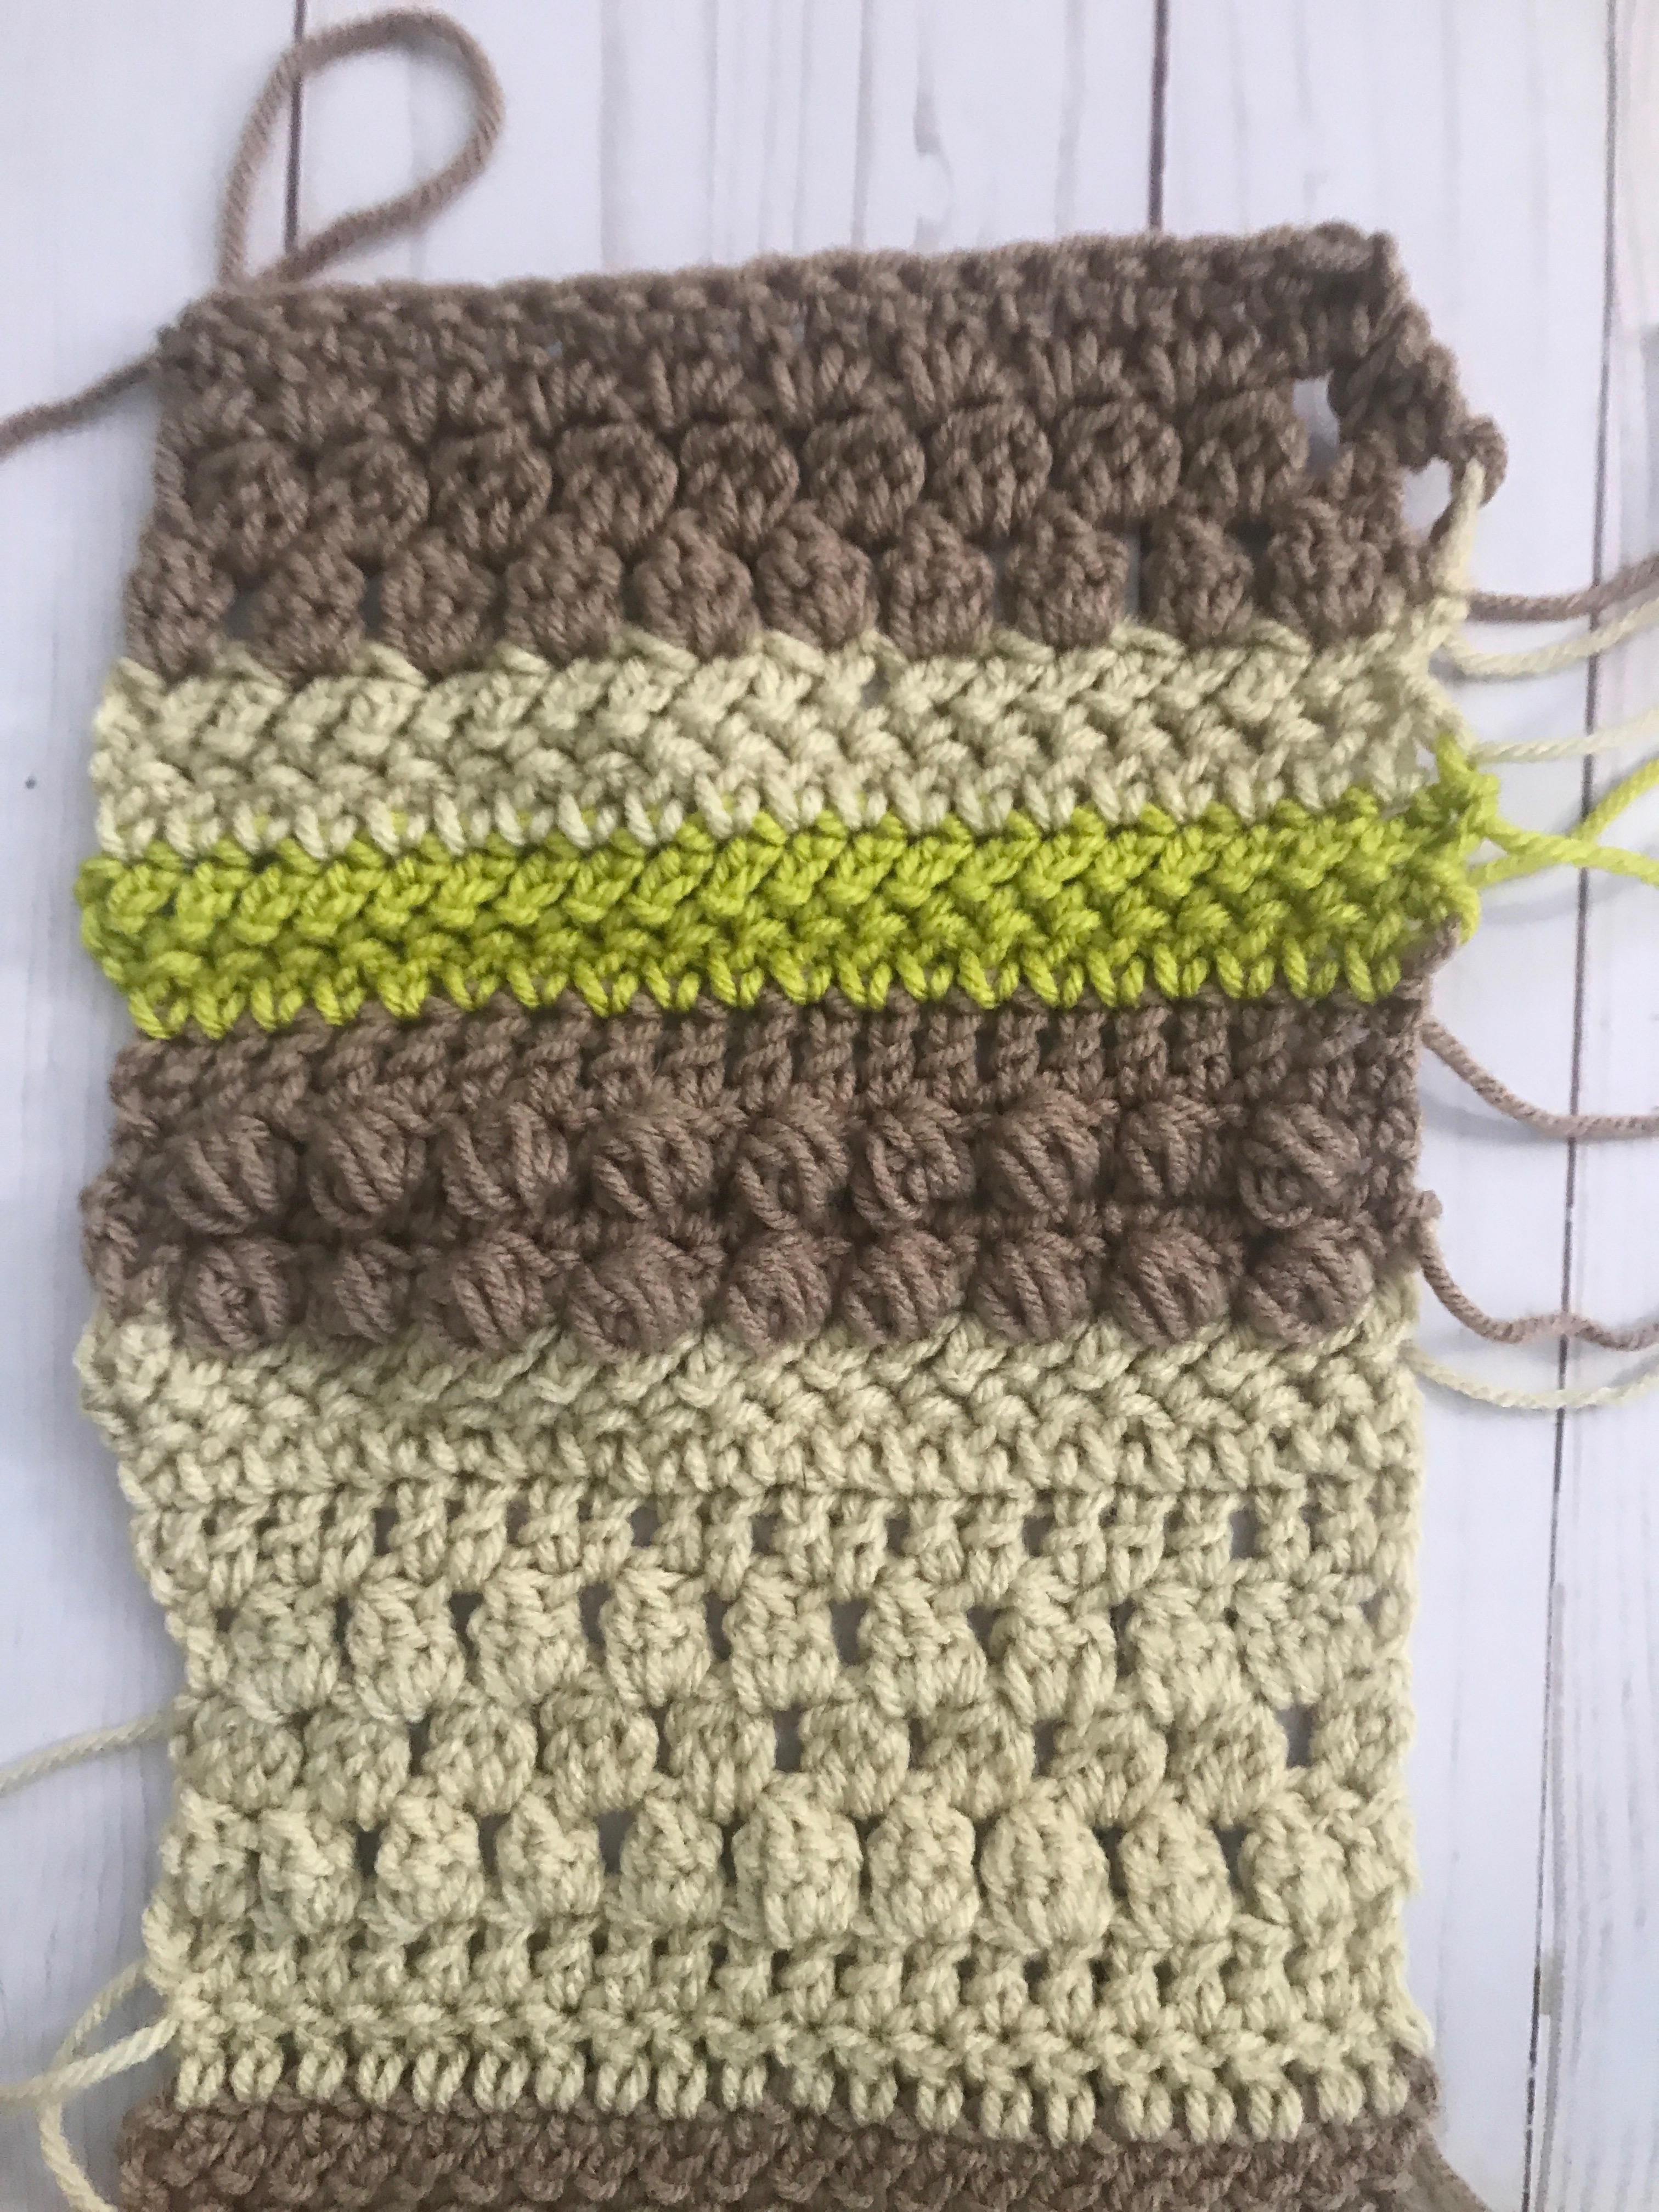
Feature Stitch is the Bean Stitch.
Bean stitch – Insert your hook, YO, draw up a loop. YO, insert your hook in the same st , YO and draw up a loop. YO, insert hook into the same space, YO, draw up a loop. YO, draw through all 6 loops on your hook. Ch1 to finish off.
Here is the Video Tutorial for the Bean Stitch.
And here is the Left Handed Version for all the lefties.
We are carrying on with the same panel. Day 15 starts with row 44 of this first panel. So get out your colours for the daily temperatures that you are using and have fun working to the end of the third week.
Day 15 Colour.
Row 44: ch2, DC into the second ch from the hook and DC into each chain across. Turn Work. (20 stitches)
Row 45: ch1, sc in first st, Bean stitch in next st, *skip a st, make a bean st in the next st* Repeat between * and * to the end. Turn work (20 st)
Row 46: ch1, Bean stitch across, sc in last st Turn work. (20st)
Day 16 Colour.
Row 47: ch1, sc in 1st st, Bean stitch across, Turn work. (20st)
Row 48: ch1, Bean stitch across, sc in last st. Turn work. (20st)
Day 17 Colour.
Row 49: Ch 2, DC into the first st and into every stitch across over the bean stitch row below, dd into each side of the individual bean stitches. Turn work. (20 st)
Row 50: Ch 2, DC into the first st and into every stitch across. Turn work. (20 st)
Row 51: Ch 2, DC into the first st and into every stitch across. Turn work. (20 st)
Day 18 Colour.
Row 52: SC into the first st. make a puff stitch in the next stitch and into each stitch across until the last st, sc into the last st. Turn work (20 st)
Row 53: Ch1, sc into the first st and into every stitch across. Turn work. (20st)
Row 54: SC into the first st. make a puff stitch in the next stitch and into each stitch across until the last st, sc into the last st. Turn work (20 st)
Row 55: Ch2, DC into the first st and into every stitch across. Turn work. (20st)
Day 19 Colour
Row 56: Ch2, HBDC into the first st and into every stitch across. Turn work. (20st)
Row 57: Ch1, HBDC into the first st and into every stitch across. Turn work. (20st)
Day 20
Row 58: Ch2, HBDC into the first st and into every stitch across. Turn work. (20st)
Row 59: Ch2, HBDC into the first st and into every stitch across. Turn work. (20st)
Day 21 Colour.
Row 60: Ch2, DC into the first st and into every stitch across. Turn work. (20st)
Don’t forget that the entire pattern tutorial for week 3 is up on my youtube channel, so you can watch along as I do each day. ( I am having problems getting it uploaded. I will take this notice down once I have it posted. )
Week 4:
Announcement:
The next four weeks of the Lotsa Stitches Temperature Blanket CAL will be in a separate blog post to prevent you having to scroll down so far to find the updates. It will be posted as Weeks 5-8 Update.
Hi there. I hope your blanket is looking good and you are ready for week 4.
My projected temperatures this week are 4, 4, 4, 5, 6, 4, 5 degrees celsius.
Feature Stitch is the Three Double Crochet Cluster Stitch.(3 dc cluster)
1: YO hook insert hook into the next stitch in the row.
2: YO and draw through the first 2 loops on the hook.
3: YO insert hook into the same st and draw through the loop, you should have 4 loops on your hook.
4: YO draw through the first 2 loops only and you should have 3 loops on your hook.
5: YO and insert hook into the same stitch and draw through that will give you 5 loops on your hook.
6: YO and draw through the first 2 loops. That will leave you with 4 loops on your hook and will leave 3 have finished double crochet s
7: YO and draw through all 4 loops on the hook.
8: Secure the cluster with a chain stitch.
Here is the Video Tutorial for the 3 Double Crochet Cluster Stitch.
And here is the left handed version.
Find your colour for Day 22 from your chart. Here we go on Week 4.
Day 22 Colour.
Row 61: Ch2, DC into the first st and into every stitch across. Turn Work. (20 stitches)
Row 62: Ch 2, dc into the first st, 3dc cluster into the next st, *sk 1, 3dc cluster into the next st* repeat between * and * to the end. Turn work (20 st)
Row 63: Ch 2, 3dc cluster into the first st, 3 dc cluster into the next space and into every sp across to the end, dc into the last st. Turn work (20 st)
Day 23 Colour.
Row 64: Ch 2, dc into the first st, 3dc cluster into the next space and into every space to the end. 3dc cluster into the last st. Turn work (20 st)
Row 65: Ch 2, DC into the first st and into every stitch across. Turn work. (20 st)
Day 24 Colour.
Row 66: Ch2, HBDC into the first st and into every stitch across. Turn work.(20 st)
Row 67: Ch2, HBDC into the first st and into every stitch across. Turn work. (20st)
Day 25 Colour
Row 68: Ch1, SC into the first st. make a puff stitch in the next stitch and into each stitch across until the last st, sc into the last st. Turn work (20 st)
Row 69: Ch1, sc into the first st and into every stitch across. Turn work. (20st)
Row 70: Ch1,SC into the first st. make a puff stitch in the next stitch and into each stitch across until the last st, sc into the last st. Turn work (20 st)
Row 71: Ch2, DC into the first st and into every stitch across. Turn work. (20st)
Day 26 Colour.
Row 72: Ch2, HBDC into the first st and into every stitch across. Turn work. (20st)
Row 73: Ch1, HBDC into the first st and into every stitch across. Turn work. (20st)
Day 27
Row 74: Ch2, HBDC into the first st and into every stitch across. Turn work. (20st)
Row 75: Ch2, HBDC into the first st and into every stitch across. Turn work. (20st)
Day 28 Colour
Row 76: ch 2, dc into the first st, 3dc cluster into the next st, *sk 1, 3dc cluster into the next st,* repeat between * and * to the end. Turn work (20 st)
Row 77: ch 2, dc into the first st, 3dc cluster into the next st, *sk 1, 3dc cluster into the next st,* repeat between * and * to the end. Turn work (20 st)
Row 78: Ch 2, DC into the first st and into every stitch across. Turn work. (20 st)
The next four weeks of the Lotsa Stitches Temperature Blanket CAL will be in a separate blog post to prevent you having to scroll down so far to find the updates.
Don’t forget that the entire pattern tutorial for week 3 is up on my youtube channel, so you can watch along as I do each day. ( I am having problems getting it uploaded. I will take this notice down once I have it posted. )
Do you like Crochet Video Tutorials.
If you really enjoy following along with videos when you crochet, I have the Simple Scarf available on my youtube channel. There are lots of other great videos you might enjoy while you are there so check out my stitch tutorials and how to make videos.
Here is the right handed tutorial for making the Simple Scarf.
And here is the left handed version for all you lefties out there. I am one lol.
Other Patterns You May Like.
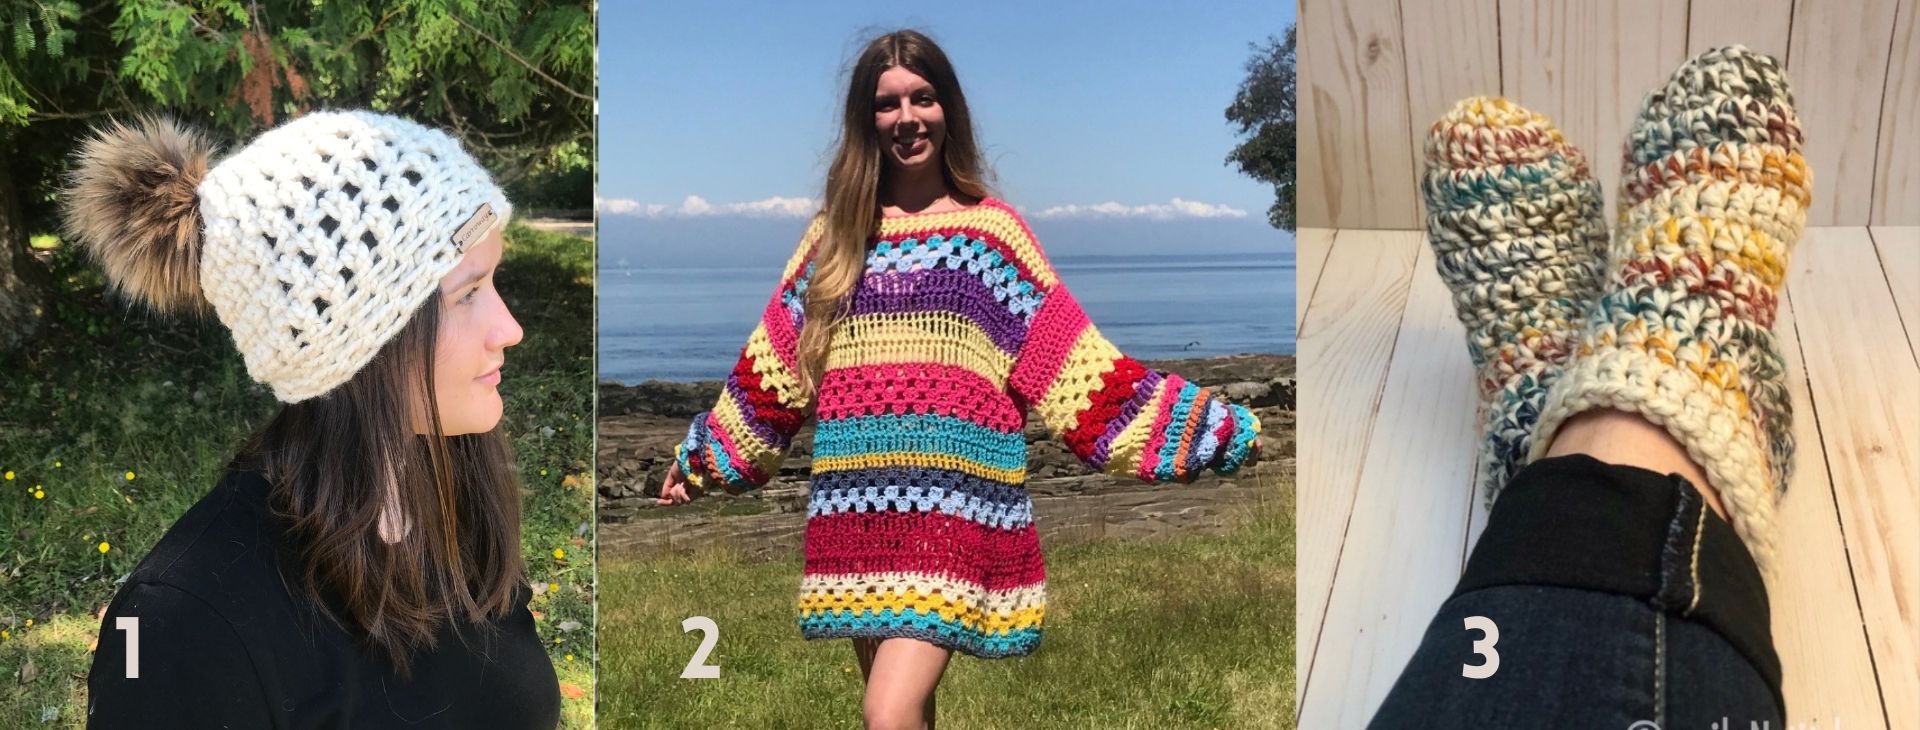
3. The Warmest Feet Ever Slipper Socks.
More Places to Find Crochet Free Patterns:
If you love crochet, you can find over a thousand free crochet patterns including some for crop tops and bralettes over at All Free Crochet
I am honoured to have my free crochet bralette pattern, the Earth Mother Bralette Pattern added to the All Free Crochet site.
 It is a great resource for crochet lovers and I am proud to also have my Take Me Outside Infinity Scarf Pattern posted over on the All Free Crochet Site.
Selling items made from my patterns?
You are more than welcome to sell items made from my pattern. Please do share my link and tag and help promote it on social media. Thank you.
If you have any questions or need help with the patterns, please email me at carrowaycrochet@outlook.com, and Iʼll be glad to help you.
Let’s Share and Connect!
Thank you for trying my free crochet pattern, I hope you enjoyed it! Please share pictures of your completed projects on Instagram and Facebook. Tag them @carrowaycrochet #carrowaycrochet and #simplescarf on Instagram.
Thank you so much for visiting me here at Carroway Crochet .
Find other patterns by Carroway Crochet in my Etsy Shop and on Ravelry.
Other places you can find me are:
This design, written work and images are a copyright of
©CarrowayCrochet and may not be copied or reproduced in any way.
You have permission to sell finished products made from this pattern, but please leave a link to my blog, www.carrowaycrochet.com in your product listing specifying that I am the designer of this pattern.
Thank you.
You make great videos!! I’m really going to love making this temperature blanket with you!
Thank you so much!
Linda H.
Oh Linda. You made my day. I am so happy. This is my first crochet along so I was not sure if people would join in. Please do join the Facebook group and share your progress there. https://www.facebook.com/groups/196493284240175/. Please say hi when you join so I know you are there. Thank you so much for commenting here.
When I initially commented I clicked the “Notify me when new comments are added” checkbox and now each time a comment is added I get three emails with the same comment. Is there any way you can remove people from that service? Thanks!
I am sorry about this. I don’t know how to do that but I will try and do some research to see if it can be reversed. So sorry.