Free Granny Square Bag Pattern

Introducing the “Granny Square Cross Body Bag” A Free Crochet Bag Pattern here on my blog.
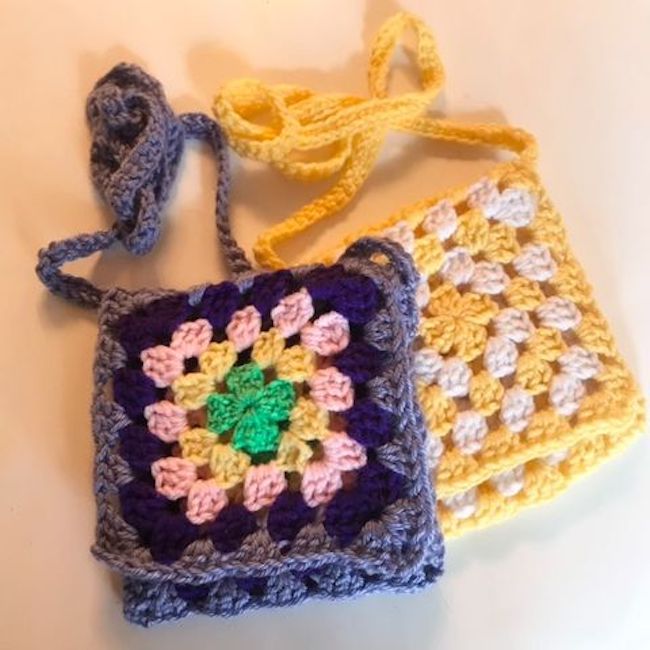
This free crochet bag pattern is for a granny square bag that can be worn over the shoulder or as a cross body bag for spring and summer days. It works great for visits to the beach and for shopping with friends. This trendy granny square bag has a flap for closure and you have the option to add a lining if you would like one.
The Granny Square Bag is the right size for carrying your phone and sunglasses, your suntan lotion and other accessories.
Use this Free Crochet Granny Square Bag Pattern to make cute granny square bag that is handy for short or long shopping trips as it will accommodate your change purse and all your cards. You can make it with your choice of worsted weight yarn, either acrylic or cotton, just look for the number (4) on the yarn label. You can also line this bag if you choose to.

I absolutely love granny squares and as spring approaches I have been exploring some ideas on how to use granny squares in fun and useful ways. My Granny Square Pouch Bag is super cute and closes with a draw string.
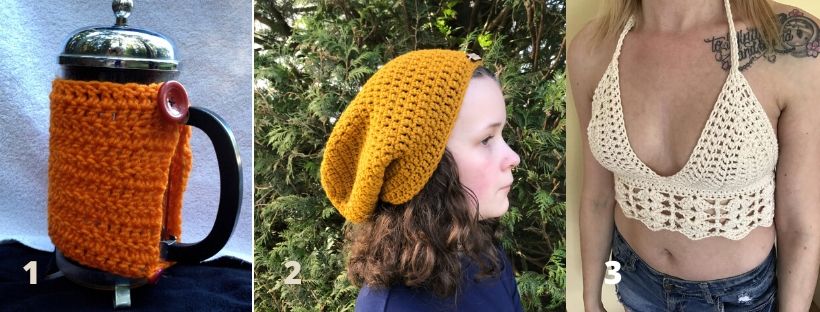
The traditional granny square pattern is one you can use for many things. My Granny Square Bucket Hat uses this square pattern.
I decided to make this Granny Square Bag with worsted weight (4) yarn, or Aran in the UK, I felt this was the perfect yarn for this small bag as it helps it hold its shape.
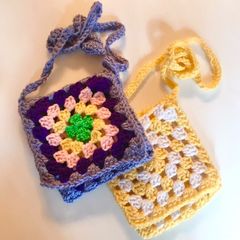
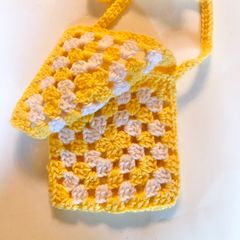
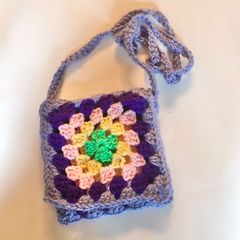
I chose two colour combinations for my prototype Granny Square Cross Body Bag. The first one I made was with yellow and white and I loved it. Then I thought I would try it with more spring/summer colours and changed colours with each round. I am really happy with how both of my Sophie Bags turned out.
**This post contains affiliate links. If you make a purchase using some of my links I may receive a small commission at no extra cost to you.**
Please consider signing up for my newletter and joining me over on facebook so you are always in the loop for what is happening with Carroway Crochet.
Sign up for my Newsletter
Get the latest info on free patterns and fun blog hops.
Join Me on Facebook.
Follow me on my Facebook Page for the latest video news and what I am up to.
Join our Crochet Community Group.
Get the latest updates on my free patterns, latest pattern release and share your crochet projects with our Carroway Crochet Community on Facebook. You will also get the updates on new blog hops I host or new pattern releases.

About the Granny Square used in my Free Crochet Bag Pattern.
The Granny Square is made from the middle out, starting with a small loop or the magic circle.
This is a traditional granny square design and the squares are made using a (4) worsted weight yarn in the US and Canada or Aran yarn in the UK. You will also need an H hook, (5mm).
This square uses alternating colours for each round of the square and the main colour is used for the strap,

Are you a Visual Learner.
Check out my video showing you how to make the Granny Square Cross Body Bag.
Here is the Left Handed version
Pin for Later
If you like crochet bags you might be interested in checking out my Feelin’ Fine Fringe Bag or my Clutch Bag pattern. There is also a great pattern for the Daisy Square Bag you will love.
If you prefer to have the Granny Square Pouch Bag pattern in front of you instead of on the screen you can get the ad free pdf .
Purchase the Daisy Square Blanket Square Pattern on Ravelry.


The Granny Square Cross Body Bag Free Pattern
Pattern by Pam Carr ©2023

Introducing the Granny Square Cross Body Bag from Carroway Crochet. I fell in love with granny squares and as spring approaches I have been exploring some ideas on how to use granny squares in fun and useful ways.
This simple granny square cross body bag has a flap and is handy as a way to carry your phone and small items when you need something with a trendy feel.
You will need to make three granny squares for this bag. One for each side of the body of the bag and one for the front flap.
The Granny Square Pouch Bag seen above uses just two colours, but you can customize your bag and have a multi coloured version and even add stripes of colour to the upper part of the bag. The sky is the limit.
Size:
Finished Bag Size: 6” wide and 7” tall (approx.). The strap is 40“ long before attaching to the purse. The purse hangs down 20” once the strap is attached.
Supplies you will need:
Yarn: Two skeins of worsted weight yarn in contrasting colours for a two coloured granny square. If you want a multi-coloured granny square choose colours from your stash.
Hook: size, H/8-5.00mm
Notions: Tapestry needle and scissors.
Gauge: 3 (clusters of 3dc plus ch1) – 8 granny stripe rows = 4” (10 cm)
Abbreviations (uses US conventions)
- Ch = chain
- st = stitch
- sc = single crochet
- dc = double crochet.
- Hdc = half double crochet
- Sl St = slip stitch
- Rnd – round
This pattern uses US terminology. The US and UK crochet terms are different, but they use the same terms to describe different stitches. Here is a simple conversion chart for anyone in the UK.
|
US Half Double Crochet (hdc) Double crochet (dc) |
UK Half Treble Crochet (htr) Treble crochet (tr) |
My YouTube channel, www.youtube.com/CarrowayCrochet, is a great resource for video tutorials for:
- How to make a slip knot
- how to single crochet.
- how to double crochet.
- how to single crochet.
Instructions:
This bag is made with three granny squares.
Two of the granny squares are joined on three sides to make up the body of the bag. Then the third square is attached to create the front flap.
Granny Square instructions.:
Make three squares.
Chain 4. Insert your hook into the first chain stitch and join with a slip stitch to create a small loop.
Round 1. Ch3, (this counts as the first dc st of your first cluster of 3dc. Make 2 more dc into the centre ring/loop. This completes the first cluster, ch3, make 3 dc into the centre ring, (this is your second cluster, ch3, make 3dc into the centre ring, (this is your third cluster), ch3, make 3 dc into the centre ring, (this is your fourth cluster, ch3, Join with a sl st to the top of the first ch3.
Change colour.
Join yarn to a ch3 corner space.
Round 2: Ch 3, (this acts as the first dc of your new cluster), make 2 more dc into the same corner sp, (this is half of the first corner to be completed at the end of the round. ) ch1, Make 3dc, ch3, 3dc into the next corner sp, (this is the second corner) ch1, make 3dc, ch3, 3dc into the next corner space, (this is your third corner) ch1, make 3dc, ch3, 3dc into the next corner space, (this is your fourth corner) ch1 , we now complete the first corner, make 3dc, ch3 and join to the top of the first ch3 with a sl st.
Change colour.
Join yarn to a ch3 corner space
Round 3: Ch 3, (this acts as the first dc of your new cluster), make 2 more dc into the same corner sp, (this is half of the first corner to be completed at the end of the round. ) ch1, Make 3dc into the ch1 sp from the previous row,( it is between two dc clusters,) ch1, 3dc, ch3, 3dc into the next corner sp,(this is the second corner) ch1, 3dc into the ch1 sp from the previous row, ch1, make 3dc, ch3, 3dc into the next corner space,(this is your third corner) ch1, 3dc into the ch1 sp from the previous row, ch1, make 3dc, ch3, 3dc into the next corner space,(this is your fourth corner) ch1, 3dc into the ch1 sp from the previous row ch1 , we now complete the first corner, make 3dc, ch3 and join to the top of the first ch3 with a sl st.
Change colour.
Join yarn to a ch3 corner space
Round 4: Ch 3, (this acts as the first dc of your new cluster), make 2 more dc into the same corner sp, (this is half of the first corner to be completed at the end of the round. ) ch1, Make 3dc into the ch1 sp from the previous row ,( it is between two dc clusters,) ch1, make 3dc into the next ch1 space, ch1, Make 3dc, ch3, 3dc into the next corner sp,(this is the second corner) ch1, 3dc into the ch1 sp from the previous row, ch1, 3dc into the next ch1 sp, ch1, make 3dc, ch3, 3dc into the next corner space,(this is your third corner) ch1, 3dc into the ch1 sp from the previous row, ch1, 3dc into the next ch1 sp, ch1, make 3dc, ch3, 3dc into the next corner space, (this is your fourth corner) ch1, 3dc into the ch1 sp from the previous row ch1 , 3dc into the ch1 sp, ch1, we now complete the first corner, make 3dc, ch3 and join to the top of the first ch3 with a sl st.
Change colour.
Join yarn to a ch3 corner space.
Round 5: Ch 3, (this acts as the first dc of your new cluster), make 2 more dc into the same corner sp, (this is half of the first corner to be completed at the end of the round. ) ch1, Make 3dc into the ch1 sp from the previous row ,( it is between two dc clusters,) ch1, make 3dc into the next ch1 space, ch1, make 3dc into the next ch1 space, ch1, Make 3dc, ch3, 3dc into the next corner sp,(this is the second corner) ch1, 3dc into the ch1 sp from the previous row, ch1, 3dc into the next ch1 sp, ch1, make 3dc into the next ch1 space, ch1, make 3dc, ch3, 3dc into the next corner space,(this is your third corner) ch1, 3dc into the ch1 sp from the previous row, ch1, 3dc into the next ch1 sp, ch1, make 3dc into the next ch1 space, ch1, make 3dc, ch3, 3dc into the next corner space, (this is your fourth corner) ch1, 3dc into the ch1 sp from the previous row ch1 , 3dc into the ch1 sp, ch1, make 3dc into the next ch1 space, ch1, we now complete the first corner, make 3dc, ch3 and join to the top of the first ch3 with a sl st.
Fasten of and weave in all the ends.
Make two more granny square for your bag.
Construction:
The Body of the Bag
Place the two squares together with the wrong sides facing and starting in one corner, whip stitch (sew) them together along one side, matching the stitches. Whip stitch along the bottom and then up the other side, stopping at the top edge. Remember to match the stitches as you go. This forms the body of the bag.
Now we will work on attaching the front flap of the bag.
Place the bag with right sides facing outwards.
Lay the third square with the right side facing down on top of the bag.
Whip stitch across the top of the bag joining the top of the flap to the back of the bag.
Fasten off and weave in the ends.
Lift the flap and drop down over the front of the bag.
Strap
Ch 140. You can make your chain longer or shorter to customize it to your needs.
Row 1: Sc into the 2nd ch from the hook and sc into each stitch across.
Fasten off and weave in the ends.
Attach the strap to either side of the bag.
I hope you love your Granny Square Cross Body Bag.
If you have any questions or need help with the patterns, please email me at carrowaycrochet@outlook.com, and Iʼll be glad to help you.
April Fools Freebie 2026
This year is my fifth year of posting the Aprils Fool Freebie crochet event.
This year I am doing things a little bit differently. There will be some foolish fun for you.
Each pattern will be randomly shared. I will be sending out an email announcing whenever a new free pattern is being shared.
There will be no rhyme or reason as to when they will be announced, so it will be a bit of April Free Pattern Fun.
Freebie # 7 is available on April 21st and 22nd.
Go claim your free pdf by clicking on the pic below and enter your coupon code APRILFREEBIE26 at the check out.

If you enjoy the patterns in this event maybe you would like to share some of your finished projects or join our growing crochet community in my Facebook Group. It would be great to have you and see what you are up to.
OTHER FREE CROCHET PATTERNS YOU MIGHT LOVE!
 It is a great resource for crochet lovers and I am proud to also have my